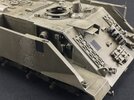
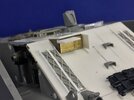
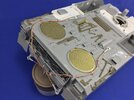
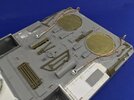
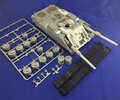
JPK 120 in 1:35

Jakko

Way past the mad part
SMF Supporter
Joined
Apr 28, 2018
Messages
10,846
Points
113
First Name
Jakko
Thanks all :smiling3:

I marvel at your knowledge of this subject - it is rather off piste. ..
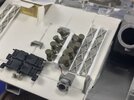
I really don’t know all that much about it, if I’m honest :smiling3: As I mentioned, I first became aware of the vehicle from the article that I posted scans of, and then doing a bit of reading. Probably the best source I found is the German Wikipedia page about the VT 1, plus a few more bits and pieces elsewhere. Most of this model, really, is extrapolating from real-world vehicles: all German tracked AFVs contemporary with this one carry ice cleats, for example, so I just worked out how many it would likely have and built some racks similar to what’s on other vehicles :smiling3:
 

Neil Merryweather

SMF Supporter
Joined
Dec 29, 2018
Messages
4,428
Points
113
Location
London
First Name
Neil
Thanks all :smiling3:


I really don’t know all that much about it, if I’m honest :smiling3: As I mentioned, I first became aware of the vehicle from the article that I posted scans of, and then doing a bit of reading. Probably the best source I found is the German Wikipedia page about the VT 1, plus a few more bits and pieces elsewhere. Most of this model, really, is extrapolating from real-world vehicles: all German tracked AFVs contemporary with this one carry ice cleats, for example, so I just worked out how many it would likely have and built some racks similar to what’s on other vehicles :smiling3:
in that case, I marvel at your extrapolative skills!
 

Jakko

Way past the mad part
SMF Supporter
Joined
Apr 28, 2018
Messages
10,846
Points
113
First Name
Jakko
Some more of that coming up :smiling3:

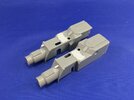
I made doors for the gunner’s optic:

2C8FC54D-0372-4554-91A5-B4BF19A3352B.jpeg

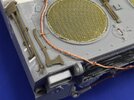
And installed the tow cables:

C59DE6FC-ECDD-478E-BD47-731E299C5687.jpeg8D0B366C-55DA-49A8-92D9-A9EE18D4B699.jpeg

I had to add an extra hook on each side on the rear plate, as the two I had put on weren’t enough to hold the cable in place.

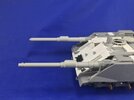
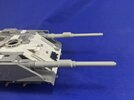
On the gun pods, I added bits to suggest coaxial machine guns:

B3F82080-6922-45F1-B0B7-A819D308A052.jpeg

I first held a MAG next to the pods to work out if and where it could fit. That showed where to build an access hatch on the top, for reloading the gun and access to an ammo bin that I imagine would be over/alongside the 120 mm barrel. For the muzzle, I drilled a hole and glued some 1.6 mm rod in, that I didn’t drill out but rounded off because I want to show them as having the rubber cap in that was/is commonly used to keep moisture out on Leopards and other German AFVs.

You probably noticed the muzzles aren’t symmetrical in the pods. This is because there are inspection windows on the inboard side, and I doubt the coax would be placed so that the only thing you can see through the windows is that machine gun :smiling3:
 

Jakko

Way past the mad part
SMF Supporter
Joined
Apr 28, 2018
Messages
10,846
Points
113
First Name
Jakko
After comments elsewhere, I reversed four of the six tow cable hooks:

4668E272-A55C-43B8-A9E3-F64A41FD9606.jpeg

This because they turned out to not actually work as I had envisioned them. I had thought the cable would want to push outward, and so bent the hooks inward. However, like that it gives the impression that not all hooks are actually doing anything at all, because the rear hooks on the engine deck should be pointing outward to bend the cable around, and those on the rear plate need to support it from below rather than hooking it from above.

So, I carefully cut the cable loose where I had superglued it to the hooks and deck, moved it to the other side of the hooks and bent them around the cable from the other side.
 

Jakko

Way past the mad part
SMF Supporter
Joined
Apr 28, 2018
Messages
10,846
Points
113
First Name
Jakko
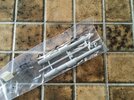
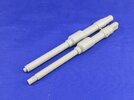
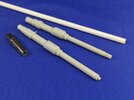
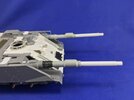
As posted elsewhere, I now have a second 120 mm barrel!

3A8618C5-7BBC-4303-8992-3B01DD770DCA.jpeg

But putting the main parts together, I soon noticed a small problem:

F7E0F022-C4FB-49E7-9E3A-D26C8FD31F5B.jpeg

The new barrel is obviously thicker than the other one, at least in front of the fume extractor. I guess the later Leopards have a thicker thermal sleeve, but this is not good for using both barrels on a single model, because it’s noticeable there too:

793F2116-EB54-4552-A681-304954C605B5.jpegC4E73147-2522-4CC3-BA2F-8E704D344D4F.jpeg

What’s more, the new barrel doesn’t have the canvas cover around it. Measuring the 2A4 kit barrel, I found it was about 5.5 mm, though both barrels aren’t properly round — they are about 0.5 mm narrower when measured top-to-bottom than side-to-side. Luckily, I have 5.5 mm tube:

5EE3FCA5-C3FE-443F-9DEB-A69DC5E526E3.jpeg

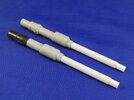
And also the rear end of a Leopard 2 barrel from an Italeri kit, of which I’ve apparently sawed the front off but I don’t remember why or when. In any case, these bits plus some 4.8 mm tube let me build what I soon began to think of as Frankenstein barrels:

18390433-EEE0-4C6D-9796-740DC36055DD.jpeg

When they’re on the model, they look much better due to being the same diameter:

DEFA0328-A0E2-4018-A976-7F985165100B.jpeg
 

Jim R

SMF Supporter
Joined
Apr 27, 2018
Messages
13,758
Points
113
Location
Shropshire
First Name
Jim
Barrels look fine. I hadn't noticed an issue with the cable hooks but what you've done makes sense. Glad you mentioned the reason for the mg offset - I thought "Jakko's made a c**k up". Mind with your meticulous research I knew it was very unlikely :smiling:
 

Jakko

Way past the mad part
SMF Supporter
Joined
Apr 28, 2018
Messages
10,846
Points
113
First Name
Jakko
Thanks (belatedly :smiling3: ) though with this model it would not so much be research as common sense failing ;)

I finally added the smoke grenade launchers:

7849DFF2-9D9C-4CE7-A7DA-5CC64E6A957F.jpeg

The original plan was to put them on the engine deck, just behind the crew compartment, but it turned out that they would have blocked vision from one of the commander’s periscopes almost completely there, so that wouldn’t do. An alternative was further to the rear on the engine deck, but the only likely places there didn’t seem overly convenient, so in the end I decided to put them on the front plate (as had been suggested to me some time ago already :smiling3: )

The launchers themselves are from the same Italeri Leopard 1 that donated the tools on the engine deck, with a straightforward base from some plastic strip and a few punched bolt heads. A bit of copper wire to a hole drilled in the left headlight base represents the electrical cable needed to fire them.

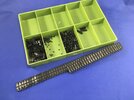
I also have one track done and the parts for the other cleaned up:

6E5C5B7C-BFF9-4536-B4BF-43448796323E.jpeg

For this, I just put links together to the same length as the kit tracks; this turned out to be 73 links of Leopard 2 track, though the kit’s KPz 70 tracks only have 68 links. The other will be built to the same length and then I can join the open ends of the first track. (This saves me from having to count out the links for the second track :smiling3: ).
 

Jakko

Way past the mad part
SMF Supporter
Joined
Apr 28, 2018
Messages
10,846
Points
113
First Name
Jakko
For the commander’s machine gun, I bought the MAG and mounting by Leopard Workshop:

21132B28-C9F5-41DB-9577-C2B53E496318.jpeg

Mostly because the effort of working out the complicated mounting and then scratchbuilding it didn’t weigh up against spending €3.95 for the set. Still, I would have liked the gun itself to be cast in white metal instead of resin, because the barrel was bent and needed hearing with a soldering iron to straighten it. It’s still not exactly straight, but that’s only visible from certain angles so I can live with it.

I think I’ll add a length of ammo belt between the box and the gun, if I can work out how to bend it to fit.
 

Jakko

Way past the mad part
SMF Supporter
Joined
Apr 28, 2018
Messages
10,846
Points
113
First Name
Jakko
I think construction is now done:

6DB4A7CD-F6F7-4AFC-A0C1-C49637F98B89.jpeg

Well, other than forgetting to add the rearview mirrors, which I noticed after taking this photo :smiling3: The gun pods, commander’s hatch and machine gun are still loose, and I added two more links to each of the tracks because I remembered yesterday that I had moved the idler wheel forward, so the normal track length would be too short. I also added an antenna mounting (from some punched discs) and the machine-gun skate thingie, from an Italeri Leopard because those are far better than the Hobby Boss version that came with the hatch ring.

Now to add those mirrors, and I can put some primer onto the model.
 

Jakko

Way past the mad part
SMF Supporter
Joined
Apr 28, 2018
Messages
10,846
Points
113
First Name
Jakko
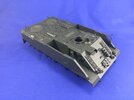
I sprayed the model earlier this week, and that didn’t go exactly flawlessly because of airbrush troubles with not one but two of the infernal things, and the paint not really cooperating either. Still, I got it painted:

CB53E1CE-F0CB-4480-A740-089DDCC6394D.jpeg

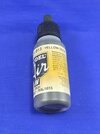
A slight problem is the colour being almost completely wrong :sad: I had bought a bottle of Vallejo Olivia Amarillo/Yellow Olive, since German (and Belgian) AFVs were finished in RAL 6014 yellow olive in the 1980s. This, though, is far too dark and green for that colour … Spot the issue at hand:

112567EA-FACA-411A-821C-DC12661B1990.jpeg

Yes, the bottle says it’s yellow olive, but RAL 6015! That colour is officially called “black olive” and that seems to be a pretty good descriptor for what is on my model now. Since the web site I bought it from only showed the name and not the RAL number, I figured this was the right bottle … Moral of the story, of course, is to do your own research.

Next step will be to mix up something from Tamiya and/or Mr. Aqueous Hobby paints, because part of my spraying troubles came from trying to use Vallejo for a complete model. It works far better for smaller areas like camouflage, highlights, etc. in my experience.
 

Jakko

Way past the mad part
SMF Supporter
Joined
Apr 28, 2018
Messages
10,846
Points
113
First Name
Jakko
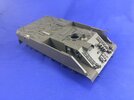
Attempt No. 2:

1FE5FFE6-E22F-4F9A-986C-E73199612E0A.jpeg

See the difference with the first:

9C811B1B-83D0-4E8D-8295-F417F8D007A2.jpeg

This is Mr. Aqueous Olive Drab (1), thinned with isopropanol, which sprays much better, at least for large surfaces, than the Vallejo did …
 

Jakko

Way past the mad part
SMF Supporter
Joined
Apr 28, 2018
Messages
10,846
Points
113
First Name
Jakko
I waited with this one until I was going to spray the Grant CDL too, to save me from cleaning the airbrush more often than necessary :smiling3:

8292C81B-B771-4BC8-B481-13E642F10479.jpeg

This has had light patches sprayed with Mig 087 Gelboliv, lightened with a little Hataka A253 MRG Stone because the Gelboliv by itself wasn’t pale enough compared to the paint underneath. It still needs a wash and a drybrush for shading and highlighting.
 

Jakko

Way past the mad part
SMF Supporter
Joined
Apr 28, 2018
Messages
10,846
Points
113
First Name
Jakko
Now to find a good shade colour … I tried the so-called “yellow olive” that’s actually black olive earlier today on a few parts of the model, but it looks like it’s not dark enough so I think I’ll mix in some black for the next try.
 

Jakko

Way past the mad part
SMF Supporter
Joined
Apr 28, 2018
Messages
10,846
Points
113
First Name
Jakko
In the end, thinned Army Painter Strong Tone proved to work well. Here’s a comparison shot between the left and right gun pods:

1613CEFE-5C1A-40BB-845F-0F5493150D47.jpeg

The left one is as sprayed, the right one has also had the wash added, which has darkened it a little (of course) but more importantly, shaded the raised detail and added more colour variation, making the part look a lot more believable, IMHO.
 

The Smythe Meister

Born to be WILD....... until about 9pm
SMF Supporter
Joined
Jan 30, 2019
Messages
5,752
Points
113
Location
Devon
First Name
Andy
Was only thinking of this one about a week ago,and thought it might have been forgotten about....only to see it pop up again :smiling3:
A weird looking thing for sure,but I kinda like it!
 

Jakko

Way past the mad part
SMF Supporter
Joined
Apr 28, 2018
Messages
10,846
Points
113
First Name
Jakko
Was only thinking of this one about a week ago,and thought it might have been forgotten about....only to see it pop up again :smiling3:
I’m going to finish this (and the Grant CDL) before I will let myself start the Churchill AVRE with SBG bridge — so I have motivation to get this done sometime soon :smiling3:

A weird looking thing for sure,but I kinda like it!
Same here :smiling3:

Definitely see the difference with the wash. Much nicer.
Agreed, I used to paint models simply in the basic colour and left it at that, but I’ve since been converted to shading and highlighting them because it just looks better, IMHO. And it’s not like you need to be a great painter to do is — the main skill is being able to spray fairly finely with an airbrush, and that’s about it. If it took more skill than that, I wouldn’t be able to do it ;)
 

Jakko

Way past the mad part
SMF Supporter
Joined
Apr 28, 2018
Messages
10,846
Points
113
First Name
Jakko
So, some other stuff got in the way, but this one needs to be finished one of these days too …

I don’t have pictures of the wash-and-drybrush efforts after the previous photos, but it’ll show up in the next ones. Nothing much special to report about those anyway: an overall wash of thinned Army Painter Strong Tone and some drybrushing with Revell Yellow Olive and Light Olive to bring out the details.

That done, I started on the markings yesterday. First, the black rectangles that Belgian vehicles invariably have on front, sides and rear. These have a white number at the top that indicates the unit, but that makes it hard to use decals from another model because the number will usually be wrong. So, I measured up a decal from another model, found it was 8 by 6 mm, and masked things off to paint the rectangles by hand.

First, I cut an 8 mm piece of 6 mm masking tape as a template, so I could put it where the rectangle goes and then mask around it with more tape:
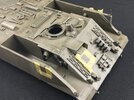
B9C85E51-607B-42F9-85FA-699B2CEA0F13.jpeg

You only need one template, of course, because once you’ve masked one, you can remove it and put it in the next location you need to mask. All that remained was to paint inside with some matt black:
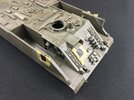
B99A5C1C-7927-4235-98D4-A42767B31625.jpeg

… and remove the tape:

AC4FE64B-89B8-4D54-B60F-6F2A134BAC5A.jpeg

I did find suitable division markings on the decal sheet from the old Italeri M108 kit, but it had a small error. The marking for 16 Armoured Division was a yellow lion’s head on a red and white shield, but the decals had the shield in black and white. Painting over it in red is not that hard with a fine brush, but due to red’s poor covering power, I had to do it in two steps, first with sand:
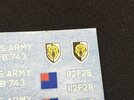
2E28F3F2-58CA-487C-9BC4-222D80098B5A.jpeg

Left painted with sand, right as printed on the sheet. Then red over the sand:
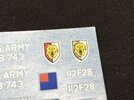
95E3071D-41E4-4E4F-970D-29F5A081B68A.jpeg

Again, left with red, right only with sand. I initially did try only with red, but saw no difference with the black ink, so I quickly wiped it off again and went for the sand undercoat.

The decals haven’t gone on yet, because after spending ages digging through my decals for suitable numbers for the black rectangles, I found I will need to cut up some numbers and assemble them from loose digits, which I didn’t feel like doing anymore tonight.

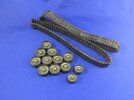
I also painted the tracks and rubber tyres on the roadwheels:
A57466CF-88E8-4744-8456-D8DA7D0EA671.jpeg

The track was first sprayed with a rust/mud colour, and then I painted the metal parts with Italeri Gun Metal followed by the lighter Games Workshop Boltgun Metal, both so that they didn’t quite cover the colour below them. The idea was to leave the rust colour in the recesses and have the boltgun metal only on the more raised areas still.

The rubber was done in my usual way of painting it dark grey (Italeri Rubber) followed by thinned Indian ink and a drybrush with a medium–dark grey (Vallejo Bluegrey in this case).

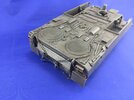
On the engine deck, I painted the tow cables while I had the boltgun metal out, and then gave them a coat of Tamiya Smoke to create shadows and give an oily effect:
BA7A1EC9-FD36-439C-B429-C07AD6BD1547.jpeg
 
Last edited:
Top