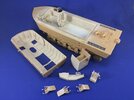
Land-Wasser-Schlepper No. 1071

Jakko

Way past the mad part
SMF Supporter
Joined
Apr 28, 2018
Messages
10,797
Points
113
First Name
Jakko
Those tracks looks identical to the ones I used on my Pz II I used for the SimonT tribute build - they were handed too
I’m not sure, but I think the LWS used Pz.Kpfz. II tracks, so that would tally.

I don't know if you've used them before
Only in so far as I built the two lengths of six links each you can see in the green box, and that was four years ago :smiling3:

The problem I ran into was when it came to putting them on the vehicle. because of the nature of the fixing points - the pins are quite short and the receiving hollows equally shallow to match - as soon as you put them under any tension, they pulled apart very easily.
Thanks for the warning, I'll have to keep that in mind when I put them on. The lengths of six seem sturdy enough, but who knows how a full track will behave? There is also a build article about this kit in Military Modelling Vol. 39 No. 12, 16 October 2009, and the builder in that says that the links are prone to breaking, which hasn’t happened to me but it’s another thing to pay attention to when I get round to assembling the tracks.

Don’t remember this at all Jakko. Looks like you made good progress before shelving it though.
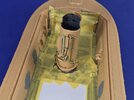
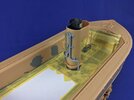
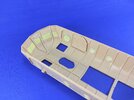
On reading back the thread, I notice I hadn’t posted a picture of what I did after assembling that bit with the three walls, which was that I painted the floor, and built the chimney, seats and dashboard. That’s about it for the progress made before the kit went back into its box :smiling3:
 

adt70hk

I know its a bit sad but I like quickbuild kits!!!
SMF Supporter
Joined
Sep 4, 2019
Messages
9,496
Points
113
First Name
Andrew
I’m not sure, but I think the LWS used Pz.Kpfz. II tracks, so that would tally.
Thanks for the warning, I'll have to keep that in mind when I put them on. The lengths of six seem sturdy enough, but who knows how a full track will behave? There is also a build article about this kit in Military Modelling Vol. 39 No. 12, 16 October 2009, and the builder in that says that the links are prone to breaking, which hasn’t happened to me but it’s another thing to pay attention to when I get round to assembling the tracks.

You're welcome. I seem to remember that I did mine in groups of 10 to keep an easy count and at that length they articulated well and stayed together fine. It was when I started to link them together that I ran into problems. I don't remember ANY breaking though - just coming apart at the join.

ATB.

Andrew
 

Jim R

SMF Supporter
Joined
Apr 27, 2018
Messages
13,726
Points
113
Location
Shropshire
First Name
Jim
Hi Jakko
I'd completely forgotten this although I had posted on the thread in my younger days :smiling:
Nice job with those pipes and good luck with masking the floor. The track links look well designed and detailed.
Jim
 

Jakko

Way past the mad part
SMF Supporter
Joined
Apr 28, 2018
Messages
10,797
Points
113
First Name
Jakko
I seem to remember that I did mine in groups of 10 to keep an easy count and at that length they articulated well and stayed together fine. It was when I started to link them together that I ran into problems.
That sounds like the problem might just be that when you put lengths together, the links can’t flex as much as when you put a single link on the end of a length, and so aren’t as tight as they should be?

I'd completely forgotten this although I had posted on the thread in my younger days :smiling:
My memory isn’t what it used to be either. Wait, who were you again? ;)

good luck with masking the floor.
I’m having some trouble thinking of a good way to mask around the exhaust pipe. Cutting semicircular bits from tape might work, I suppose.
 

Jakko

Way past the mad part
SMF Supporter
Joined
Apr 28, 2018
Messages
10,797
Points
113
First Name
Jakko
I hadn’t thought of Maskol at all, and even though my bottle of it dried oud about a decade ago, I could also just use PVA glue, I suppose. Though tape kind of has my preference, so I'll try messing around with that first, and if it doesn’t work as I want, reach for something else :smiling3: Touching up will probably be needed anyway, but I’d prefer to spray the interior so I don’t have to paint it more than once.
 

stillp

SMF Supporter
Joined
Nov 17, 2016
Messages
7,220
Points
113
Location
Rugby
First Name
Pete
I I could also just use PVA glue, I suppose.
Someone else (Richard?) suggested that once. I tried it a while ago but couldn't get it to come off. Perhaps my PVA glue is too good?
Pete
 

Jakko

Way past the mad part
SMF Supporter
Joined
Apr 28, 2018
Messages
10,797
Points
113
First Name
Jakko
I’ve not had that problem when applying it to painted plastic, but I must say I’ve never used it for masking so maybe I should be careful, yes.
 

Jakko

Way past the mad part
SMF Supporter
Joined
Apr 28, 2018
Messages
10,797
Points
113
First Name
Jakko
After a quick trip to the shops, I have new superglue and could therefore finish the pipework:

55C15E6A-9FCE-4FB3-AEB7-F2FD14CBB975.jpeg

I also masked off the rest of the floor. As you can see, it doesn’t really fit snugly around the smokestack, but I think I’ll follow Tim’s advice and just touch up the floor there. I need to prime the copper first, though, before I spray the interior.
 

Jim R

SMF Supporter
Joined
Apr 27, 2018
Messages
13,726
Points
113
Location
Shropshire
First Name
Jim
Hi Jakko
Always difficult to mask a curved shape in a confined area. I'm sure the touch up of the floor won't be too hard.
Jim
 

Jakko

Way past the mad part
SMF Supporter
Joined
Apr 28, 2018
Messages
10,797
Points
113
First Name
Jakko
I still have the paint I used on the floor originally (an old Humbrol tin), so it shouldn’t be too difficult to fix :smiling3:
 

Jakko

Way past the mad part
SMF Supporter
Joined
Apr 28, 2018
Messages
10,797
Points
113
First Name
Jakko
Mr. Surfacer applied to the brass rod etc. as a primer:

7D9781B8-E731-4877-9187-5C54E024A198.jpeg

And I masked off the windows:

39A689C1-3F07-4BC3-96F1-4DDA409609B7.jpeg

I did the angular ones at the front on both sides before glueing them in, but the round ones only on the inside because I noticed that there is an edge that overlaps the clear part from the outside. I’m waiting for the glue to dry so I can mask the other side too, so I don’t push the windows back in by accident :smiling3:

Masking the insides was very easy, though: just put a piece of tape slightly bigger than the window in, push it right into all the corners with a blunt sculpting tool, and then trim with a sharp knife. The outside was actually more difficult.
 

Jim R

SMF Supporter
Joined
Apr 27, 2018
Messages
13,726
Points
113
Location
Shropshire
First Name
Jim
Hi Jakko
I hate masking windows, so many opportunities for it to go wrong. What glue do you use for clear parts?
Jim
 

Jakko

Way past the mad part
SMF Supporter
Joined
Apr 28, 2018
Messages
10,797
Points
113
First Name
Jakko
These were fairly easy to mask because the inside is recessed, and the outside of the round windows too once they’ve been glued in place. I glued them in with Tamiya extra thin, because I wanted them to be in strongly enough to mask he outside. If I would still have had access to the interior after painting, I would probably have used PVA or something instead, though.
 

Jakko

Way past the mad part
SMF Supporter
Joined
Apr 28, 2018
Messages
10,797
Points
113
First Name
Jakko
Interior sprayed:

55808744-12FD-428B-96D2-F95AF62519A6.jpeg

This should be the German ivory colour, but I didn’t have that so I used British Portland Stone instead, which is also a yellowish, off-white colour so it should do. This was LifeColor paint, which I bought years ago to use on British vehicles, but I found LifeColor almost impossible to brush-paint — no matter which colour, it needs four, five or even more coats to cover even reasonably. I had never tried spraying it, but it seems to cover much better. I sprayed it unthinned, and though that worked, a few drops of water and/or higher pressure may have been better. Something to keep in mind for next time, I suppose :smiling3:
 

adt70hk

I know its a bit sad but I like quickbuild kits!!!
SMF Supporter
Joined
Sep 4, 2019
Messages
9,496
Points
113
First Name
Andrew
Coming on nicely Jakko. Looking very good so far.

Have you looked at the tracks again yet?
 

Jakko

Way past the mad part
SMF Supporter
Joined
Apr 28, 2018
Messages
10,797
Points
113
First Name
Jakko
Yep, those are exactly the tracks that are also in this kit, except that the instructions for the LWS say the L is for the left-hand side and F for the right. I’ve by now cleaned up all of the links and assembled four or five ten-link lengths. As it needs 147 links per side, according to Bronco (Spielberger says 143, so I guess the kit’s links are about 3% too short :smiling3:) I’ll have plenty more to assemble …
 
Top