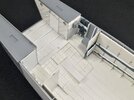
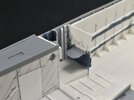
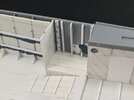
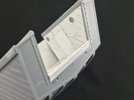
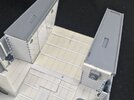
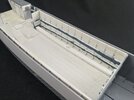
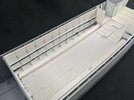
Landing Craft, Assault — Operation Infatuate I, 1 November 1944 (1:35 Gecko kit)

Jakko

Way past the mad part
SMF Supporter
Joined
Apr 28, 2018
Messages
10,837
Points
113
First Name
Jakko
This is the kind of work where you’re happy you’ve invested in a good-quality guillotine tool:
IMG_0104.jpeg

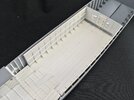
22 triangles of 6 mm along the two right-angled sides. I cut a strip, 6 mm wide, and then used the tool to cut it at 45-degree angles from two sides. Glueing them in place was actually the hardest bit, because it’s difficult to hold them in place while trying to get the glue on them :smiling3: I put them just behind the frames, though I’m not 100% sure that’s correct: I still can’t tell which direction the cross-section view in the drawings actually looks in :smiling3: But on the real boat, these were nailed to the frames to reinforce the corners, so they were either in front or behind them.
 

Jakko

Way past the mad part
SMF Supporter
Joined
Apr 28, 2018
Messages
10,837
Points
113
First Name
Jakko
A variety of factors caused this model to go into stasis for a bit, but I’ve now continued (partly caused by having had to order paint for the railway crossing, and that hasn’t arrived yet :smiling3: ).

IMG_0146.jpegIMG_0147.jpegIMG_0148.jpeg

Mainly, I closed the gaps in the floor and added the rear plates to the steering shelter and machine-gun cockpit. Take my advice and cut your floor plates to already fill the gaps between the frames, rather than having to cut and stick in separate pieces like I had to.

The blue paint is Tamiya XF-18 Medium Blue, which (probably) isn’t the right colour for an LCA, but it’s close enough that it will do for the areas that may be out of reach to an airbrush later on.
 

Ian M

Administrator
Staff member
Administrator
Moderator
SMF Supporter
Joined
Dec 14, 2008
Messages
19,736
Points
113
Location
Falster, Denmark
First Name
Ian
You are giving this the all or nothing treatment I can see
 

Jakko

Way past the mad part
SMF Supporter
Joined
Apr 28, 2018
Messages
10,837
Points
113
First Name
Jakko
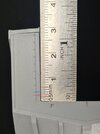
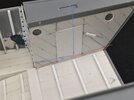
Pretty much … it won’t be 100% accurate, but far more so than Gecko made it. And, joy of joys, elsewhere we’ve just worked out that the front ramp is about 3 mm too tall — and thus, the opening for it is probably 3 mm too deep :sad: I need to do some careful measuring in the drawings to see if I need to correct it by sticking in a new front floor. Again …
 

Jim R

SMF Supporter
Joined
Apr 27, 2018
Messages
13,748
Points
113
Location
Shropshire
First Name
Jim
Very good Jakko. Coming along a treat. It's definitely more you than Gecko.
 

Jakko

Way past the mad part
SMF Supporter
Joined
Apr 28, 2018
Messages
10,837
Points
113
First Name
Jakko
Very definitely :sad: So far I think I’ve used … the hull, the engine room bulkhead (in reverse), four door handles, the two forward decks, the box that the steering wheel sits on, two rings, and the seat from the kit. Oh, and four vents cut from the kit’s front passage bulkheads. So that’s twelve to sixteen parts, depending on how you count, that came in the box …
 

Jakko

Way past the mad part
SMF Supporter
Joined
Apr 28, 2018
Messages
10,837
Points
113
First Name
Jakko
Here is what’s wrong with the bow ramp:

IMG_0149.jpeg

On the real thing, the ramp is 2 feet 11 inches, or 35 inches, high, which makes things easy for us: 1 inch, or 25.4 mm on the model. Gecko has made the opening for it 28 mm already (the top of the ramp should be where the seam is between the hull and the deck), and if you measure the kit’s ramp part (C1), it’s 28 mm as well — when the real ramp of course overlapped the hull to provide a watertight seal. From the real construction drawings, the opening should be 24 mm high in 1:35 scale.

The red line in the photo is where the bottom edge of the ramp should be, and the blue line indicates the correct location of the bottom of the opening in the hull. Now for the tricky bit, can you actually fit the forward passage floor so that it meets up with the height of this blue line?

IMG_0150.jpeg

Yes, you can. The red line here is the floor at its correct height, while the blue lines indicate the fully open door, which of course needs to clear the floor. (The plastic card strip on the floor represents the lower section of the armoured doors, which hinged down. This is 4 mm high in 1:35 scale, so the lower blue line is at that height above where the strip would hinge.)

I think I shall be constructing yet another front floor …
 

Jakko

Way past the mad part
SMF Supporter
Joined
Apr 28, 2018
Messages
10,837
Points
113
First Name
Jakko
With the corrections made:

IMG_0152.jpegIMG_0151.jpeg

I first glued a strip of 3.2 by 1 mm into the bottom of the opening, and filed its top edge at an angle so the floor would fit better on it. The floor itself is 0.75 mm plastic card, also with its rear underside filed to an angle so it doesn’t sit too high. It deliberately sticks out a little at the front, so I can trim and file it to size after the glue dries.
 

Jim R

SMF Supporter
Joined
Apr 27, 2018
Messages
13,748
Points
113
Location
Shropshire
First Name
Jim
Well Jakko I had to read it through a couple of times and study your photos but I can see the problem and the solution. Well done sorting it although the solution itself was pretty straightforward.
Keep at it, this is modelling at it's best.
 

Jakko

Way past the mad part
SMF Supporter
Joined
Apr 28, 2018
Messages
10,837
Points
113
First Name
Jakko
When over on the TWENOT forums, where about three of us are building this kit, we discovered the problem with the ramp’s height,¹ my first thought was that I would have to live with it because I didn’t think I would be able to correct it anymore on my model. A closer look, though, told me that it was still easily possible to fix the problem. So my model now has a double front floor :smiling3:

¹ Note that if you follow that link, Google Translate uses “valve” for “ramp” because in Dutch, the same word, klep, is used for both.
 

Waspie

SMF Supporter
Joined
Mar 13, 2023
Messages
2,511
Points
113
Location
Portland - Dorset
First Name
Doug
Hat off to you Jakko, you have certainly gone that extra mile with this build. The research, the craftsmanship to get where you are is incredible. (As well as being great to watch it progress).
 

Jakko

Way past the mad part
SMF Supporter
Joined
Apr 28, 2018
Messages
10,837
Points
113
First Name
Jakko
Thanks :smiling3: If I’m honest, I think this is probably medium-grade scratchbuilding. Nearly all of it is flat plates and strip without difficult shapes, intricate bits or very fine parts — as opposed to the sort of work people like @scottie3158 or @Scratchbuilder habitually do, and which I don’t see myself pulling off :smiling3:

The next bit here was the side benches in the troop compartment. Early boats had open, slatted benches here, which Gecko provides for all three positions (there is to be a bench in the middle too). Later, the side benches were replaced by enclosed ones which were filled with buoyant material. (Some photos show boats that have such a bench in the middle too, or only the central bench like that, with slatted ones along the sides.) In 1:35 scale, all of these are about 5 mm high and 6.5 mm wide.

An enclosed bench is easy enough if you use Gecko’s floor: just cut two strips of plastic card, set one vertically on the floor where the bench is, and glue the other on the top in a Γ shape — this because you can’t see the outer side, so you don’t need to bother fitting it, except maybe a little bit for support at the front and back.

However, my floor curves like the real one, and cutting a plastic strip to follow that curve is rather tricky. Thinking about this problem, I hit on the idea of square tube, but as I mentioned, the bench is wider than it’s tall, so that doesn’t work either. And then I happened across 6.4 by 3.2 mm rectangular tube :smiling3: After buying a pack and cutting a section to length for the bench, I curved it to follow the floor (just pulling it over the edge of the workbench, plus a little pushing and pulling with my fingers). Next, I cut two strips from plastic card, 0.75 mm and 1 mm thick and about 6 mm wide.

To actually fit the bench, I glued one strip to the floor, making sure its visible edge was in the right location. Then the other one on top of it, followed by the tube to get a nice, square upper side, again taking care to line up the visible side.

IMG_0153.jpeg

You can still see the lamination here, but that’s OK, some filler will take care of that:

IMG_0154.jpeg

That just needs to be sanded smooth once it’s dry.
 

Allen Dewire

Proud Rabble Member
SMF Supporter
Joined
Apr 27, 2018
Messages
4,105
Points
113
Location
Bamberg
First Name
Allen
I have been following this from the cheap seats Jakko. Too warm to sit in your upstairs and watch for this old guy......

What I really enjoyed the most, is you bought this kit with a fantastic and historical idea for it....But, let's look at the facts here......

You buy a kit, open the box, check the parts, take a good look at some references, break out the ruler, start measuring the dimensions, realize the kit is a total dud in that area, close the box after cutting the hull off the sprue and then scratch the rest of the build, using the boxtop pic and your references, as the kit parts are all wrong!!!...Respect Jakko, and you are doing one heck of a job on this Sir!!!...

And I thought I was Mad!!!...

Prost
Allen
 

Jakko

Way past the mad part
SMF Supporter
Joined
Apr 28, 2018
Messages
10,837
Points
113
First Name
Jakko
Maybe so but I don't undertake a complete refit lol.
Imagine what would happen if we got together to work on a model …

You buy a kit, open the box, check the parts, take a good look at some references, break out the ruler, start measuring the dimensions, realize the kit is a total dud in that area, close the box after cutting the hull off the sprue and then scratch the rest of the build
To be fair, I have the box open next to me and regularly look at various parts to check stuff. But in general, I use it mainly for storing the hull when I’m not actively working on it, as well as the figures that will go on it and all the parts that are going to end up in my spares box at the end ;)

Respect Jakko, and you are doing one heck of a job on this Sir!!!...
Thanks :smiling3:

And I thought I was Mad!!!...
I will refer you to the title below my avatar ;)
 

Allen Dewire

Proud Rabble Member
SMF Supporter
Joined
Apr 27, 2018
Messages
4,105
Points
113
Location
Bamberg
First Name
Allen
You're Right, we are having so much fun in this wonderful hobby!!!........Aren't we???...
 

Jakko

Way past the mad part
SMF Supporter
Joined
Apr 28, 2018
Messages
10,837
Points
113
First Name
Jakko
That’s what I keep telling myself, anyway …
 
Top