Revell 1/72 B17-G Flying Fortress.

spanner570

SALAD DODGER
SMF Supporter
Joined
May 26, 2009
Messages
13,050
Points
113
First Name
Ron
Glad you folks approve of the 'Butchery' thus far. I certainly am glad to get it behind me......

Good point Paul. Luckily the main spar(s) goes through the fuselage, (See sprue shot of same) so hopefully no wing sag. :cold-sweat:

Jim. There are floors in the kit, but because more detail will be exposed than the kit maker intended, I will have to scratch build some extras - and plenty more besides.

Rick. Edam, that was clever! Now you see why your most excellent suggestion earlier in the thread about battle damage wouldn't have worked. Even a B-17 would struggle to keep airborne....

Thanks for all the great input boys. :thumb2:

Ron
 
Last edited:

Jakko

Way past the mad part
SMF Supporter
Joined
Apr 28, 2018
Messages
10,951
Points
113
First Name
Jakko
So, after consuming a can of best ale to calm me down, I wound up my 'Poundshop' Dremel lookalike
If I may offer a tip for future models like this? Using a fretsaw is much easier than drilling loads of holes and then cleaning up the jagged edges that leaves :smiling3: Though regardless of the method used, the end result you got to looks good, it should show off the interior very nicely.
 

spanner570

SALAD DODGER
SMF Supporter
Joined
May 26, 2009
Messages
13,050
Points
113
First Name
Ron
Thanks boys....

Jakko, thanks for the input, but a fret saw would be far too brutal. The frame is around 12" tall and trying to thread the blade into the tensioned frame numerous times would end in disaster and would result in breakage of the brittle plastic, particularly where the plastic 'gaps' was very narrow. Even a coping saw would be too risky.

Also, the problem arises of trying to fasten a half round, thin bit of plastic securely enough to saw through. How can a fret saw be used? With the mini drill, I laid the fuselage half on a flat bed and held it down whilst drilling.

Although the method I've used looks clumsy and heavy handed, I had far more gentle control than any other method I've used in the past.

None the less, thank you for your suggestion for anyone contemplating similar mutilation in the future..... :thumb2:

Ron
 
Last edited:

Tim Marlow

Little blokes aficionado
SMF Supporter
Joined
Apr 27, 2018
Messages
16,863
Points
113
Location
Somerset
First Name
Tim
Thanks boys....

Jakko, thanks for the input, but a fret saw would be far too brutal. The frame is around 12" tall and trying to thread the blade into the tensioned frame numerous times would end in disaster and would result in breakage of the brittle plastic, particularly where the plastic 'gaps' was very narrow. Even a coping saw would be too risky.

Although the method I've used looks clumsy and heavy handed, I had far more gentle control than any other method I've used in the past.

None the less, thank you for your suggestion for anyone contemplating similar mutilation in the future..... :thumb2:

Ron
Whatever works for you works for you Ron :thumb2:.
However, if you ever do want to try an alternative, a Jewellers piercing saw is much gentler than a fret saw. The blades come with very much finer teeth :tongue-out3:
 

spanner570

SALAD DODGER
SMF Supporter
Joined
May 26, 2009
Messages
13,050
Points
113
First Name
Ron
Whatever works for you works for you Ron :thumb2:.
However, if you ever do want to try an alternative, a Jewellers piercing saw is much gentler than a fret saw. The blades come with very much finer teeth :tongue-out3:

....but the brittle plastic still needs to be fastened down to ensure a safe and secure way of removing unwanted material. Obviously a vice is to be avoided!

So with the half fuselage lying flat, how can one use a saw - Any saw? ;)
 
Last edited:

Tim Marlow

Little blokes aficionado
SMF Supporter
Joined
Apr 27, 2018
Messages
16,863
Points
113
Location
Somerset
First Name
Tim
....but the brittle plastic still needs to be fastened down to ensure a safe and secure way of removing unwanted material. Obviously a vice is to be avoided!

So with the half fuselage lying flat, how can one use a saw - Any saw?
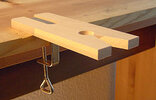
Personally Ron I’d use something like this…..comes from the jewellery industry. I think it’s called a bench pin.
CD9C56A7-1DFB-4A87-90C8-D6EA781B05FC.jpeg
To make your cut outs, I would proceed as follows. Drill a hole in each corner of the cut out on the model. Thread the blade through, tension the saw, and then saw between the holes.
To support the fuselage, just hand hold the fuselage side against the long side of the bench support, and make sure the cut is right up against the edge. The workpiece is then fully supported. You pretty much move the workpiece up around the blade as you make the cut rather than the other way around.

I made my table out of a scrap of plywood, by the way, and it has scars all over it. I’ve used it for years and years, modified plastic kits and cut down to 10thou brass sheet on mine without distortion. You can actually bodge up any support you need and screw it to the bench pin.

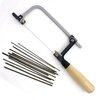
If you haven’t come across the piercing saw, the saw blades go right down to 84 teeth per inch (8 O) and can be as thin as 0.15mm. They cut on the pull stroke, so press down the piece onto the support, and exert almost no pressure when on the upstroke. Not that obvious from this picture, but the blades you can see are all packs of ten…..

E2ADE404-DA7E-425B-B855-E18D6C192EE8.jpeg
I‘m honestly not trying to tell you how to suck eggs, by the way. I just thought you sounded interested……if you aren’t, then just ignore this post ;)
 

Jakko

Way past the mad part
SMF Supporter
Joined
Apr 28, 2018
Messages
10,951
Points
113
First Name
Jakko
a fret saw would be far too brutal.
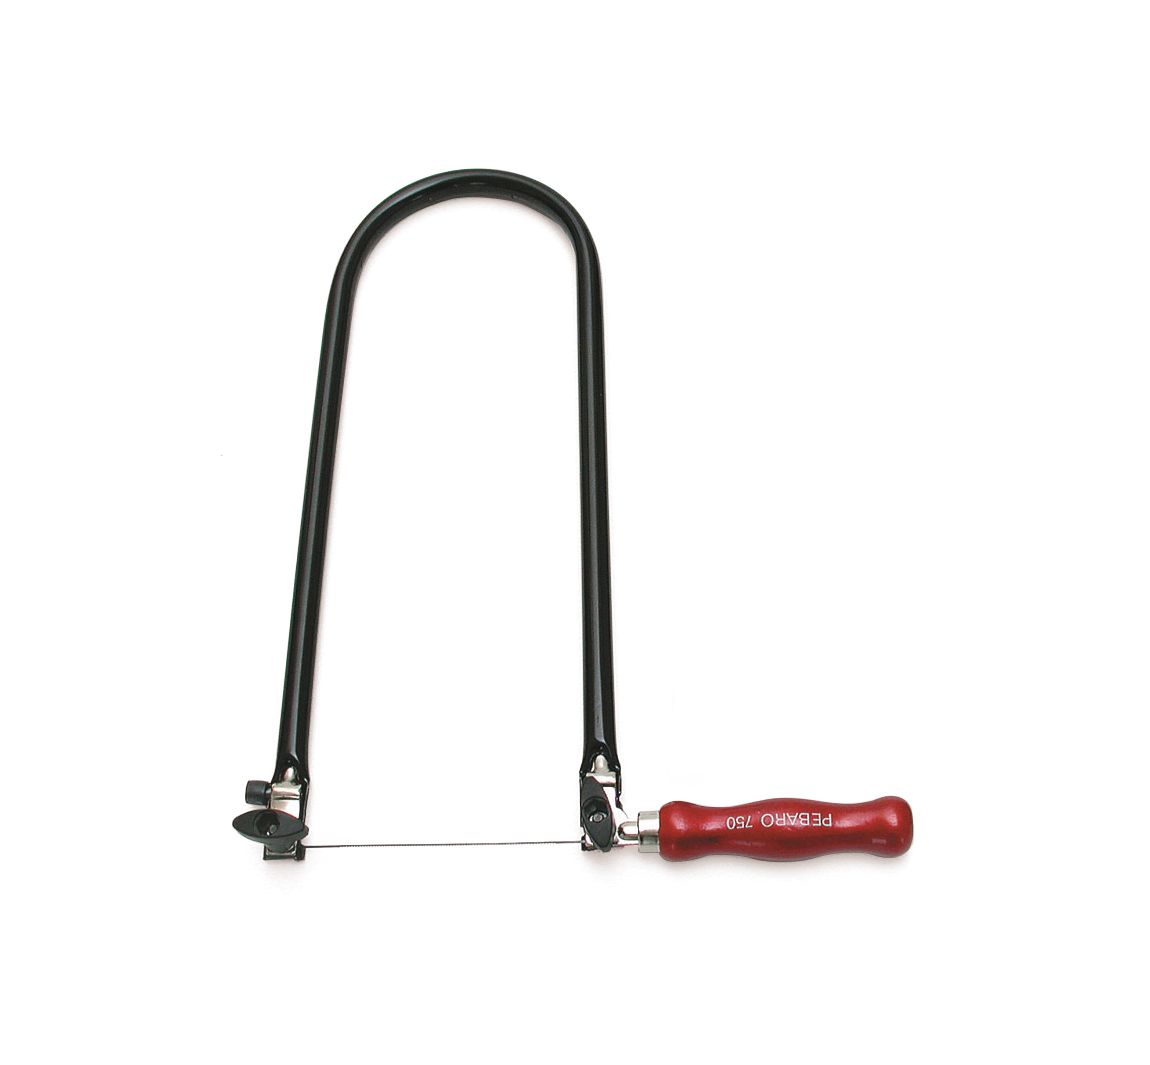
I suspect my English terminology is off. I mean a saw like this:

925986_5946714.jpg


In Dutch this is a figuurzaag, literally a figure saw, and the plank with a notch that Tim showed is a figuurzaagplankje, “figure-saw(ing) little-plank” :smiling3:

Used in the manner Tim describes for the shorter type of saw bow, you can make very accurate and fine cuts through plastic with one of them.
 

boatman

SMF Supporter
Joined
Nov 8, 2018
Messages
13,025
Points
113
Location
NORFOLK UK
First Name
christopher
WELL 570 i used your idea on my tiger bridge windows where they are very fragile an then file them smooth an they came out ok an i think this is the best way to go but exscuse me you other guys with your saws but this is just my opinion
chrisb
 

Tim Marlow

Little blokes aficionado
SMF Supporter
Joined
Apr 27, 2018
Messages
16,863
Points
113
Location
Somerset
First Name
Tim
I suspect my English terminology is off. I mean a saw like this:

925986_5946714.jpg


In Dutch this is a figuurzaag, literally a figure saw, and the plank with a notch that Tim showed is a figuurzaagplankje, “figure-saw(ing) little-plank” :smiling3:

Used in the manner Tim describes for the shorter type of saw bow, you can make very accurate and fine cuts through plastic with one of them.
Terminology is fine Jakko…..that’s a fret saw……finer than a coping saw, but not as fine as a piercing saw…..I think I was lucky enough to go to school when they still taught woodwork and metalwork…..
 

spanner570

SALAD DODGER
SMF Supporter
Joined
May 26, 2009
Messages
13,050
Points
113
First Name
Ron
I'm not going to argue or bang my head against the proverbial, but it will be sufficient to write that I spent all my working life as a joiner/carpenter (50 years) using a fret, coping (you name it) saw. Almost all my tools were hand powered, as electric drills and things were as yet a rare sight. I know what I'm talking about and for the application I have described about 50 pages ago, no saw would do the job as quickly, more convenient, safely, both to fingers and the plastic model, better than drilling out and smoothing.

Sorry to be so abrupt and I guess I might be alienated by certain members but hey, it's Christmas and I really don't give a st*ff anyway......


Meanwhile, back at the build.....

The comfortable seating arrangement.

The delightful deck chair for the pilot/co pilot and 'secretary stools' for other crew members......:astonished:

P1350250.JPG

P1350416.JPG

P1350417.JPG

P1350419.JPG

Cheers.
Ron
 

Tim Marlow

Little blokes aficionado
SMF Supporter
Joined
Apr 27, 2018
Messages
16,863
Points
113
Location
Somerset
First Name
Tim
Well, I never wanted to get you so bent out of shape Ron, but if you only read your own meaning into my posts, rather than what I actually wrote, then I suppose that was always going to happen.

Never mind….I don’t really give a stuff either. I’ve got far more serious things to worry about. I definitely won’t alienate anyone over such a pointless exercise as alternative ways to butcher plastic, so Merry Xmas to you and yours.
 

spanner570

SALAD DODGER
SMF Supporter
Joined
May 26, 2009
Messages
13,050
Points
113
First Name
Ron
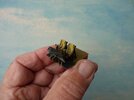
Here is the cockpit.
The colours are probably wrong, I just went by the instructions. They'll do for me.

P1350422.JPG

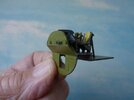
I made some rough seat belts from the instruction sheet paper. Black dashboard whatever it is, glued in place.
P1350424.JPG

Front bulkhead fitted.
P1350433.JPG


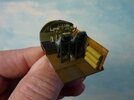
Finished cockpit.
I slightly altered the colours of the plywood floor, as the real colours tend to vary slightly from sheet to sheet.
Also there was no stbd. wall thingy or oxygen bottles, so I scratch built them from plastic card and sprue bits respectively.
P1350439.JPG


Cheers.
Ron
 
Last edited:

The Smythe Meister

Born to be WILD....... until about 9pm
SMF Supporter
Joined
Jan 30, 2019
Messages
5,809
Points
113
Location
Devon
First Name
Andy
Here is the cockpit.
The colours are probably wrong, I just went by the instructions. They'll do for me.

View attachment 469608

I made some rough seat belts from the instruction sheet paper. Black dashboard whatever it is, glued in place.
View attachment 469609

Front bulkhead fitted.
View attachment 469610


Finished cockpit.
I slightly altered the colours of the plywood decking, as the real colours tend to vary slightly from sheet to sheet.
Also there was no stbd. wall thingy or oxygen bottles, so I scratch built them from plastic card and sprue bits respectively.
View attachment 469611


Cheers.
Ron
Wow!!
That's coming along a treat Ron :smiling3:
The cockpit looks awesome,gotta keep reminding myself that it's braille scale ;)
 

spanner570

SALAD DODGER
SMF Supporter
Joined
May 26, 2009
Messages
13,050
Points
113
First Name
Ron
Thanks for the nice post, Andy. :thumb2:


Next up is the bomb bay.

This better shows the answer to Paul and Jim's question about rigidity of the port wing once the fuselage is ripped about.

The kit supplies four bombs, two each side. There was plenty of room for more, so I doubled the amount to eight from my bits bag.

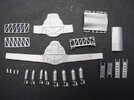
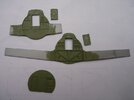
Here are the kit components for the bomb bay.......The walkway, right centre, is upside down.:upside:
P1350248.JPG

First coat brushed on.
P1350249.JPG


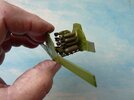
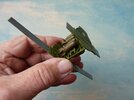
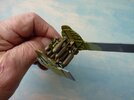
Here's the initial stage of the bomb bay...The walkway and the eight bombs fitted on their racks and glued between the two main spar bulkheads.
P1350425.JPG

P1350426.JPG

P1350427.JPG

As a bonus, I'm learning more about the guts of a B-17G as I tackle each stage of this terrific kit from Revell.

It might not be totally accurate, but such things don't bother me. I'll be adding bits as I go along. It's just a joy to build and am I having fun! That's all that matters. And at only £20 delivered, plenty of beer tokens to spend.

Cheers.
Ron
 

scottie3158

SMF Supporter
Joined
Apr 27, 2018
Messages
12,769
Points
113
Location
Spalding
First Name
Paul
Thanks for the nice post, Andy. :thumb2:


Next up is the bomb bay.

This better shows the answer to Paul and Jim's question about rigidity of the port wing once the fuselage is ripped about.

The kit supplies four bombs, two each side. There was plenty of room for more, so I doubled the amount to eight from my bits bag.

Here are the kit components for the bomb bay.......The walkway, right centre, is upside down.:upside:
View attachment 469652

First coat brushed on.
View attachment 469653


Here's the initial stage of the bomb bay...The walkway and the eight bombs fitted on their racks and glued between the two main spar bulkheads.
View attachment 469656

View attachment 469657

View attachment 469658

As a bonus, I'm learning more about the guts of a B-17G as I tackle each stage of this terrific kit from Revell.

It might not be totally accurate, but such things don't bother me. I'll be adding bits as I go along. It's just a joy to build and am I having fun! That's all that matters. And at only £20 delivered, plenty of beer tokens to spend.

Cheers.
Ron
That's what it's all about Ron, having fun. And it's coming on a treat.
 
Top