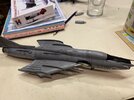
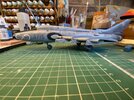
SMER 1/48 Sukhoi su 22m4 in polish service

yak face

Wossupwidee?
Staff member
Moderator
SMF Supporter
Joined
Jun 13, 2009
Messages
12,416
Points
113
Location
sheffield
First Name
tony
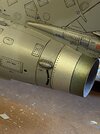
Panel line washes - not something im a massive fan of , personally I think they tend to get overdone, and the model ends up looking like a technical drawing or blueprint. That said I usually emphasise at least the control surfaces and have done full washes where the subject would definitely benefit from it , this build being one of those. So off we went with the oil wash . Next up is the tricky job of cleaning up without wiping it all off again ! 0432F6AE-5BD0-4807-A83F-15160D565BF6.jpeg
 

yak face

Wossupwidee?
Staff member
Moderator
SMF Supporter
Joined
Jun 13, 2009
Messages
12,416
Points
113
Location
sheffield
First Name
tony
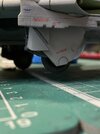
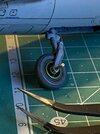
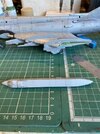
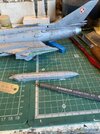
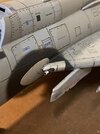
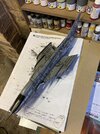
Well it looks a lot less in your face now its had a final coat of semi matt. Been getting on with the undercarriage , wheels on including the new axle for the nosewheel and the tricky 3 part main gear door assembly. Next up fitting the stores which cones with its own dilemma , 1D205CFF-8446-417A-9C23-DFE9EDA22799.jpeg325F0574-53CC-450B-8A4B-939A81F03545.jpeg5C0CE186-19B7-49CD-AE37-932A7F6D3067.jpeg
 

yak face

Wossupwidee?
Staff member
Moderator
SMF Supporter
Joined
Jun 13, 2009
Messages
12,416
Points
113
Location
sheffield
First Name
tony
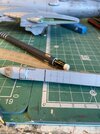
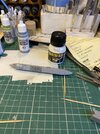
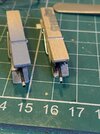
Into the final furlong now with this build. The final stage always seems to take forever as theres so many tiny little details to add . Referring back to the dilemma mentioned earlier , the KKR1 reconnaissance pod on the centreline is the problem. The kit one was very sparsely detailed , ive already added the camera covers at the front but after finding better references realised theres a massive detail underneath missing. The pod has a raft of flare chutes for night time photography ( 152 in all , in rows of seven and eight)
Not being able to find any decal for this meant i had to improvise and the only way i could attempt it was to add the dots freehand with a pen . After about ten attempts ive ended up with this , a bit rubbish but im not messing about any more , its close enough and no ones going to see it underneath anyway. C9110C9C-4834-4700-862F-BFA84D33CB62.jpeg6563ECE6-52AE-4BE7-A8E8-5A3FCC38C992.jpegD239D31D-2C4E-4B8F-B145-4E7CA401D440.jpegF0D2FA59-595D-4DE2-898F-9BD0271C08AD.jpeg5E5CFE61-7DF9-444D-8ABB-867D113E9546.jpeg
 

Jakko

Way past the mad part
SMF Supporter
Joined
Apr 28, 2018
Messages
10,861
Points
113
First Name
Jakko
You’re braver than I am, and clearly have a steadier hand, adding those flare holders with a pen :smiling3:
 

yak face

Wossupwidee?
Staff member
Moderator
SMF Supporter
Joined
Jun 13, 2009
Messages
12,416
Points
113
Location
sheffield
First Name
tony
Took off the temporarily fixed rear canopy today and demasked it . The seat can now be fitted ( remember the treading on it episode!)
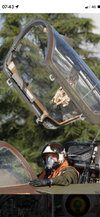
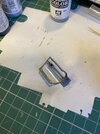
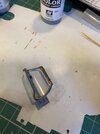
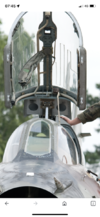
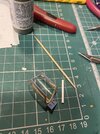
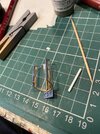
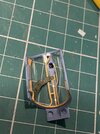
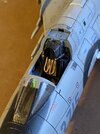
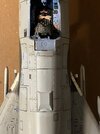
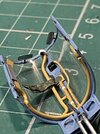
The canopy is one of those areas where virtually all makers dont try hard enough , apart from making a canopy true to scale thickness and the odd mirror most kits neglect this sometimes very detailed area . This is no exception , the kit providing nothing but the glass parts and a periscope mirror for the outside . The AM photo etch provides a few bits ( mirrors , latches, area round the hinge ) but theres still loads to add ( see the photos )
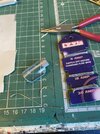
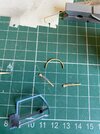
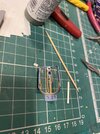
I started making the demister pipework and the long panels at each side using plastic card and 30amp fuse wire, the latch pieces were off the pe fret . Theres a few more cables / pipes to add yet plus the prominent instrument training hood (?) ( the crumpled up thing hanging on the left had side ) 94BBA9D7-77F9-4805-83E8-9634DFA087EE.jpegFEAA99F1-5DF0-4A7A-BBC2-C33289F1A86F.jpegBBB930E7-648F-4EAA-8EFF-0AFC20F0E1DC.jpegDCADE8C2-AA5C-499A-82E3-97AC7C641D6B.jpegCFB6B18A-D81A-4D73-85F9-A25626D71B93.jpegD097F8F7-D12F-49FA-8D34-08FD5DE0ECB7.jpeg656F1C65-CE6D-4F3F-AE20-20C67B1D82A1.png
 

JR

Member of the Rabble and Pyromania Consultant
SMF Supporter
Joined
May 26, 2015
Messages
17,322
Points
113
Location
lincs
First Name
John
That's some brilliant work there Tony precise and clean.
 

Airborne01

SMF Supporter
Joined
Mar 30, 2021
Messages
3,191
Points
113
Location
Essex
First Name
Steve
You are definitely having a giraffe mate - that's impossibly good! Looking forward to even more of the same!
Steve
 

yak face

Wossupwidee?
Staff member
Moderator
SMF Supporter
Joined
Jun 13, 2009
Messages
12,416
Points
113
Location
sheffield
First Name
tony
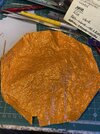
Got the instrument flying hood sorted , courtesy of a Terrys chocolate orange wrapper( its a dirty job but somebodys got to do it :hungry:) , a little piece of which was folded up and painted. Just the mirrors to fit and sort the hinge/ hydraulic ram area . The guns have been drilled out , painted and had the end section wrapped in aluminium tape . These have now been fitted — interesting sidenote- as can be seen in the overhead view they are asymmetric , dont know why but thats how they are on the real thing so top marks to the kit designers for picking up on it . The seat has been glued in and ive given the elevators an extra locating pin in the form of brass tube which will go in the C shaped actuating slot , as the single pin didnt seem sturdy enough .56B16A3F-E34C-4EB0-B69B-D77C4525D8AE.jpeg954873A8-B334-4B98-BB2B-8D63B5244CA2.jpeg4B285E93-BC9C-4AB1-857D-9E5D4494A5C5.jpeg1A5CCA8C-B2B9-4F40-81E2-AF18B862EC6B.jpeg507CAA1D-D25F-48C4-9A8C-46364FCC0247.jpeg09FE436F-C18F-42F2-B118-C7A1C1FD1F83.jpeg6FFDA31B-CAD0-4944-AE8B-C74A6798D39E.jpeg391E86E7-35D1-4CE8-AA27-2C9825F7D9AE.jpeg8105A45E-7AB3-4A40-94ED-C5F0C42C22BF.jpegF3C816EC-0756-4177-83B8-B1C345064FB4.jpeg
 

yak face

Wossupwidee?
Staff member
Moderator
SMF Supporter
Joined
Jun 13, 2009
Messages
12,416
Points
113
Location
sheffield
First Name
tony
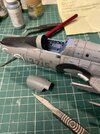
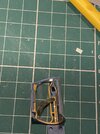
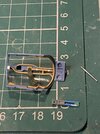
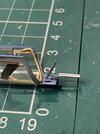
Canopy now finished ready to go on later. I fitted the PE mirrors which were silvered with the Molotov chrome pen and the hinge mechanism was made from bits of scrap and some more telephone wires. The hydraulic ram is the needle from an empty revell contacta liquid cement bottle , cut to size.
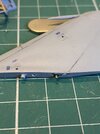
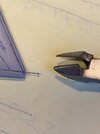
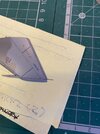
Ive also been adding the static dump wicks at the ends of the wings / elevators and top of the rudder. These were paintbrush bristles glued on then thickened at the base with canopy glue . A blob was added to the end too , once this was dry ( overnight) the very tip was snipped off to give a flat end , this almost club like shape being peculiar to Sukhois .
Its at the stage now where i have to be really careful handling it as theres so many tiny bits to knock off , ive already lost a tiny aerial which will have to be remade. E128900C-CB20-4511-89AF-7D68E4956004.jpeg1B8C9B6E-1AF0-4042-86F9-27DAEA092A71.jpegA142FA2C-A80A-4289-9546-B22D26D705D5.jpegFA021E19-0200-46A6-A6A9-E1DF74FA0C3B.jpegE93EB883-B01F-4EF6-AABA-9EF93521169D.jpeg2D96A4BB-5E61-4F6C-AC89-D743769560F0.jpeg
 
Joined
Feb 29, 2012
Messages
442
Points
63
First Name
Sebastijan aka Seb
Love the canopy interior detailing - so prominent yet so often overlooked by the modellers!
 
Top