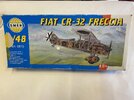
SMER FIAT Cr 32 Freccia in 1/48 ( ish!)

yak face

Wossupwidee?
Staff member
Moderator
SMF Supporter
Joined
Jun 13, 2009
Messages
12,416
Points
113
Location
sheffield
First Name
tony
Seen as how ive nearly finished the Zero for Karls GB , a month early no less ! , I thought I could squeeze in a quickish build before Andys Japanese GB starts in july .
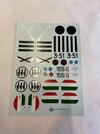
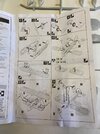
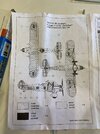
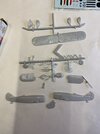
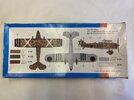
This is the SMER reboxing of the old Artiplast tooling of the FIAT Cr32 . The kit is actually 1/50 scale but when SMER reboxed the Artiplast kits they marketed them as 1/48 . Its not a problem for me , i know it would drive some people mad though . Anyways its a 1960s tooling , so the detail in the cockpit is a seat ….thats it , just a seat ! But the external detail is quite nicely done and its got great decals ( I’m going to do the spanish civil war version ). Ive done one of these before , many moons ago** and got round the cockpit problem by sticking a pilot in - bugger all can be seen once hes installed , so i’ll be using that strategy again .
**https://www.scale-models.co.uk/thre...utica-fiat-cr32-and-typhoon.11034/#post-91630
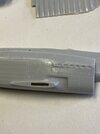
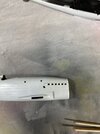
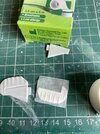
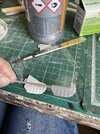
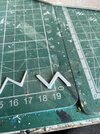
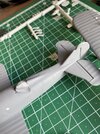
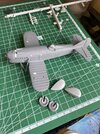
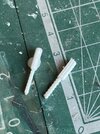
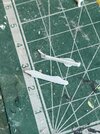
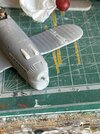
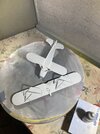
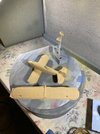
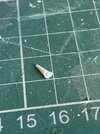
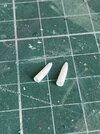
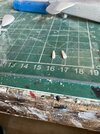
First off though , Ive got to fabricate a replacement tailplane and elevator as ones missing ! IMG_2652.jpegIMG_2653.jpegIMG_2654.jpegIMG_2655.jpegIMG_2656.jpeg
 

yak face

Wossupwidee?
Staff member
Moderator
SMF Supporter
Joined
Jun 13, 2009
Messages
12,416
Points
113
Location
sheffield
First Name
tony
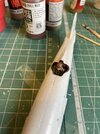
Made a start on this. Ive drilled out the exhausts and cut a divider out of plastic card to stop the see through effect. I got a fat little mester out of the spares box to fill the opening nicely . The inside of the fuselage has been primed and will just be getting a coat of interior green. I was wrong about the kit only supplying a seat , theres an instrument panel too , so that doubles the parts count in the cockpit , yay ! IMG_2660.jpegIMG_2661.jpegIMG_2665.jpegIMG_2666.jpegIMG_2664.jpeg
 

adt70hk

I know its a bit sad but I like quickbuild kits!!!
SMF Supporter
Joined
Sep 4, 2019
Messages
9,514
Points
113
First Name
Andrew
Eduard it is not but looking forward to what you do with this!

ATB

Andrew
 

Jakko

Way past the mad part
SMF Supporter
Joined
Apr 28, 2018
Messages
10,861
Points
113
First Name
Jakko
The detail on the fuselage is not half-bad for a kit of this vintage, though. Recessed panel lines and rivets that are fairly fine, it could have been a lot worse.
 

yak face

Wossupwidee?
Staff member
Moderator
SMF Supporter
Joined
Jun 13, 2009
Messages
12,416
Points
113
Location
sheffield
First Name
tony
The detail on the fuselage is not half-bad for a kit of this vintage, though. Recessed panel lines and rivets that are fairly fine, it could have been a lot worse.
Yes its quite nicely done jakko , a perfect mix of recessed panel lines and raised rivets ( although the rivets do look a tad big ! ) , it makes into a great looking model with a bit of fettling and a few refinements .( not to mention smoke and mirrors and just plain cheating - stick a pilot in to hide the lack of interior !) Cheers tony
 

yak face

Wossupwidee?
Staff member
Moderator
SMF Supporter
Joined
Jun 13, 2009
Messages
12,416
Points
113
Location
sheffield
First Name
tony
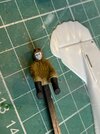
The illusion has now started ! IMG_2689.jpeg
No its not Alice Cooper , I thought I’d try and help with defining his features so dry brushed white over the black primer . He’s now had a full face makeover and now looks a bit more human ! IMG_2690.jpeg
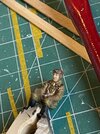
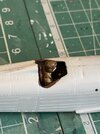
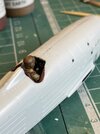
The fuselage has had the instrument panel added after painting a generic set of dials on it ( it wont really be seen as its quite deep under the coaming ) and the chubby Senor was tried for size.
This revealed that he was too low and couldnt see out of the cockpit ! So a booster cushion was installed under his square arse ! I also added a control column from stretched sprue as this would be visible between his legs . He’s now nestled in the cockpit and the fuselage halves have been glued , blocking all view of the total lack of interior . Next job sort the fuselage seams without losing any detail and fill those two whacking great sink marks on top of the nose !IMG_2691.jpegIMG_2692.jpegIMG_2693.jpegIMG_2694.jpegIMG_2695.jpeg
 

flyjoe180

Joe
SMF Supporter
Joined
Jan 18, 2012
Messages
12,438
Points
113
Location
Earth
First Name
Joe
Nice start Tony. The face on you pilot is one of the best I have ever seen (not the KISS version).
 

yak face

Wossupwidee?
Staff member
Moderator
SMF Supporter
Joined
Jun 13, 2009
Messages
12,416
Points
113
Location
sheffield
First Name
tony
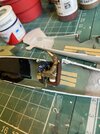
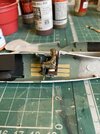
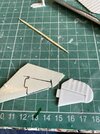
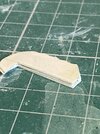
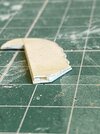
Got the seams and sink marks filled and glued the lower wings on . I now turned my attention to the missing tailplane .two pieces of plastic card were cut to shape and glued together with a strip between them at the front edge for the elevator. The tailplane was cut from a piece out of the spares box . IMG_2488.jpegIMG_2489.jpegIMG_2490.jpegIMG_2704.jpeg
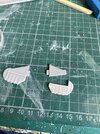
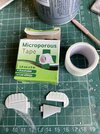
I glued plastic strips for the ribs and decided to try and simulate the covered effect with microporous tape . I tried a bit and it looked good so both sides of the elevator were covered , cut to shape and given a coat of primer. Once this has dried it can be cleaned up and fitted . IMG_2705.jpegIMG_2706.jpegIMG_2708.jpeg
 

Jim R

SMF Supporter
Joined
Apr 27, 2018
Messages
13,770
Points
113
Location
Shropshire
First Name
Jim
Excellent work Tony. Pedro the pilot looks superb. Tail fabrication is really good.
 

Geoffers

SMF Supporter
Joined
Jan 26, 2017
Messages
1,022
Points
113
Location
Shropshire
First Name
Geoff
Great stuff Tony, I’m enjoying watching you put this together :thumb2:

I must say that it seems better to have limited cockpit detail to hide once buttoned up rather than spend age’s creating lots of detail that no one will ever see :thinking:

Geoff
 

yak face

Wossupwidee?
Staff member
Moderator
SMF Supporter
Joined
Jun 13, 2009
Messages
12,416
Points
113
Location
sheffield
First Name
tony
Progress has been a but slow lately , due to being busy at work and other things taking up spare time ( changing my car and laying some false grass !)
Ive been cleaning up the fuselage and lower wings and now its in primer , with a few raised rivets reinstated with tiny blobs of canopy glue . The holes on the wings for the interplane struts dont line up with the struts fitted to the top wing ( i remembered this from the last one i built) so these were filled and re drilled . I also filled the holes for the machine guns as the kit supplied items were pants , plus I read that the wing guns were often removed to save weight .
A lot of the kit parts either need replacing or extreme clean up like the square section , flash ridden cabane struts , these being sanded down to an aerofoil section . Other bits like the tailplane struts will simply be replaced with rod IMG_2798.jpegIMG_2811.jpegIMG_2808.jpegIMG_2804.jpegIMG_2803.jpeg
Ive also assembled the wheel spats and cut out a section of the wheels so they can be fitted last off to save masking ( like @The Smythe Meister , with his fascination for turrets , i’m very partial to a spatted wheel ! )
 

Tim Marlow

Little blokes aficionado
SMF Supporter
Joined
Apr 27, 2018
Messages
16,820
Points
113
Location
Somerset
First Name
Tim
Very cool. Excellent work that’s bringing this up to standard very quickly.
 

yak face

Wossupwidee?
Staff member
Moderator
SMF Supporter
Joined
Jun 13, 2009
Messages
12,416
Points
113
Location
sheffield
First Name
tony
Forgot to say , I replaced the dodgy kit gun tubes with styrene tube , cut at an angle and flattened into an oval shape .472880FE-A3BA-4ABD-82BC-DB6554688ED7.jpeg3770EE4E-319A-4980-A11A-CF8DC97BDD3C.jpeg131B8BC4-1185-4798-8D04-9109E091A7C5.jpegF974CB2B-BBE0-4A8A-B197-6AAD3DCD68C5.jpeg
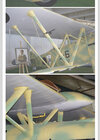
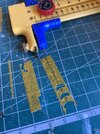
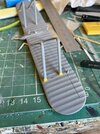
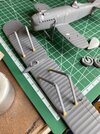
Been looking at the pics on the walkaround and realised that the interplane struts have a collar type fixing at each end . Obviously the kit doesnt so I used curved strips of kabuki tape to wrap around the ends and secured them with a drop of superglue . I’m going to have to do something similar at the bottom ends and also on the N shaped cabane struts . Once this was done the underside of the top wing and the fuselage and lower wing got a coat of sky grey. That was yesterday so today the undersides got masked up and the top of the wing , fuselage and wheel spats got a coat of sand yellow . Next up is the green and brown mottles .8732E007-3EAE-4F9B-AE6C-37681DB39868.jpeg099551F2-00F9-4A1F-A60C-A0E47894C24A.jpegC162FE59-C186-445D-87A4-7AE4DEC348CD.jpeg4B584D40-EDEB-45C7-B821-3D283C5AE38E.jpeg14C28D96-D7BB-4F98-8923-BB7B54DCF9DF.jpegDE4EB717-59D8-4492-A9E5-0953807E964E.jpeg
 
Top