StDs Clutch of 28mm trucks - Bedfords & AECs

Steve-the-Duck

SMF Supporter
Joined
Jul 3, 2020
Messages
1,215
Points
113
Location
Medway Towns
First Name
Chris
Well, here we go
As I'll be doing all four of these pretty much simultaneously, I'll just do the one thread

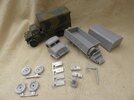
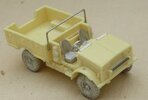
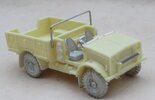
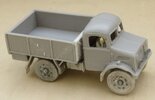
First up, the Bedford MW 15cwt - This is the only one that's going to be mostly out-of-the-box, apart from some detail stuffIMG_1773.JPG
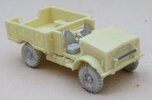
So far, the only addition is the tow bar out of plastic rod. I'll be completing this as an early version with aeroscreens rather than the full windscreen. Still haven't decided whether to do a BEF one or a Caunter Western Desert. Probably the latter
 
Last edited:

Steve-the-Duck

SMF Supporter
Joined
Jul 3, 2020
Messages
1,215
Points
113
Location
Medway Towns
First Name
Chris
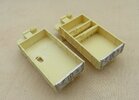
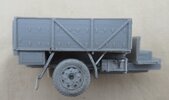
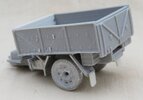
Next up, the second Bedford, and OY converted to an OX
IMG_1672.JPG
I'm re-posting the parts pic top compare with:
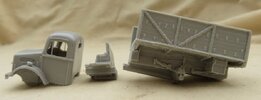
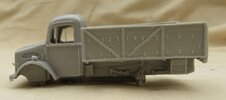
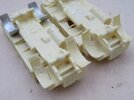
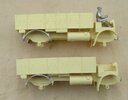
IMG_1776.JPGIMG_1777.JPG
...the major surgery already completed. I've still to remove the support bars from the side, and add in the front panel of the tilt
IMG_1778.JPG
Here's the dry fit of the major parts to give an idea of where I'm going
I've a photo of a later-type OX, with the slatted bonnet side panels, serving with a UXB unit, so I may base this on that when it comes to paint
 

Steve-the-Duck

SMF Supporter
Joined
Jul 3, 2020
Messages
1,215
Points
113
Location
Medway Towns
First Name
Chris
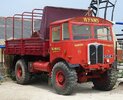
Finally, the Matadors
This will be the only fully civvie job, plus an early BEF artillery tractor
IMG_1770.JPGIMG_1771.JPG
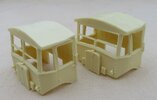
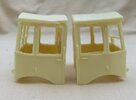
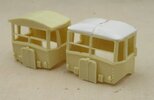
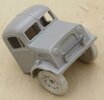
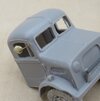
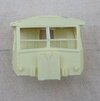
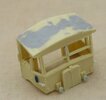
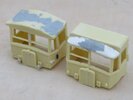
Comparing the two cabs, after removing the 'windows' (and part of the front frame!) you can see the big kink in the top of one, so that will goes to the early version with the different roof

IMG_1775.JPG
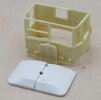
So, roof removed and the Lego piece cut
IMG_1783.JPG
Which hasn't turned out to bad and a reasonable representation of the roof
Lots more work to do here
 

Steve-the-Duck

SMF Supporter
Joined
Jul 3, 2020
Messages
1,215
Points
113
Location
Medway Towns
First Name
Chris
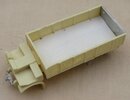
So onto the main bodies
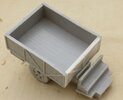
IMG_1784.JPG
On the left, what will be the civvie job with the seats removed. That was an hour plus sawing and another hour dremeling. Is that a word?
Grind grind. I discovered the chuck on my mini drill no longer holds the bit properly, which is weird, until I wrap the shaft in a bit of sellotape. How can a piece of brass just expand ?
Anyway...
IMG_1785.JPG
So, of course, one of the front mudguards on the civvie one broke off, but it was a clean break so re-attached. On the early version, the front mudguards bend back at the rear, so that's a quick cut-and-shut

IMG_1786.JPG
Lastly, a piece of my thinnest plasticard, with new planking scribed, to cover up the sanding and hole in the base

One problem I may be having later is the steering wheel is moulded with the driver. Not a problem for the military mover. Also, one set of wheels I've got are not 'handed', with a front pair and back pair with tread going in the same direction. I think I've got three nearside front wheels and one rear wheel in one kit. Well, would a civvie user go to the trouble of 'handing' the wheels?
Maybe not
 

Steve-the-Duck

SMF Supporter
Joined
Jul 3, 2020
Messages
1,215
Points
113
Location
Medway Towns
First Name
Chris
So, progress report. First the Bedford OX as that's the most alteration work done
IMG_1805.JPG
Wheels and towbar on the cab
IMG_1808.JPGIMG_1809.JPG
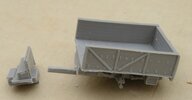
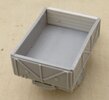
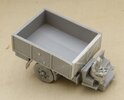
Shortened cab floor attached , plus new front panel added and detailed to the cargo body
IMG_1810.JPG
There's a bit of placcy card to fill the gap. I didn't really need to do the filler on it though
IMG_1811.JPG
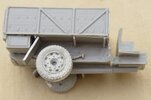
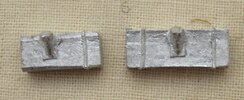
Nearside fuel tank with the unmodfied offside for comparison. Close-up they look terrible, but the eye is fine!
IMG_1820.JPG
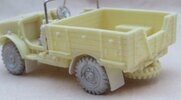
Nearside fuel tank in place with placcy strip framing, plus both rear mudguards added, with an extra flap on the rear guard that all service ones seem to carry. I could only find one pic that showed for definite that the support on the front mudguard was just a strip
IMG_1822.JPG
So, both tanks and mudguards in place, plus the support framing on the cargo walls removed and the tie-eyes replaced
IMG_1821.JPGIMG_1823.JPG
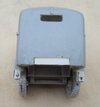
The back of the cab has a cut out to fit to the base piece, so that needed filling with a shim. Rearview mirror is rod and the end of a 1/35 German gasmask case.
Still haven't decided whether to put in the driver
 

Steve-the-Duck

SMF Supporter
Joined
Jul 3, 2020
Messages
1,215
Points
113
Location
Medway Towns
First Name
Chris
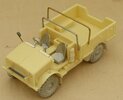
And now the MWD which is just extra detail adding
IMG_1804.JPG
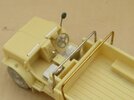
A bar for the cab tilt support frame. If I can get some more rod of roughly the same size I can do a GS load carrying version, rather than the platoon transport that it is at the moment. The two strips on the bonnet are the supports for the aeroscreens, to be added later. Also, two missile warheads added to the front mudguards for the indicators
IMG_1824.JPG
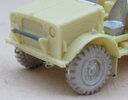
The kit doesn't include the prominent extensions to the rear mudguards, nor the rubber flaps on the front guards, so that's a simple placcy card addition. On the bonnet is the brass rod support for the rearview mirror, to add later when there's less chance of keep knocking it off!
IMG_1825.JPG
Tow eye, simple fuse wire loops, added to the front
IMG_1826.JPG
And the rear mudguards

No update as yet on the Matadors as I'm still working on the early version roof to my satisfaction.
Plus the Civvie 0853 I'm doing has a chunk of extra detail I need to add to the side of the cargo, if I'm to do the particular beast
 

Mini Me

SMF Supporter
Joined
Jun 1, 2018
Messages
10,162
Points
113
First Name
Rick
Lots going on here all at once! Keep it coming Chris. :thumb2:
 

Tim Marlow

Little blokes aficionado
SMF Supporter
Joined
Apr 27, 2018
Messages
16,838
Points
113
Location
Somerset
First Name
Tim
Coming along nicely Chris. Fair bit of work required though ;)
 

Ian M

Administrator
Staff member
Administrator
Moderator
SMF Supporter
Joined
Dec 14, 2008
Messages
19,798
Points
113
Location
Falster, Denmark
First Name
Ian
Well, here we go
As I'll be doing all four of these pretty much simultaneously, I'll just do the one thread
Chris; The Forum norm is one model per thread. (Diorama the only exception). In this one instance I will let it slide.

NOTE TO ALL this is not an invitation to all do the same. Further attempts at anarchy will be deleted.
 

Mini Me

SMF Supporter
Joined
Jun 1, 2018
Messages
10,162
Points
113
First Name
Rick
Too late Ian I've already "snookered" you at least a half a dozen times over the years! ;) I'm not sure what harm there is in having your own one man GB....particularly when it comes to the smaller scales and the vehicles are all in the same construction category, like, all armour , softskins or wing things. In the spirit of modeling I would think....the more the merrier:smiling4: Can you imagine the confusion it would cause if I wanted to build four 1-87 scale ambulances at the same time and had to start a thread on each one?
I hope that you take this comment as constructive criticism and not an argumentative reply to to your above comments.
Thanks for your consideration in advance.

Tricky Rick
 

Steve-the-Duck

SMF Supporter
Joined
Jul 3, 2020
Messages
1,215
Points
113
Location
Medway Towns
First Name
Chris
Thanks Rick, and to everyone else that's been taking a look

Y'know, I blame myself, for not reading the group build rules, this being the first one I've joined from the outset
Reading instructions? What madness is this!

Still,thanks for the leeway Ian, most appreciated. However, the Bedfords are pretty much built now and will be painted next, so they'll subsequently appear in a completed thread

The Matadors are a comparison build, so I'll be concentrating on the civvie 0853, such that the other, early, 853 version will just be alongside
Now I just need a load of 1mm brass rod to do all the extra tilt frames and ironmongery on the cargo body
 

Ian M

Administrator
Staff member
Administrator
Moderator
SMF Supporter
Joined
Dec 14, 2008
Messages
19,798
Points
113
Location
Falster, Denmark
First Name
Ian
Too late Ian I've already "snookered" you at least a half a dozen times over the years! ;) I'm not sure what harm there is in having your own one man GB....particularly when it comes to the smaller scales and the vehicles are all in the same construction category, like, all armour , softskins or wing things. In the spirit of modeling I would think....the more the merrier:smiling4: Can you imagine the confusion it would cause if I wanted to build four 1-87 scale ambulances at the same time and had to start a thread on each one?
I hope that you take this comment as constructive criticism and not an argumentative reply to to your above comments.
Thanks for your consideration in advance.

Tricky Rick
I am well aware of your militant activity within the forum. I can only agree that doing four threads of the same build would be a waste of time and effort for all. I am not sure that the need to cover the building of four identical kits is there either but hey ho. There is also a bit of a difference in building four of the same and building several different.
Anyhow not the place for this discussion. Sorry Chris for invading your thread.
 

Steve-the-Duck

SMF Supporter
Joined
Jul 3, 2020
Messages
1,215
Points
113
Location
Medway Towns
First Name
Chris
I am well aware of your militant activity within the forum. I can only agree that doing four threads of the same build would be a waste of time and effort for all. I am not sure that the need to cover the building of four identical kits is there either but hey ho. There is also a bit of a difference in building four of the same and building several different.
Anyhow not the place for this discussion. Sorry Chris for invading your thread.
Not a problem really, Ian. After all , you're the one overseeing this whole thing
 

Steve-the-Duck

SMF Supporter
Joined
Jul 3, 2020
Messages
1,215
Points
113
Location
Medway Towns
First Name
Chris
Okay, so the Bedfords are done, completed pics will go over in the appropriate softskins thread.
Here are the last build pics:
IMG_1848.JPGIMG_1849.JPG
The MWD finished as a GS version, with the rear tilt frames, rather than a platoon transport. Gear stick and handbrake added, from pins!
IMG_1851.JPGIMG_1854.JPG
The OX has a driver, out of the Matador. And finally all the parts put together
 

Mini Me

SMF Supporter
Joined
Jun 1, 2018
Messages
10,162
Points
113
First Name
Rick
Very nice Chris.....I like what you're aiming for. :thumb2:
 

Steve-the-Duck

SMF Supporter
Joined
Jul 3, 2020
Messages
1,215
Points
113
Location
Medway Towns
First Name
Chris
Okay, so NOW I've noticed there's a 'Completed Group Builds' section in the Military Vehicles area, so I should've posted the finished Bedford pics there rather in their own 'Completed Softskins' thread. They might have been seen then! But, hey ho.

So, here's where we are on the Matadors
IMG_1968.JPG

Front of the cab before modifications, other than the rebuilt windscreen frame

IMG_1988.JPG
So, kink in the roof filled and sanded, new headlights, position/ indicator lights and rear view mirror frame added

IMG_1989.JPG
As is too often the case with me, I have a rethink halfway through, then have to re-jig things. To save myself a little work, I've cut back the Lego piece cab roof on the early military version, and added a section from the one-piece tilt top, which is closer to the actual shape of the roof. Now I just have to Miliput fill the corners
 

Steve-the-Duck

SMF Supporter
Joined
Jul 3, 2020
Messages
1,215
Points
113
Location
Medway Towns
First Name
Chris
Extensive modifications of the cargo body, so far
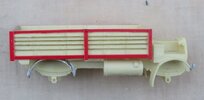
IMG_1969.JPG
Some plastic strip and brass rod for the extensive framing on the outside. Still need to add the tool box behind the fuel tank
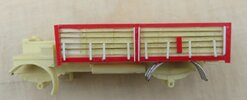
IMG_1990.JPG

Offside completed with extra detailing. I may add a few small strips to the bottom of the frame as the truck has a load of eye rings fitted there, assumingly to tie the tilt to. There are what may be hinges on the frame supports, so the whole side folds down, but it's difficult to tell
Photos of the GS (general service) cargo body are sparse to say the least, most Matadors being built as Artillery tractors. Or cranes. Or workshops. Again with the 'oh, that would look better if I did that', the photo implies there's a gap between the cab and the cargo body, so I COULD shorten it a little.

But not now I've come this far
There tractor has a door at the front of the body and a frame step, but I've removed both of them.

Next will be the tilt frames
 
Top