Steady, wait 'til he's right on the bridge!" A 1/72 diorama

spanner570

SALAD DODGER
SMF Supporter
Joined
May 26, 2009
Messages
13,006
Points
113
First Name
Ron
O.k., I've finally got some sense into the layout. I have decided the initial plan was too big, so I made a couple more houses (just the rough outlines for now) and after juggling everything around like a demented chess player, I've arrived at this more compact version......

You can see the course of the canal going through the middle. I have raised one half of the terrain to accomodate the canal lock. I intend to hack away the polystyrene below the bottom lock gate and under the bridge, this will form the lower canal bank. It will also give me a nice tall lock gate by the bridge. I will glue a piece of 4mm plywood over all the underside to stiffen the poly and also give me a canal bottom below the lock.

The lock will be modelled full of water, thus avoiding modelling lots of exposed stone work....Good thinking Batman!!

The road, bottom corner, coming up and then left over the bridge, is where the Americans will be coming.

Here are the pictures of the layout. I'm happy with this, but as fresh ideas come along anything can happen.....and usually does!

As this canal and bridge modelling lark is new to me, any suggestions / ideas are more than welcome.

Ron

View attachment 54828

View attachment 54829

View attachment 54830

'Wait 'til he's on the bridge.' 017.jpg

'Wait 'til he's on the bridge.' 016.jpg

'Wait 'til he's on the bridge.' 015.jpg
 
Last edited by a moderator:

spanner570

SALAD DODGER
SMF Supporter
Joined
May 26, 2009
Messages
13,006
Points
113
First Name
Ron
\ said:
Thanks for that Ron, I'd tried both the hard block stuff and the water colours that come in the little pots with poor results, so I wondered what you were using. I'll look out for them on future forays.Cheers,

Tony.

Quiet, sorry meant to say will watch and admire.:respect4: and pick up some tips along the way.
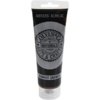
Nice one Tony, as an add on to your paint question. As I brush paint only, initially I used some of my Vallejo Model colour paints, these were great, providing a good key for the children's paints, but I thought there must be a cheaper alternative, so I tried the 'tubes'. These are as good as Vallejo for purpose, and a darn sight cheaper too!

Thinking about it, you spray paint, so why not use your A.B. for the initial coat and then children's stuff thereafter?

Ron
 
Last edited by a moderator:

mossiepilot

A learner learning
SMF Supporter
Joined
Jul 17, 2011
Messages
2,480
Points
48
First Name
Tony
Thank Ron, but I'm a hairy sticker, the only spraying I do comes out of cans in the form of primer.

Tony.
 

Ian M

Administrator
Staff member
Administrator
Moderator
SMF Supporter
Joined
Dec 14, 2008
Messages
19,744
Points
113
Location
Falster, Denmark
First Name
Ian
Whoa! that roof is well good Ron.

I can see that I am missing out on quite a lot making my own pizza's!!!

I can't really help with the canal bride question, but I think it sounds like you and the current misses Ron, will be taking a walk along some tow paths in the near future, you must have a few over there.

Looking forward to the next episode.

Ian M
 
Joined
Aug 22, 2011
Messages
998
Points
43
Location
North Wales, U.K...
First Name
Andy
\ said:
As this canal and bridge lark is new to me, any suggestions / ideas are more than welcome.Ron
You could take a look over at the Llangollen canal, plus would make a nice day out, or even the one over by the M56...
 

spanner570

SALAD DODGER
SMF Supporter
Joined
May 26, 2009
Messages
13,006
Points
113
First Name
Ron
Thanks for the posts boys, I appreciate the suggestions.

Ron
 
Last edited by a moderator:
C

CDW

Guest
\ said:
but I thought there must be a cheaper alternative, so I tried the 'tubes'. These are as good as Vallejo for purpose, and a darn sight cheaper too!
If you have a "HomeBargains" nearby then try this stuff ... it's Colvin & co acrylic .... quid a tube :smiling3:

They have red, yellow, blue, green, brown and white (to give them their normal names:smiling3:)

View attachment 52300

If you already use this stuff then ignore the above and reply with "shut up Colin and gerroff my thread" :smiling3:

View attachment 54849

colvin.jpg
 

spanner570

SALAD DODGER
SMF Supporter
Joined
May 26, 2009
Messages
13,006
Points
113
First Name
Ron
That's interesting Colin, I have a local Home Bargains, I'll get a tube and try it out..........If it's useless, and you know that I know where you live (sort of), I will travel the 200 odd miles up the M6 ect, with the tube, and not only show you what I think of the paint, but ban you from further interruptions on my thread, gorr'it!!!!!!!!!!!

Now then, now then, guys and gals, I've glued the base plywood to the poly, and the navvies have been and dug out the 'Cut' for me. See how I have achieved the lock step, I will place a piece of summat in the lock to bring the water up close to the top, as in real life. Also it has given me the extra height for the tall lock gate I needed.

We can see the basic layout better now, and get a better idea of where the bridge is going to be.

As this is just the first tentative step in the shaping of the thing, I have left plenty of scope for trimming if required......Remember the old addage, "It's easier to cut things off than put them back!"

Here are a couple of pictures of the excavation and I hope you approve thus far, 'cos I'm getting a bit of a buzz on now!

Cheers,

Ron

View attachment 54850

View attachment 54851

'Wait 'til he's on the bridge.' 018.jpg

'Wait 'til he's on the bridge.' 019.jpg
 
P

pneupack

Guest
B****y excellent work Ron can I be your apprentice : ) maybe you and Colin could build me an extension of course it would have to be in BIGGER scale lol.

Robert
 
C

CDW

Guest
Looking good so far, i think the levels for the lock should look about right when it's got "water" in it.

You say this is in seventy toofs scale, are you having figures or just vehicles??

As for the trip up here if the paints crap ..... kettles on and i might even make some sarnies if i can still walk (just thinking the worst on where you're going to shove it:smiling3:)
 

spanner570

SALAD DODGER
SMF Supporter
Joined
May 26, 2009
Messages
13,006
Points
113
First Name
Ron
\ said:
B****y excellent work Ron can I be your apprentice : ) maybe you and Colin could build me an extension of course it would have to be in BIGGER scale lol.Robert
It's a done deal Robert.....You can help Colin and I build your extension! I'll make the walls and roof and Colin can do all the interior, 'cos he's ace at it, as we can see from his dios.

Ron
 

spanner570

SALAD DODGER
SMF Supporter
Joined
May 26, 2009
Messages
13,006
Points
113
First Name
Ron
\ said:
Looking good so far, i think the levels for the lock should look about right when it's got "water" in it.You say this is in seventy toofs scale, are you having figures or just vehicles??

As for the trip up here if the paints crap ..... kettles on and i might even make some sarnies if i can still walk (just thinking the worst on where you're going to shove it:smiling3:)
Thanks Colin, yes, I hope the lock height is summat like, if not I can always lift the sides a wee bit, or dig out the poly to lower. I'll get a better idea when I tackle the canal stonework, gawd help me!

The plan is to have both 1/72 armour and figures for the Allies approaching the bridge. The thread title is being spoken by a German, so something, somewhere is going to be well hidden!

Don't worry, I'll supply the vaseline.............!

Cheers,

Ron
 
Last edited by a moderator:

yak face

Wossupwidee?
Staff member
Moderator
SMF Supporter
Joined
Jun 13, 2009
Messages
12,415
Points
113
Location
sheffield
First Name
tony
Looking brilliant ron, i just love these hand built jobbies of yours , in my opinion far better than anything you can buy (plus its FREE too !!!) cheers matey tony
 

spanner570

SALAD DODGER
SMF Supporter
Joined
May 26, 2009
Messages
13,006
Points
113
First Name
Ron
Thanks for the enthusiastic comments boys, I appreciate them.....

Here is a bit more progress. I've left the buildings and locks for a while 'cos I couldn't resist a go at the bridge. Be gentle, it's my first go at one!..

I had a look on doodle images and have incorporated various stonework into my bridge.

I started with a bit of scrap card and gradually cut it to shape and then drew some rough guide lines for the stonework. When I was happy with it, I transferred the outline to a piece of styrene, this I cut out with my knife. I then added the stone work proper by again using the knife to scribe the masonary joints in a sort of random stone effect, but symmetrical where required.......With the bridge side closest to us I decided a nice curved bend on one end to follow the road would look nice. The other is slightly higher at either end as I want it to form a wall along the upper level.

Finally I used the inside of a toilet roll to get the round on the underside of the bridge....Nothing fixed yet, just a dry run.

I hope you like it so far......

Cheers,

Ron

Here are the pictures of the bridge:-

View attachment 55120

View attachment 55121

View attachment 55122

View attachment 55123

View attachment 55124

View attachment 55125

View attachment 55126

View attachment 55127

'Wait 'til he's on the bridge.' 020.jpg

'Wait 'til he's on the bridge.' 021.jpg

'Wait 'til he's on the bridge.' 022.jpg

'Wait 'til he's on the bridge.' 023.jpg

'Wait 'til he's on the bridge.' 024.jpg

'Wait 'til he's on the bridge.' 025.jpg

'Wait 'til he's on the bridge.' 026.jpg

'Wait 'til he's on the bridge.' 027.jpg
 
P

Polux

Guest
Fantastic work Ron!!

Will be one of the most nicely dio I have seen, I'm sure!!

Piety for us, the human modellers lol!!

Cheers
 
S

Sky Raider

Guest
Ron, I missed this one but realy enjoyed catching up. Brilliant work as usual. well done mate.

Andy
 

spanner570

SALAD DODGER
SMF Supporter
Joined
May 26, 2009
Messages
13,006
Points
113
First Name
Ron
Thanks Polux and Andy for your very kind comments...

O.K., I've done some more work on the bridge and it's nearly ready for final fitting. After some invisible strengthening with scrap styrene, I formed the bridge arch with a toilet roll middle. But it was too flimsy and smooth, so I used card instead. Here occurred a 'Happy accident'!.....As I was bending it to the arch shape it started to crease...The more I bent it the deeper became the creases. Bingo! As I am simulating a render finish underneath the bridge, I wanted some 'cracks' and there they were!...Don't you luuurve it when this kind of thing happens?

Once the strengthening had hardened, I fitted the road over the bridge, this is just fairly thick card glued down with UHU all purps..I'm well chuffed with my first bridge and glad it's behind me too! As you can see, I've allowed plenty of room to build up the road levels approaching the bridge. (I actually thought of this in advance.lol)

With the bridge in position (you can see better now how I've tried to blend the bridge side into the higher ground) I got a better overall picture so I sat back and thought "What next?"

These came to mind:- A slope by the bend and leading up to the house / A set of steps going up to the lock and a small overflow sluice just below the lock.

The steps were roughly carved from the styrene using a junior hacksaw blade. The 'real' steps will be glued to this base work.

Nothing is fixed yet, 'cos I know I shouldn't, but I'm sure to have a fiddle and change things around as fresh ideas surface.....

That's it for now, next up the locks, should be good for some hair pulling and a can or two!!!!

Here's the pictures of this stage, thanks for taking the time to have a look at the progress.

Cheers all,

Ron

View attachment 55141

View attachment 55142

View attachment 55143

View attachment 55144

View attachment 55145

View attachment 55146

View attachment 55147

View attachment 55148

'Wait 'til he's on the bridge.' 028.jpg

'Wait 'til he's on the bridge.' 029.jpg

'Wait 'til he's on the bridge.' 030.jpg

'Wait 'til he's on the bridge.' 031.jpg

'Wait 'til he's on the bridge.' 032.jpg

'Wait 'til he's on the bridge.' 033.jpg

'Wait 'til he's on the bridge.' 034.jpg

'Wait 'til he's on the bridge.' 035.jpg
 
Last edited by a moderator:

yak face

Wossupwidee?
Staff member
Moderator
SMF Supporter
Joined
Jun 13, 2009
Messages
12,415
Points
113
Location
sheffield
First Name
tony
Excellent stuff matey, its going to be a cracker, the bridge looks spot on by the way , cant wait to see the lock gates etc. are they by any chance going to be constructed from daves stirring sticks!? cheers tony
 

Ian M

Administrator
Staff member
Administrator
Moderator
SMF Supporter
Joined
Dec 14, 2008
Messages
19,744
Points
113
Location
Falster, Denmark
First Name
Ian
Very nice Ron.

I can actually say that that is the best bridge you have ever built. To dato. lol' I like the way you turn these uninspiring bits of white styrofoam into some of the coolest building seen.

Ian M
 
Top