Tamiya 1/48th Scale Spitfire Mk Vb

SteveT

SMF Supporter
Joined
Jan 18, 2024
Messages
275
Points
93
Location
Lancashire
First Name
Steve
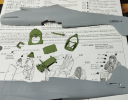
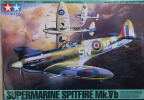
Hello everyone, yes it's time for me to build my first Spitfire since the mid 1970's. The kit is a Tamiya 1/48th code number: 61033.
I've just this minute opened the box but work will start now, I'll update this with images as I go.

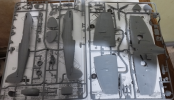
Here's the box art and the sprues!

Note to mods:- Apologies for starting another thread, my Me109 build has been put on hold for a couple of kits.
spit_1.pngspit_2.png
 

SteveT

SMF Supporter
Joined
Jan 18, 2024
Messages
275
Points
93
Location
Lancashire
First Name
Steve
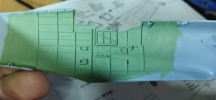
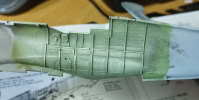
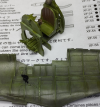
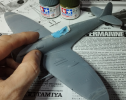
Mini-update! I've primed the parts required for the first couple of steps, painted them tamiya cockpit green then primed the fuselage pieces.

I will say this now, I lack around 50-60% of the paint colours listed in the instructions, so for some of the colours, I'm just guessing based on what I have, so if it's totally wrong please forgive me.

spit_3.png
 

yak face

Wossupwidee?
Staff member
Moderator
SMF Supporter
Joined
Jun 13, 2009
Messages
12,398
Points
113
Location
sheffield
First Name
tony
Great start steve , this one shouldnt give you any problems, cheers tony
 

Jakko

Way past the mad part
SMF Supporter
Joined
Apr 28, 2018
Messages
10,793
Points
113
First Name
Jakko
Nothing wrong with that. As for using what you have instead of what the instructions say: that’s how (nearly) all of us started :smiling3:
 

Ian M

Administrator
Staff member
Administrator
Moderator
SMF Supporter
Joined
Dec 14, 2008
Messages
19,721
Points
113
Location
Falster, Denmark
First Name
Ian
That looks fine Steve. Just remember that a dirty aircraft is sometimes called a wreck. Outside that is. A bit of oil, a bit of soot. If a typical grass airfield a bit of staining on the tyres.
 

Airborne01

SMF Supporter
Joined
Mar 30, 2021
Messages
3,160
Points
113
Location
Essex
First Name
Steve
That is a lovely little kit Steve - I have the same one perched on the shelf of doom - can't remember why though!
Steve
 

SteveT

SMF Supporter
Joined
Jan 18, 2024
Messages
275
Points
93
Location
Lancashire
First Name
Steve
I'm a little puzzled about the upper wing surfaces. They have two rather thick and pronounced lines on each side and the instructions say to remove this.

Why put it there if it's to be removed? also i'm not sure I can remove them cleanly because they are quite thick and are surrounded by things that's going to make it
quite hard to get in and sand smooth.

Quite frankly I'm even thinking I'd rather leave them there than make a mess of removing them.

spit_8.png
 
  • Sad
Reactions: JR

Geoffers

SMF Supporter
Joined
Jan 26, 2017
Messages
1,010
Points
113
Location
Shropshire
First Name
Geoff
Hello Steve,

Sometimes a manufacturer will use the same basic kit part for various Mks of the same varient.

For instance this wing may also be for the Spitfire MkV tropical version for which those bits would be appropriate.

It’s often easier to remove lumps and bumps than try and add them.

Hope this helps.

Geoff.
 

Neil Merryweather

SMF Supporter
Joined
Dec 29, 2018
Messages
4,424
Points
113
Location
London
First Name
Neil
Leave them if you want,it's your model, whose business is it but yours?
The whole point of this is to build your confidence, don't do things to undermine that at this stage. Most of us made our mistakes in our teens and didn't care, we just moved on to the next one. Channel your inner teenager and just go for it
 

SteveT

SMF Supporter
Joined
Jan 18, 2024
Messages
275
Points
93
Location
Lancashire
First Name
Steve
Okay been doing some more work on this, it was going okay-ish until I noticed some gaps and tried to use humbrol filler putty but ended up making an almighty mess.
anyway, it's ready for the dreaded painting, the instructions say to mix this paint and mix that paint and I reply is "no chance". So I'm going to try and use Grey/Green
Tamiya XF81 and XF82 (ocean grey 2 and raf dark green 2)

Feeling a bit crap right now so i'm not going to start this until the morning.

spit_9.png
 

SteveT

SMF Supporter
Joined
Jan 18, 2024
Messages
275
Points
93
Location
Lancashire
First Name
Steve
I've just used my trigger Ghaaleri (spelling?) airbrush for the first time and I must say I really like it. I sprayed it grey as I've been told it's better to do the light colour
first and then the dark, so I'll probably do another coat later today and then leave it until tomorrow to mask.

Masking is going to be ..interesting.. as I have options now. I've got proper model masking tape this time and I have a tin of AK camo putty. so i'm not sure what I'll try yet.

Unfortunately I can't seem to get rid of the mess the humbrol filler putty made, have sanded it but it's still visible. Make have to suck it up and accept it.
also I've just watched a video on sprue-goo and started to make some. Will stick an image in later when she's dried.
 

Jakko

Way past the mad part
SMF Supporter
Joined
Apr 28, 2018
Messages
10,793
Points
113
First Name
Jakko
Unfortunately I can't seem to get rid of the mess the humbrol filler putty made, have sanded it but it's still visible.
You can always sand filler back to the plastic to get rid of it entirely :smiling3: But I’ve found a good way to check if it’s smooth or not is with your finger: just feel carefully with a fingertip, and if you can feel anything that isn’t smooth, such as a transition from the plastic to the filler, it needs more work. Another way to check is to paint a neutral colour such as grey over the filler and surrounding area — once the paint dries, if you can’t tell where the filler is, it’s smooth enough :smiling3:
 
Top