Here she is, the big one……. The biggest model I have attempted and, most likely, the biggest injection moulded aircraft produced. (So far - a 1/32 Sunderland anyone???)
There are issues with this kit, two in particular, the wing aerofoil profile is wrong but that is something I cannot really do anything about, that said, based on a finished example I saw at Telford, it still looks like a Liberator when finished so it does not bother me.
The second significant issue relates to how the rear turret is moulded. There is a seam join between two halves where we really don't want a seam on a transparency. Again it’s not something I can deal with but if I can find an aftermarket alternative then I will get that, but none found so far. So I will probably just make the best of it.
Here is the box.
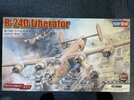
I love the desert scheme on these but it will take some work to make it interesting in this scale.
The aftermarket.
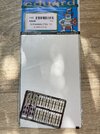
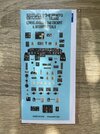
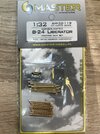
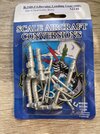
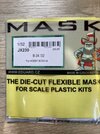
The masks above did not specify the mark of B24 and I found that it contains the front turret transparencies and not the glasshouse needed for this kit. Therefore while I will use the above where possible I will use these below for the glasshouse nose section (and elsewhere if the above is not right). Montex, of course being vinyl and therefore pretty poor at covering curves without lifting the kabuki tape masks from Eduard are preferred.
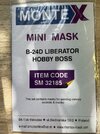
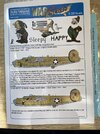
I will use the decals above for ‘Squaw’
Now, to give you a sense of size. I don’t exactly have small hands…
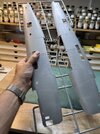
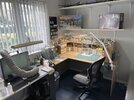
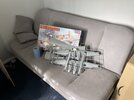
Here is my customary pic of my modelling bench all cleaned down and set up ready to start. Note that my sprue rack is full with no room to take the transparencies, decals and aftermarket. Even so, I had to put the larger parts on my sofa, no room elsewhere.
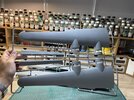
This being so large a model with a wingspan of 42 inches I have decided on two display options.
Firstly because this aircraft has a tricycle undercarriage my hope is that it will fit nose in on my shelves (they are 18 inches wide) with the open bomb bay hanging out over space. My initial rough measuring suggests it might work, it will be close though. If not then I will not fix the wings permanently into place and will make them removable so the aircraft can be put on the shelves with the wings behind the fuselage.
That’s the plan anyway. My Border Lancaster will be the next build and I will need room to store that, wings off, as well. That should be fine as I have lots of shelf space.
Hopefully I will cut plastic on Monday.
.
There are issues with this kit, two in particular, the wing aerofoil profile is wrong but that is something I cannot really do anything about, that said, based on a finished example I saw at Telford, it still looks like a Liberator when finished so it does not bother me.
The second significant issue relates to how the rear turret is moulded. There is a seam join between two halves where we really don't want a seam on a transparency. Again it’s not something I can deal with but if I can find an aftermarket alternative then I will get that, but none found so far. So I will probably just make the best of it.
Here is the box.

I love the desert scheme on these but it will take some work to make it interesting in this scale.
The aftermarket.


The masks above did not specify the mark of B24 and I found that it contains the front turret transparencies and not the glasshouse needed for this kit. Therefore while I will use the above where possible I will use these below for the glasshouse nose section (and elsewhere if the above is not right). Montex, of course being vinyl and therefore pretty poor at covering curves without lifting the kabuki tape masks from Eduard are preferred.


I will use the decals above for ‘Squaw’
Now, to give you a sense of size. I don’t exactly have small hands…


Here is my customary pic of my modelling bench all cleaned down and set up ready to start. Note that my sprue rack is full with no room to take the transparencies, decals and aftermarket. Even so, I had to put the larger parts on my sofa, no room elsewhere.


This being so large a model with a wingspan of 42 inches I have decided on two display options.
Firstly because this aircraft has a tricycle undercarriage my hope is that it will fit nose in on my shelves (they are 18 inches wide) with the open bomb bay hanging out over space. My initial rough measuring suggests it might work, it will be close though. If not then I will not fix the wings permanently into place and will make them removable so the aircraft can be put on the shelves with the wings behind the fuselage.
That’s the plan anyway. My Border Lancaster will be the next build and I will need room to store that, wings off, as well. That should be fine as I have lots of shelf space.
Hopefully I will cut plastic on Monday.
.
Last edited:


