Defending the Hauptstadt...Berlin '45...

rtfoe

SMF Supporter
Joined
Apr 29, 2018
Messages
7,546
Points
113
Location
Malaysia
First Name
Richard
Brilliant, good read from start to now Allan. Been lurking and watching the process...arduous but well worth the effort on the shell casings. It's so good I can't add anything except to stuff tissue for Niagra falls....nobody's looking. It's going to be a cracker when finished.

Cheers,
Richard aka Wabble
 

Lee Drennen

Box Stock Builder with a Twist/ Rabble Member
SMF Supporter
Joined
Apr 29, 2018
Messages
5,830
Points
113
Location
Wortham Mo
First Name
Lee
Appreciate it Rick and as a re-thought, it's better to have it closed. In combat, with a crew of 3, it most likely wouldn't be used for its purpose of self-defense. I have some plugs from a Brummbär kit and plenty of chain for them though...
The “Dude II” knows his stuff. Great stuff so far my friend.
 

Allen Dewire

Proud Rabble Member
SMF Supporter
Joined
Apr 27, 2018
Messages
4,122
Points
113
Location
Bamberg
First Name
Allen
Morning Guys,

Thank you all for the wonderful comments!!! They are greatly appreciated, but the winner is John (JayCee), as he knew the 7.5cm KwK 42 L/70 gun was fired electrically and not with a firing pin...I'm surprised no one else caught what I did there and there won't be any indents on the shell casing bottoms anyway. Top job John!!!

Prost
Allen, trying to keep you all on your toes.............
 

Allen Dewire

Proud Rabble Member
SMF Supporter
Joined
Apr 27, 2018
Messages
4,122
Points
113
Location
Bamberg
First Name
Allen
Just trying to help, Allan.
John.
Very much appreciated John, Thanks again...

Great stuff with those shell cases Allen. Real good problem solving.
Thanks very much Jim. It was time consuming, but they're finished now...

Excellent SBS.
Thanks Paul, but I didn't realize it was an actual SBS when I wrote the post. I guess it wouldn't do you much good in your scale though my friend...

I have been doing quite a bit on this of late and sorry for the late replies. I have found that one just can't sit at the table the whole day and play. Rather unhealthy I'm afraid. I have taken this month off from work as things are rather slow this time of year, so I take walks and ride my bike to get some exercise between bouts at the table. Now, moving along, we finished the shell casings,

IMG_3346.JPG
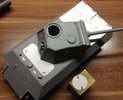
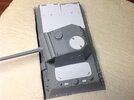
I have no idea what to do with the left-over warheads though. In total we have 48 so far. If I do need more, then I have another 48 as backup. I then finished up the turret. I glued the muzzle brake back onto the barrel after I got it as round as I could with the scraper. Then glued it all together, added the lifting hooks and scratched a cupola cover for the turret,

IMG_3347.JPG
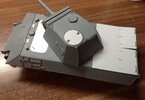
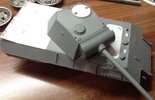
The normal drum cupola was stripped off including periscopes and the parts were used for repairs on other battle worthy Panthers elsewhere in the Reich. To finish off the Panther, I added the tool/equipment holders that were welded on the hull, but stripped of all their tools,

IMG_3349.JPG
And on the other side,

IMG_3350.JPG
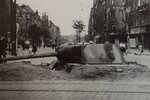
Of course, you won't be able to see them once the hull is buried in the street, but they were there,

For Reference Only
IMG_3314 (2).JPG

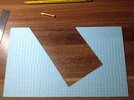
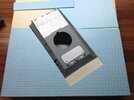
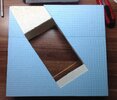
With the Panther done, it was time to plan out the street section. I had some blue foam in the stash that I bought at the Euro in 2016, but never used. I figured I could scribe the cobble stones into it and didn't have to be too large in size. I ended up having to use two thickness' as there was only one sheet of each in the pack of 4-6mm. No problem as 1mm isn't a big deal in size. I now give you a top-secret German weapon. The "SchwimmPanther",

IMG_3351.JPG
Ok, Panther's never did swim!!! This size allows me to build up the dirt and cobble stones, scatter the shell casings and not have it too large in scale. It's not set in stone yet and I may change it a bit. Another view,

IMG_3352.JPG
The chassis will sit a bit deeper as this is just a test fit. Now it was time to move forward...

I woke up yesterday and decided to get stoned...No, not that stuff we did way back when...Cobble stones folks. I knew I would need quite a few and I had the plan,

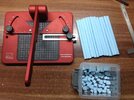
IMG_3353.JPG
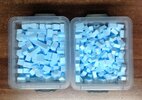
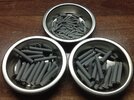
Cut the strips @ 0.5mm and chopped them off @ 0.8mm length. The leftovers would be used too as these were different lengths to fill the odd spaces. I made 20 strips and after chopping them up, I had about 300 cobbles. Looking at the reference pics to see how they were placed, I noticed something odd. The damn cobbles were twice as big in diameter as the shells. Huh!!! Wrong thickness of foam used!!! We are building a street scene here, not the Reichstag. Time to get stoned again!!! Using smaller thickness foam and an hour or two later, we had them done,

IMG_3355.JPG
The big Reichstag blocks on the left and the real street cobbles on the right. You can really see the difference between the two. I think there are about 400 in the plastic bowl to use around the tank. Next up will be designing a base for the dio and then scribing the cobbles into the foam sheet around the tank......

It's ice cold here and the temps don't go above -2° the whole day. Nights are -12° or more. I just love winter. Thanks again for looking in and I hope to have an update soon. Have a good Wednesday and stay warm folks...

Prost
Allen
 

adt70hk

I know its a bit sad but I like quickbuild kits!!!
SMF Supporter
Joined
Sep 4, 2019
Messages
9,526
Points
113
First Name
Andrew
Very much appreciated John, Thanks again...


Thanks very much Jim. It was time consuming, but they're finished now...


Thanks Paul, but I didn't realize it was an actual SBS when I wrote the post. I guess it wouldn't do you much good in your scale though my friend...

I have been doing quite a bit on this of late and sorry for the late replies. I have found that one just can't sit at the table the whole day and play. Rather unhealthy I'm afraid. I have taken this month off from work as things are rather slow this time of year, so I take walks and ride my bike to get some exercise between bouts at the table. Now, moving along, we finished the shell casings,

View attachment 469313
I have no idea what to do with the left-over warheads though. In total we have 48 so far. If I do need more, then I have another 48 as backup. I then finished up the turret. I glued the muzzle brake back onto the barrel after I got it as round as I could with the scraper. Then glued it all together, added the lifting hooks and scratched a cupola cover for the turret,

View attachment 469314
The normal drum cupola was stripped off including periscopes and the parts were used for repairs on other battle worthy Panthers elsewhere in the Reich. To finish off the Panther, I added the tool/equipment holders that were welded on the hull, but stripped of all their tools,

View attachment 469315
And on the other side,

View attachment 469316
Of course, you won't be able to see them once the hull is buried in the street, but they were there,

For Reference Only
View attachment 469317

With the Panther done, it was time to plan out the street section. I had some blue foam in the stash that I bought at the Euro in 2016, but never used. I figured I could scribe the cobble stones into it and didn't have to be too large in size. I ended up having to use two thickness' as there was only one sheet of each in the pack of 4-6mm. No problem as 1mm isn't a big deal in size. I now give you a top-secret German weapon. The "SchwimmPanther",

View attachment 469318
Ok, Panther's never did swim!!! This size allows me to build up the dirt and cobble stones, scatter the shell casings and not have it too large in scale. It's not set in stone yet and I may change it a bit. Another view,

View attachment 469319
The chassis will sit a bit deeper as this is just a test fit. Now it was time to move forward...

I woke up yesterday and decided to get stoned...No, not that stuff we did way back when...Cobble stones folks. I knew I would need quite a few and I had the plan,

View attachment 469320
Cut the strips @ 0.5mm and chopped them off @ 0.8mm length. The leftovers would be used too as these were different lengths to fill the odd spaces. I made 20 strips and after chopping them up, I had about 300 cobbles. Looking at the reference pics to see how they were placed, I noticed something odd. The damn cobbles were twice as big in diameter as the shells. Huh!!! Wrong thickness of foam used!!! We are building a street scene here, not the Reichstag. Time to get stoned again!!! Using smaller thickness foam and an hour or two later, we had them done,

View attachment 469324
The big Reichstag blocks on the left and the real street cobbles on the right. You can really see the difference between the two. I think there are about 400 in the plastic bowl to use around the tank. Next up will be designing a base for the dio and then scribing the cobbles into the foam sheet around the tank......

It's ice cold here and the temps don't go above -2° the whole day. Nights are -12° or more. I just love winter. Thanks again for looking in and I hope to have an update soon. Have a good Wednesday and stay warm folks...

Prost
Allen
Wow! 'nuff said!!
 

Mini Me

SMF Supporter
Joined
Jun 1, 2018
Messages
10,162
Points
113
First Name
Rick
Evvvvvvrybodddddddddy Musssssst get Stonnnnnnnnned! :tongue-out3: Dylan was one of my faves.......looks great Allen hope you don't go loopy laying all that rock.;)
 

Graeme C.

SMF Supporter
Joined
Apr 29, 2018
Messages
1,487
Points
113
First Name
Graeme
Interesting bit of history you're recreating there Allen, those cobbles look like a lot of work though.
 

Allen Dewire

Proud Rabble Member
SMF Supporter
Joined
Apr 27, 2018
Messages
4,122
Points
113
Location
Bamberg
First Name
Allen
Once again, I'm late to my own party...Apologies for the very late replies Gentlemen. Christmas and all that sort of rot.....

Wow! 'nuff said!!
Thanks Andrew! Don't know about the wow factor yet though...

Developing superbly Allen!
Steve
Much appreciated Steve and I can only wish it gets better. Hope you had a Merry Sir!!!...

Evvvvvvrybodddddddddy Musssssst get Stonnnnnnnnned! :tongue-out3: Dylan was one of my faves.......looks great Allen hope you don't go loopy laying all that rock.;)
Easy Buddy, we don't want to let the cat of the bag, now do we??? Actually, laying the blocks really won't be too bad. I think painting them will be 100% worse...

Interesting bit of history you're recreating there Allen, those cobbles look like a lot of work though.
Thank you, Graeme. Cobbles were actually quite easy to make with a sharp knife and the RP Toolz cutter. Its history is extemely interesting and terrifying too. Berlin, in Feb.-May 1945, was not a place I would have wanted to be in. Real scary stuff happening. I do hope you and the family had a wonderful Christmas and you got lots of pressies Sir!!!...

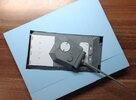
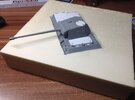
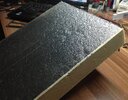
With Crimbo over, it was time to get going on this again. I had to ditch the SchwimmPanther street as it wasn't working at all. I did have another idea to use styrofoam for the base. Have lots at work, but I'm off for the month, so I asked my friend Uli if he had anything in the shop behind my house. He gave me a slab of this,

IMG_3370.JPG
5cm thick foam insulation with alu coating. I cut off a chunk, peeled the alu off and went about chopping out a hole to fit the Panther. This foam is (luckily) easy to work with and doesn't make a big mess either. After an hour of fine tuning the cut-out, we had this,

IMG_3366.JPG
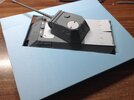
Panther in a hole!!! Ok, the foam is 5cm deep and the Panther needed less than a 4cm depth. I used a wood skewer stabbed into the foam to support the front. The hooks hold it in place on the back,

IMG_3367.JPG
With that done, I made some cobblestone forms from 2 pencils and a paint brush ferrule. I did a test on the insulation foam but had terrible results as it's too coarse for the imprint to work. Back to my blue foam,

IMG_3369.JPG
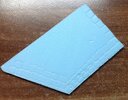
Here are my trial samples. As you can see, the top and side imprints were funky, so I had to modify the ferrules a bit. The bottom left prints are too square. The bottom right prints look PDG (pretty damn good) to my eyes, so we'll go with it!!! The bottom right last print (overlaps my mistakes) is from the paint brush ferrule, smaller in length as the others and very useful for corners and gap filling. Then I pulled out a sheet of 2mm blue foam and cut it to the size of the base. The sheet was smaller than the base, but worked,

IMG_3368.JPG
I have to shave the right side of the base as it's cut a little crooked and remove 1 1/2 cms from the rear as the foam is lumpy. The strip will fill most of the blank area at the rear. I have some 1mm and 3mm to finish it off, if needed. The blank area in the front will be built up with dirt and blocks...

Next up, the fun begins, and with nerves of steel (beer), I have to imprint the cobbles into the street foam!!! Lucky me...Again, I apologize for the late replies and all C, C, and Abuse is cheerfully accepted. Have a great evening one and all!!! Cold one time!!!..........

Prost
Allen
 

BattleshipBob

Bob, bob, bobing along!
SMF Supporter
Joined
Apr 28, 2018
Messages
6,240
Points
113
First Name
Bob
Somehow missed this Allen??

Just caught up, really impressed. Some great skills.
 

Mini Me

SMF Supporter
Joined
Jun 1, 2018
Messages
10,162
Points
113
First Name
Rick
"Cobble" on Allen.....this is shaping up nicely and I am extremely interested in this particular subject, as I have a few Panther D's that have been robbed of their engine decks to help me create early (low fan) G's....... I have often wondered what I could do with the rest of the tank.......problem solved! :thumb2:
 

scottie3158

SMF Supporter
Joined
Apr 27, 2018
Messages
12,775
Points
113
Location
Spalding
First Name
Paul
Allen,
Love where this is heading. I do my cobbles the same way with and old paint brush ferrule. If I can say when you have cut all the cobbles, screw up a ball of baking foil into a tight ball then run that over the surface it gives a great texture to the stones.
 

Allen Dewire

Proud Rabble Member
SMF Supporter
Joined
Apr 27, 2018
Messages
4,122
Points
113
Location
Bamberg
First Name
Allen
Happy New Year folks and sorry for the replies a year late...

Somehow missed this Allen??

Just caught up, really impressed. Some great skills.
Thanks Bob!!! It's a fun project and I'm trying to give it my best. Hope you and Julie had a good holiday my friend...

"Cobble" on Allen.....this is shaping up nicely and I am extremely interested in this particular subject, as I have a few Panther D's that have been robbed of their engine decks to help me create early (low fan) G's....... I have often wondered what I could do with the rest of the tank.......problem solved! :thumb2:
Got no choice Rick......You should try it with the Panther's you have. The only prob I see is you trying to make cobbles in your scale...Do you have a microscope to use for them??? Thanks and take care Bro...

Allen,
Love where this is heading. I do my cobbles the same way with and old paint brush ferrule. If I can say when you have cut all the cobbles, screw up a ball of baking foil into a tight ball then run that over the surface it gives a great texture to the stones.
Thanks Brother and it almost headed into the bin. It did work out good in the end though. Thanks for the tip and I will definitely give it a shot in the morn. You did mean tin foil???...

So, after a few sessions at the table, some cold ones and watching some killer concerts on the telly New Year's Eve, I started to make a screwed up typical Berlin cobblestone street,

IMG_3376.JPG
I got this far before I had to stop, as I was ferruled out!!! I tried to break up the pattern a bit to give it some character and not be monotonous. In other words, when the construction company made this street, way back when, they were under the influence of too many Berliner Pils while setting the cobblestones in place.............With the Panther in place,

IMG_3377.JPG
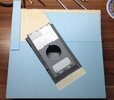
Ok, so we are getting someplace here......Today, I went about finishing the street up. With ferrule in hand, I pressed on. I also trimmed the base block on the right side to make it square again. I also cut off 1.5cm from the rear of the block. And then,

IMG_3378.JPG
It's not perfect and you can see where the sheets end. I had to make a two-piece section for the left side to finish it. You can see the diagonal joint, but earth will cover it up. I left the rear section blank as it was where they dug out the hole to put the Panther in. it will have dirt and rows of blocks built up. Same in the front and on the sides. You can also see the wood skewer that supports the front of the Panther. It makes it easy to take it out to work on the base. You slip the nose into the hole and slide it forward and the rear falls into place and stays there. Works for me...

That's it for now. Still a lot to do. Painting is also still a prob here. It's warmed up a bit, but the winds and rain are killing me. Thanks again for looking in and have a great week all...

Prost
Allen
 

Lee Drennen

Box Stock Builder with a Twist/ Rabble Member
SMF Supporter
Joined
Apr 29, 2018
Messages
5,830
Points
113
Location
Wortham Mo
First Name
Lee
Happy New Year Allen! Looking good
 
Top