Defending the Hauptstadt...Berlin '45...

Allen Dewire

Proud Rabble Member
SMF Supporter
Joined
Apr 27, 2018
Messages
4,105
Points
113
Location
Bamberg
First Name
Allen
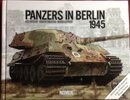
Taking a small break from my 1/2 track build due to a touch of resin lung and being too cold to use the AB, I've been reading 'Panzers in Berlin, 1945'. It's a really fascinating picture story of the defense of the Hauptstadt in 1945. Cheap, it wasn't, but worth every penny of the price. Loads of interesting pics and a lot of the history too. It's from Panzerwrecks,
IMG_3179.JPG
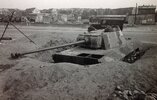
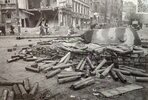
I have decided to re-create a scene from the book. It shouldn't be a long, drawn-out affair as the idea was quite simple and it keeps the dio small to boot. This is what I'm shooting for,
For Reference Only
IMG_3315.JPG
A Panther Ausf. D that was buried at an intersection and able to shoot down 3 main streets to fend off the attacking red hoards (sorry JR). I will post up the background and location info when I start the build. The build will be based on a dirt-cheap Panther D kit I snagged off evilbay. I will only be using about 1/2 of it......The kit,
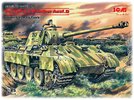
35361_box_310x234x60.jpg
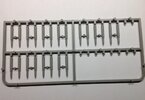
The destructions and the sprues of it,
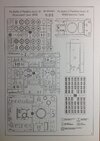
IMG_3313.JPG
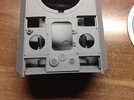
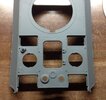
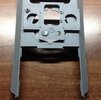
I had to download a copy as I bought the kit without a box or destructions..........And what I will be using from the kit,
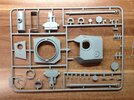
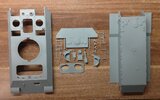
IMG_3312.JPG
IMG_3311.JPG
The driver's and radio operator's hatch plate will be used as a template for scratchy as well as the exhaust pipe. The middle piece in the rear deck will be removed and scratchy plates will be substituted. I have about 50 Panther rounds that will need to be cut and then drilled out to make empty shell casings. That should be a fun job!!! Construction should start in a few days, or maybe sooner if it stays cold like it is now. All C, C, and Abuse welcome and have a good week...

Prost
Allen
 

adt70hk

I know its a bit sad but I like quickbuild kits!!!
SMF Supporter
Joined
Sep 4, 2019
Messages
9,514
Points
113
First Name
Andrew

Allen Dewire

Proud Rabble Member
SMF Supporter
Joined
Apr 27, 2018
Messages
4,105
Points
113
Location
Bamberg
First Name
Allen
Wow, thanks for the interest Guys,
Very interesting project, Allen.
Sorry, no Abuse up to now....:flushed::tongue-out3:

Andrea
I hope so. Don't worry Andrea, there will be some abuse once I get going...

That seems like a cunning plan to build a tank without having to paint wheels or do tracks!
Pete
Shhhh Pete!!! Don't let the cat out of the bag Sir!!!

Good idea Alan. You'll need to scratch a lot of bricks and shell cases.
Thanks Jigs and I will have to do some bricks. I have a sprue of 96 Takom Panther shells from the stash. I forgot to take a pic Jim. They will need to be cut off, drilled out and stamped on the bottom with a punch to make the empty shells. Henry Ford time, I think...

I certainly hope so my friend. I need a plastic fix...

Allen,
Chair pulled up and waiting with eager anticipation.
Just stay outta the fridge till I start Bro!!! Then everything will be fine...

Prost
Allen
 

minitnkr

Rabble & escape committee member
SMF Supporter
Joined
Apr 27, 2018
Messages
6,726
Points
113
Location
Dayton, OH
First Name
Paul
OK, can you imagine the carnage at the other end of the three streets as a result of all those rounds. I wonder if they just ran out as the turret looks unmarked. Great dio. idea. You'll kill this......and you'll have enough leftover for an early bergepanther.
 

Allen Dewire

Proud Rabble Member
SMF Supporter
Joined
Apr 27, 2018
Messages
4,105
Points
113
Location
Bamberg
First Name
Allen
Morning everyone,

It seems a bout of the Man Flu is kicking my butt at the moment. I feel like crap, but life goes on in Bamberg...

Count me in Allen to the rapidly growing rabble
Glad to have you Mick and sorry, there won't be any marbling here like on your build though...

Looks like a great topic to reproduce. I'll be watching

Mike
Thanks Mike. It is a very interesting subject and I hope you will enjoy it...

Exactly what I though….the lengths some blokes will go to…..should be good though.
Now Mr. Marlow, you know I love to paint road wheels and make tracks, especially Friuls!!! I can't understand what you and Pete are thinking...

Not yet Andrea;)
Easy Dude 2...Has July showed up yet???

OK, can you imagine the carnage at the other end of the three streets as a result of all those rounds. I wonder if they just ran out as the turret looks unmarked. Great dio. idea. You'll kill this......and you'll have enough leftover for an early bergepanther.
I can only wonder myself Paul. You can also see there are some rounds lying about that didn't fire. I'm afraid I won't be able to build anything from the leftover parts. I need the hull to bury this puppy. I could do a supply truck with the road wheels, suspension arms, tracks and other parts in it sometime...


The background...

An order given on 22 Feb. 1945, created a Panzer company that was to be equipped with 10 Panthers and 12 Pz. IVs. These vehicles were
were too damaged to be repaired. The company Krupp-Druckenmüller, in Berlin-Tempelhof, stripped the vehicles of their motors, transmissions, road wheels, suspension and all other usable parts. Remaining was the hull and the turret with main gun. They also patched up the armor and created plates to cover the rear deck and driver's compartment. Some of them were repainted accordingly and some retained their original turret numbers too.

Panzerkompanie (bo) Berlin was formed on 24 Feb. 1945, for the defence of the Hauptstadt and were given these 22 Panzers to use. They were to be located and emplaced at key intersections around the 'S-bahn Ring' in the city, with good fields of fire. The (bo) stood for Bodenständig which means immobile in our speak. The tank had a crew of 3 men, commander, gunner, and loader. The turret was manually operated as there were no electrics or motor in the hull. The Panzerkompanie (bo) Berlin was not under the command of a higher authority. The tanks fell under control of the various sector commanders where they were used.

Now there were also other various defenses using just tank turrets. These were mounted on steel/wood containers buried in the streets too. Again, with a crew of 3 men, manually operated turret and a bit less ammo storage space. The scene I am depicting is using a Panther D. The other Panther's used had an Ausf. A or G turret mounted on them. The Panther D was used about 4 kms north of the Brandenberg Gate. It was around 500 meters up from the FlaKtower in the Humboldthain park. It was buried at the intersection of Badstraße and Pankstraße and could also fire down Prinzenalle. More info will follow as the build goes along...

I haven't started to build the tank yet and decided I would begin this by finding a method of making the expended rounds needed. I figure about 40 should do the trick for the ground. My Takom sprue has 96 rounds on it, so I started with 32 of them,

IMG_3317.JPG
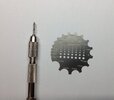
One sprue attachment point on the bottom, GOOD...2 shells sprued together, NOT SO GOOD...We needed to remove them carefully from each other. I found that if you cut them too close to the attachment point, it leaves a little sunken mark in the casing. You have to cut 2mm away from them. Then you can shave them down with a sharp hobby knife without probs. I had only wished that Takom had made the sprue point on the warhead instead of the casing. Next up was removing the seams on them. They're not 100% round and a tick mis-molded too. We needed to use this,

IMG_3319.JPG
When using the Voyager scraper, always remember to use the next size up when scraping. If the part fits perfect into the semi-circle, it will scrape the sides more than the seam itself. 3mm is a perfect fit for the casing, so I used 3.5mm to do the job. When done, you can cut off the shell head and drill the casing out. A few mm's deep is enough. I thought I could use my RP Toolz cutter to chop off the shell heads. It won't work. I shimmed the casing in the front to keep it level, but it wiggles side-to-side when you apply down pressure to cut. So, it was back to the nippers to cut them off, very carefully!!! Once done you can drill them and put them aside,

IMG_3318.JPG
Here, 2 are done and the third is scraped and needs the shell head cut off. A new problem came up when I wanted to use my rivet punch to do the firing pin cap housing on the bottom. The punch is convex and not concave as I had thought. DOH!!!...I will have to use some hollow brass tubing to make the housing. Then I can make the firing pin indent in the middle. A Henry Ford method is not in the cards any time soon. This will be a lot of work, but worth it in the end......One last note, if you attempt this, don't cut the shell head off before you have scraped the shell casing seam lines down. If you do, you will have nothing to hold on to while scraping...Trust me......

That's it for now. Niagara Falls won't stop and the head is starting to thump like a disco...Stay healthy and stay safe folks...

Prost
Allen
 

Allen Dewire

Proud Rabble Member
SMF Supporter
Joined
Apr 27, 2018
Messages
4,105
Points
113
Location
Bamberg
First Name
Allen
Evening again everyone,

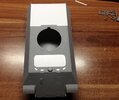
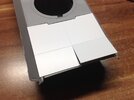
Starting to feel a bit better and have been occupying my time by working the table. It's still too cold to hissy and right now, it's snowing outside...While pondering a new Henry Ford method for the shells, I decided to build the hull and then the turret. The kit is straight forward and builds up rather well. There's a bit of flash and a few seam lines to be dealt with, but nothing major. ICM plastic is a bit soft so you have to take care cutting and scraping it. First up was scratching the cover for the driver's compartment. I used the kit piece to trace out one on some 0.30 plastic sheet,

IMG_3320.JPG
Very easy to do and you only need to sand the round edges to make it fit. It will get 2 handles later. Next was prepping the rear deck for the plates that were used to cover it. These were completely stripped of everything usable to repair other Panthers. Here's what the kit offered for a rear deck,

IMG_3321.JPG
An easy job to do. Break out the JLC razor saw blade and have at it,

IMG_3322.JPG
Warning!!! Panther lovers please look away now!!!......3 cuts with the JLC blade held in your fingers did the trick, and.....

IMG_3323.JPG
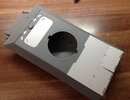
you have a convertible rear deck. Do a few measurements and grab more 0.30mm sheet and start cutting. Just don't forget to add the recessed areas behind the turret in your measurement. (Yes, I did add them.......I'm old but not stupid) Now you have this,

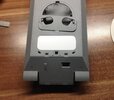
IMG_3326.JPGI have also covered the periscope slots, filled in the headlight holes and the travel lock holder holes too. Glued the driver's flap closed and debated over leaving the front fender covers on or cutting them off. Most pics show them removed, so that's the route I went. The rear deck plate was 4 plates in total. The two rearmost were hinged and would allow ammo to be loaded and also used an escape route if needed. Quick measurements, some scribing and a cut, gives you this,

IMG_3328.JPG
I bent the right plate upwards to give the deck a bit of character. Don't forget these tanks were stripped inside and there was access from front to rear. Each plate had 3 simple hinges and two handles for each plate. With some more scratchy, this was the result,

IMG_3330.JPG
I added the front plate handles and notice that the front fenders are gone too. These mods were pretty much standard on all of the 10 Panthers that Krupp-Druckenmüller made for the Pz. Kp. (bo) Berlin. Here is a pic of another Panther that was dug in,
For Reference Only
IMG_3329.JPG
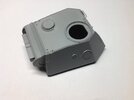
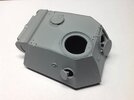
The hull is a late Ausf. D or early Ausf. A, but the turret is very interesting. It is from a Panther Ausf. G late and manufactured by M.A.N. in March 1945. It features a chin mantlet and if you look closely, you can see the welded-on loops on the turret sides denoting this particular type. I moved on and began to assemble the turret. It went together nicely and the hatches are workable too,

IMG_3332.JPG
The hatches are closed here and the fit is good all around. And now,

IMG_3333.JPG
They open easily. Too bad the small arms port plugs were not molded separately as it would have been nice to have one out and hanging on a chain. I need to add the 3 lifting hooks, 2 tiny bits and scratch a cover for the commander's cupola. My Olga Olfa to the rescue for cutting a disk out. Lastly will be adding the barrel and the mantlet......

All the scratchy was easy and straightforward to do. You just need some 0.30 plastic sheet for the plates, 0.10 sheet and 0.30 rod for the hinges and a good straight edge for the scribing and cutting...

That's it for tonight. I hope to do more over the weekend as I am feeling better and the Mojo is soaring. Thanks for looking in and all nonsense, good or bad, is most welcome as are any questions you may have. Have a good weekend!!!...

Prost
Allen
 

Mini Me

SMF Supporter
Joined
Jun 1, 2018
Messages
10,162
Points
113
First Name
Rick
Allen, all looking good. I like the idea of the dangling pistol port cover......just drill that bad boy out and scratch one out of styrene. I'm sure you can kick up a bit of chain to do the dangly thing. ;)
 

therapy

SMF Supporter
Joined
Apr 21, 2019
Messages
886
Points
93
Location
East Anglia
First Name
Nick
Really enjoying the history lesson you're providing alongside the build Allen. I knew nothing about these things.... glad you are feeling better.

Nick
 

Jim R

SMF Supporter
Joined
Apr 27, 2018
Messages
13,770
Points
113
Location
Shropshire
First Name
Jim
Glad you're feeling better Allen. Very interesting background. Desperate needs call for desperate measures. Those shell cases will take time but are such an important part of the dio. Excellent, neat, scratchwork on the hull.
 

Allen Dewire

Proud Rabble Member
SMF Supporter
Joined
Apr 27, 2018
Messages
4,105
Points
113
Location
Bamberg
First Name
Allen
Great progress Allen, lovely clean scratchery.
Thanks Mick, I have always enjoyed doing the scratchy. Good that it wasn't too hard. Hope you are well my friend...

Allen, all looking good. I like the idea of the dangling pistol port cover......just drill that bad boy out and scratch one out of styrene. I'm sure you can kick up a bit of chain to do the dangly thing. ;)
Appreciate it Rick and as a re-thought, it's better to have it closed. In combat, with a crew of 3, it most likely wouldn't be used for its purpose of self-defense. I have some plugs from a Brummbär kit and plenty of chain for them though...

You're off to a great start Allen,but can you finish it? looking at previous form, I won't hold my breath ....;)
Prove me wrong,big boy :cool:
So true Neil and looking at my history, you are correct. Now that retirement is finally sinking into my melon, I have taken a new outlook on our hobby and bringing things to an end is one of the top priorities of this big boy!!!

Really enjoying the history lesson you're providing alongside the build Allen. I knew nothing about these things.... glad you are feeling better.

Nick
Thank you Nick and it's always good to let everyone know the background on what you are building. The battle for Berlin was a brutal and ugly fight to the end. I lived in Berlin for 5 1/2 years as a soldier from mid '85 till late '90. The city and its history are totally fascinating. I could write a book over my time living there. I never thought I would be able to walk through the Brandenberg Gate in my lifetime......But in 1990...........I did!!!...

Glad you're feeling better Allen. Very interesting background. Desperate needs call for desperate measures. Those shell cases will take time but are such an important part of the dio. Excellent, neat, scratchwork on the hull.
Thanks Jigs!!! I'm back to almost 100% health wise and the mojo is flying. Jim, It was a very desperate time...Fanatics fighting to the bitter end, too many civilian losses and soldiers that knew the war was lost and just wanted it to finally end. I do love my scratchy and have a look below my friend...

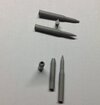
Feeling much better, but still having crappy cold weather outside, I drove on with this project. I went to finish up the turret and when I tried to glue the barrel halves together, there was a slight problem. One half was molded about 1mm shorter than the other. No way they would line up correctly and I didn't want to use one of my alu barrels for it. So, I hacked off the muzzle brake, trimmed the pins and hit her with TET. Needs a cleanup and a scrape to be done,

IMG_3339.JPG
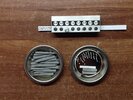
Then I could also glue the muzzle brake together properly aligned. In between, I kept scraping off the mold lines on the shells. The ones in the bowl are done. Those on the left still need the scrape treatment. Yesterday I attempted to make a hollow punch thing to mark the shell bottom to show the firing cap. A few hours later, I gave up as my attempts were too big to simulate what I needed. Plan B came into effect and I went for it,

IMG_3341.JPG
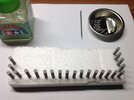
I punched out 46, 1mm discs from a strip of 0.10mm sheet. I will glue these on the case bottoms to represent the caps. In the bowl are 22 shaved shells that will receive them...But how? Using my old melon and trying to think like Henry Ford, I came up with an idea,

IMG_3342.JPG
The Henry Foam assembly line to act as the third hand I needed to accomplish this task...Now I could dab a drop of TET with the left hand and add the disc with the right hand. I found my needle pin wasn't up for the job here, so I used my extra fine tweezers to do it. Less than 10 minutes later, we were done,

IMG_3343.JPG
There are a couple that are a bit off center, but I'm happy with the results. The caps will still need the firing pin indents from the PaK. I'll do that with a pin mark and a 0.25mm drill bit. First, we have to cut off the shell heads and drill out the casings...Maybe I should apply to get a patent for my Henry Foam Assembly idea!!!..
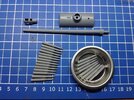
Trying to snip off the heads with my fine cutters, as well as my normal sprue cutters produced unsatisfactory results. After 3 attempts with each, I fell back on my trusty JLC saw. This time I used one with a handle. This worked quickly and very good with clean cuts too. A quick swipe/scratch with a blade and they were done. Then came the touchy work of drilling them out to look like fired round casings. It's easy to do using 3 things from your tool stash. The pointed awl, a drill bit that's smaller than the inside diameter, and a drill bit that is just under the size of the inside diameter,

IMG_3345.JPG
Mark the middle of the casing with the awl. Use the smaller bit to drill the starter hole and center it if necessary. Once centered, use the bit with the pin vice and drill the shell out to about 2-3mm in depth. The shells in the bowl are drilled and done. Yes, some of the firing caps do look a bit thick, but I will run them over a sanding stick to thin them down before indenting them...

The score is now 24 (almost) finished and another 24 to do. I really don't think more than 48 are needed for the dio. The original pic shows more lying about, but this pic was taken after the fact and the war. If you look closely, you will see full rounds lying there too. I don't think a loader (in his right mind) would throw a live round out of the turret, even if it didn't fire in the gun (defective firing cap). But who knows for sure at the time and in the heat of battle.......

Once again, that's all folks and it's time for bed. All C, C, and abuse is cheerfully accepted. I hope to have some more fun at the table in the morn. Stay well and have a good night........

Prost
Allen
 
Top