Looking the Dog's Huevos Allen......cobbles no prob Sir.........come pre stamped on craft type paper from the hobby store!Happy New Year folks and sorry for the replies a year late...
Thanks Bob!!! It's a fun project and I'm trying to give it my best. Hope you and Julie had a good holiday my friend...
Got no choice Rick......You should try it with the Panther's you have. The only prob I see is you trying to make cobbles in your scale...Do you have a microscope to use for them??? Thanks and take care Bro...
Thanks Brother and it almost headed into the bin. It did work out good in the end though. Thanks for the tip and I will definitely give it a shot in the morn. You did mean tin foil???...
So, after a few sessions at the table, some cold ones and watching some killer concerts on the telly New Year's Eve, I started to make ascrewed uptypical Berlin cobblestone street,
View attachment 470723
I got this far before I had to stop, as I was ferruled out!!! I tried to break up the pattern a bit to give it some character and not be monotonous. In other words, when the construction company made this street, way back when, they were under the influence of too many Berliner Pils while setting the cobblestones in place.............With the Panther in place,
View attachment 470724
Ok, so we are getting someplace here......Today, I went about finishing the street up. With ferrule in hand, I pressed on. I also trimmed the base block on the right side to make it square again. I also cut off 1.5cm from the rear of the block. And then,
View attachment 470725
It's not perfect and you can see where the sheets end. I had to make a two-piece section for the left side to finish it. You can see the diagonal joint, but earth will cover it up. I left the rear section blank as it was where they dug out the hole to put the Panther in. it will have dirt and rows of blocks built up. Same in the front and on the sides. You can also see the wood skewer that supports the front of the Panther. It makes it easy to take it out to work on the base. You slip the nose into the hole and slide it forward and the rear falls into place and stays there. Works for me...
That's it for now. Still a lot to do. Painting is also still a prob here. It's warmed up a bit, but the winds and rain are killing me. Thanks again for looking in and have a great week all...
Prost
Allen
You are using an out of date browser. It may not display this or other websites correctly.
You should upgrade or use an alternative browser.
You should upgrade or use an alternative browser.
Defending the Hauptstadt...Berlin '45...
- Thread starter Allen Dewire
- Start date
boatman
SMF Supporter
HI Allen somehow i missed this so ive just looked through your blog an its very intresting an nice building work you have done an i again did not know that they did this with tanks that were no longer usable in the defence of berlin but it was a very good idea as thats all thats needed in this type of warfare of defence so ive lernt something today
chrisb
chrisb
Jim R
SMF Supporter
Just had a most enjoyable catch-up Allen. Lots of experimenting and solving problems. Glad the tank got suitably buried. Cobbles look great. The tip for using a screwed up piece of kitchen foil to texture the foam is good.
Thanks Lee!!! It was fun, but I'm glad all the noise is over till next New Year...Happy New Year Allen! Looking good
Too kind Buddy!!! And what's this cheating crap with imprinted paper??? Scratchy baby, scratchy is the way to go...Looking the Dog's Huevos Allen......cobbles no prob Sir.........come pre stamped on craft type paper from the hobby store!
That's what is so great about this forum Chris. I learn new tricks all the time too. Glad you like it. Not nearly as technical as your Tiger build that is still way over my head. I hope you and Jen had a happy New Year and take care of yourselves...HI Allen somehow i missed this so ive just looked through your blog an its very intresting an nice building work you have done an i again did not know that they did this with tanks that were no longer usable in the defence of berlin but it was a very good idea as thats all thats needed in this type of warfare of defence so ive lernt something today
chrisb
Much appreciated Jim!!! You look at the pics and it seems pretty easy to re-create and then...DOH!!! Not even close...I have never worked with foamboard before, and our man JR has helped me a lot. I still have to try the tin foil trick, as I don't have any left after the holidays. I have to buy a new roll tomorrow...Just had a most enjoyable catch-up Allen. Lots of experimenting and solving problems. Glad the tank got suitably buried. Cobbles look great. The tip for using a screwed up piece of kitchen foil to texture the foam is good.
Playing around today, I decided to get the street glued down to the foam block. I broke out the cheap white glue and started sling it all around. I didn't realize that a little is better than too much and had to wipe it back. When I pressed the big piece of street down, the stuff oozed everywhere. Cleanup was in order and then a couple of wood CD rack shelves and 2 weights placed on them, so it could dry flat. After a few hours, I glued the other 2 smaller pieces down (using less white glue) again with the shelves and weights on top,
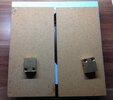
I let this dry for a few hours and then did a test fit to see how it would look,
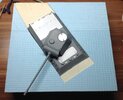
Yup, looks like a Panther in a hole in the street...A side view,
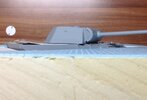
and another view,
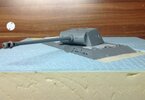
I'll have to check using my loose cobbles as it looks like she might sit too deep and have to be raised up a bit. I'll do that in the morn.
Thanks once again for having a look and the encouraging comments folks. It definitely keeps the Mojo soaring!!! As usual, all C, C, and abuse is encouraged and cheerfully accepted. Have a good one!!!
Prost
Allen
That's looking very nice indeed Allen,
Excellent stuff Sir... Love it
Excellent stuff Sir... Love it

scottie3158
SMF Supporter
Looking good my friend, the other thing you can try is use a piece of flat plastic the same size as a cobblestone and press on a few random cobbles at different agles to represent stones that have dropped or moved over the years. It gets rid of that perfect just laid look.
Yes....the incredible shrinking Panther. If I understand your construction method correctly, all you will need to do is "raise" the bar a little to put this back on "track".....I'll get me coat!..... 
PS. Life is too short to scratch what is readily available and looks right for the purpose at hand.
PS. Life is too short to scratch what is readily available and looks right for the purpose at hand.

Evening Crazy's,
Wow, thanks so much for the tips and kind words. I haven't been just sitting around spending money. I have been thinking about a few things/ways to make laying the cobbles around the Panther easier. I came up with this,
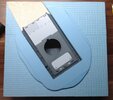
A general idea of the area surrounding the Panther that was filled with dirt. I had to make some snippets for the curved parts. Doesn't look too bad. Then, I glued them to the main piece,
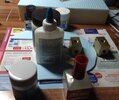
Used a bunch of things to keep the snippets in place till the glue dried. I really need to get me some more heavier pieces like the 2 brass ones. Then I placed it on the street and did a test with some cobbles. A no go, as 2 rows of them was......Too high. I decided to add a second foam sheet to make it as high as the 2 block rows. To make this work, I had to raise the Panther about 3mm. Pulled the skewers, re-stabbed them and we were in business, finally!!!...I glued the second sheet on and with some trimming on the insides for the tool racks, we ended up with this,
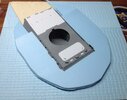
Now we're talking!!! I wasn't about to dump 1 kg of dirt and stuff to take up the difference. The cobbles will be placed around the rim and then I can do the second row. This will be covered in Vallejo thick mud and fine sand. I will fill in the rear section with more foam as the cobbles go all the way around the emplacement. Once the hull is painted, I can glue this to the street and start the cobble work around it. Here's a side view of how she sits,

You can see I have room to form the mud/dirt to the hull and all around the emplacement. It has to have a bit of a contour effect so it doesn't look like a pancake. As I have never worked with foamboard before, I am pretty happy with my work so far. Still a lot to do, but I am really having fun here...
Thanks again for looking in and your kind words. Everybody have a great week and stay safe...
Prost
Allen
Wow, thanks so much for the tips and kind words. I haven't been just sitting around spending money. I have been thinking about a few things/ways to make laying the cobbles around the Panther easier. I came up with this,

A general idea of the area surrounding the Panther that was filled with dirt. I had to make some snippets for the curved parts. Doesn't look too bad. Then, I glued them to the main piece,

Used a bunch of things to keep the snippets in place till the glue dried. I really need to get me some more heavier pieces like the 2 brass ones. Then I placed it on the street and did a test with some cobbles. A no go, as 2 rows of them was......Too high. I decided to add a second foam sheet to make it as high as the 2 block rows. To make this work, I had to raise the Panther about 3mm. Pulled the skewers, re-stabbed them and we were in business, finally!!!...I glued the second sheet on and with some trimming on the insides for the tool racks, we ended up with this,

Now we're talking!!! I wasn't about to dump 1 kg of dirt and stuff to take up the difference. The cobbles will be placed around the rim and then I can do the second row. This will be covered in Vallejo thick mud and fine sand. I will fill in the rear section with more foam as the cobbles go all the way around the emplacement. Once the hull is painted, I can glue this to the street and start the cobble work around it. Here's a side view of how she sits,

You can see I have room to form the mud/dirt to the hull and all around the emplacement. It has to have a bit of a contour effect so it doesn't look like a pancake. As I have never worked with foamboard before, I am pretty happy with my work so far. Still a lot to do, but I am really having fun here...
Thanks again for looking in and your kind words. Everybody have a great week and stay safe...
Prost
Allen
Jim R
SMF Supporter
You're properly thinking this through Allen. Definitely going in the right direction.
scottie3158
SMF Supporter
All looking very nice dude.
Thanks Jim! It's funny, but I do spend 70% of the time thinking about what to do and 30% of the time actually doing something...Working with foamboard is really fun at the moment and it won't be the last time I use it...You're properly thinking this through Allen. Definitely going in the right direction.
Thanks Bro! Really having a good time with this at the moment. That Beemer is of yours is really nice too!!!...All looking very nice dude.
Appreciate it Buddy! I don't want this thang to weigh a ton when it's finished. Right now, the whole thing weighs about 800 grams. No bricks, but lots of cobbles have to be added when I get the Kitty hull painted...Lovely.....this will save hours of time digging around in flower beds to get enough dirt to pile up around this "dead cat" bring on the bricks and cobbles Buddy!
So, another quick update on the 'Kitty in the Hole'...I've been playing in the foamboard to finish off the back of the emplacement. Pretty easy stuff and after an hour of tinkering, cutting and gluing, we got it done,
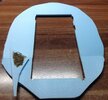
Needs a little cleaning up around the edges, but the basic shape is there. This can only be glued to the base after I can paint the Panther hull. Once this is glued on the base, I can't get the Panther out of or in the hole anymore...I also did a test piece to see how the AV Thick Mud out of the jar would look on the board. After it dried, I found I applied it with a brush that was too soft to break the clumps up. I have a few other methods to try tomorrow with it. I'll do a few more tests to find the best results. A close-up shot,
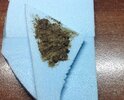
You can see the clumps pretty good. Overall, it kinda, sorta, maybe looks like packed
Short and sweet tonight Folks. All comments and abuse cheerfully accepted. Have a good one!!!...
Prost
Allen
Don't let the "odor" deter you Allen, I'm sure it will disappate once things have dried  .......but really, playing about with elephant poo at your age! Looks like you might need some "kitty" litter to help hide the obvious.
 .......but really, playing about with elephant poo at your age! Looks like you might need some "kitty" litter to help hide the obvious.
Nah Bro, as long as I keep a window open, it's no problem and remember, age is all mind over matter...I don't mind and it don't matter!!!Don't let the "odor" deter you Allen, I'm sure it will disappate once things have dried.......but really, playing about with elephant poo at your age! Looks like you might need some "kitty" litter to help hide the obvious.

Thank you Mick! I just hope when I do glue the ring on it, I didn't forget anything on the hull. So far, so good...Great work Allen, that's one nicely planted Panther
I didn't get to do any experiments today as I was running around shopping and doing some research. I did manage to finally work out a way to paint all those damn shell casings!!! Like I said to Jim, I think (sometimes) a lot more than I actually do. I had a brain
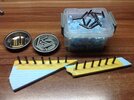
Just tape down a strip of AK masking tape to the foamboard and push the shells into one of the scores in it. It holds them securely and you are able to paint them up with your hairy stick. They don't fall off either. I made 2 so when you are finished painting the second set, the first set is dry enough to pop them off onto the plastic lid. When I am done with them all and they have thoroughly dried, I will dab some paint on the bottoms and inside the top of the casings. I'm really loving this foamboard stuff!!!...
Even shorter than yesterday people and thanks for looking in!!!......Stammtisch tonight as I deserve a Schnitzel w/ homemade potato salad and a few cold ones to wash it down......
Prost
Allen
Storm'in along beautifully.
Thanks Paul!!! I'm trying to give it my best and I am really having a lot of fun with it. Hope all is well in downtown Ohio and the snow isn't too deep...
While the weather here has been quite crappy with rain and winds, I decided to go for it and fire up the hissy stick. It was one of the quickest sessions I've ever had. Hose out the window, compressor on, booth and lamp on, shot a squirt of AK 3rd Gen rotbraun in the cup and had at it. Took about 8 minutes, start to finish and it was over......Voila,
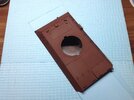
Painted 'Panther in a Hole'......I used Red Oxide as I would think (Not a 100% proven fact) that when the hull was stripped and the plates were added, the Krupp-Druckenmüller repair shop in Tempelhof just primed the hull. Other tanks were repainted and the original turret was put back on them, with the original turret numbers. The turret for this Panther was repainted though...Then I did a dirt board test fit,
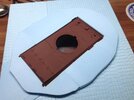
That should work pretty well!!!...I just need to glue it to the street now. Another view,
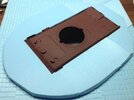
Once it's glued down, I can start laying the cobbles around it. I've also finished painting the rest of the shell cases. In the morn, when they're fully dry, I can dab the bottom of them with steel and swirl some black into the opening on top, holding them in my fingers. The Henry Foamboard Assembly Line jigs will be stripped down and retired till another time when needed...
So the fun goes on and we are actually making progress here!!! More to come good people...Have a great weekend and Moggle on!!!....
Prost
Allen
While the weather here has been quite crappy with rain and winds, I decided to go for it and fire up the hissy stick. It was one of the quickest sessions I've ever had. Hose out the window, compressor on, booth and lamp on, shot a squirt of AK 3rd Gen rotbraun in the cup and had at it. Took about 8 minutes, start to finish and it was over......Voila,

Painted 'Panther in a Hole'......I used Red Oxide as I would think (Not a 100% proven fact) that when the hull was stripped and the plates were added, the Krupp-Druckenmüller repair shop in Tempelhof just primed the hull. Other tanks were repainted and the original turret was put back on them, with the original turret numbers. The turret for this Panther was repainted though...Then I did a dirt board test fit,

That should work pretty well!!!...I just need to glue it to the street now. Another view,

Once it's glued down, I can start laying the cobbles around it. I've also finished painting the rest of the shell cases. In the morn, when they're fully dry, I can dab the bottom of them with steel and swirl some black into the opening on top, holding them in my fingers. The Henry Foamboard Assembly Line jigs will be stripped down and retired till another time when needed...
So the fun goes on and we are actually making progress here!!! More to come good people...Have a great weekend and Moggle on!!!....
Prost
Allen
scottie3158
SMF Supporter
Dude.
Good to see you cracking on with this. Looking good.
Good to see you cracking on with this. Looking good.
