1/24 Airfix Spitfire (the new one)

stona

SMF Supporter
Joined
Jul 22, 2008
Messages
11,481
Points
113
First Name
Steve
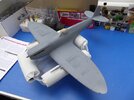
I finally got this thing primed and ready to spray and mask the Sky fuselage band and Yellow leading edge stripe, I'll also do the propeller blade tips. It looks exactly like the last photo, just a slightly different grey :smiling3:

The Sky band was only 18" wide, which equates to just 12.7mm (call it 13mm) at this scale.
The Yellow tips and leading edge stripes were both just 4" wide, which equates to 4.2 mm (call it 4 and a bit) at this scale. I'll be cutting some masking to the correct widths for these two. I see a lot of models on which the leading edge stripes in particular are much too wide!
 

adt70hk

I know its a bit sad but I like quickbuild kits!!!
SMF Supporter
Joined
Sep 4, 2019
Messages
9,507
Points
113
First Name
Andrew
Looking forward to the colour flying Steve!
 

stona

SMF Supporter
Joined
Jul 22, 2008
Messages
11,481
Points
113
First Name
Steve
Looking forward to the colour flying Steve!
I use Hycote Plastic Primer, which is good stuff, but does need 24 hours to go off/harden. I always give the primer coat a quick polish with a fine (2500 grit) paper before I start painting, so I really have to wait until tomorrow before I carry on.
 

adt70hk

I know its a bit sad but I like quickbuild kits!!!
SMF Supporter
Joined
Sep 4, 2019
Messages
9,507
Points
113
First Name
Andrew
I use Hycote Plastic Primer, which is good stuff, but does need 24 hours to go off/harden. I always give the primer coat a quick polish with a fine (2500 grit) paper before I start painting, so I really have to wait until tomorrow before I carry on.
Do you decant into a container for the AB or straight from the can?
 

stona

SMF Supporter
Joined
Jul 22, 2008
Messages
11,481
Points
113
First Name
Steve
Do you decant into a container for the AB or straight from the can?
Straight from the can.

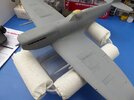
You've just got to be careful not to flood the model. I seal the cockpit with Blu-Tac, which is why the sliding hood not sitting quite right, and attach other removable panels in the same way. I use the good old wet tissue method to mask wheel wells, intakes etc.

P1010635.JPG
Primer always shows up something I've got to fix (like the back inch or so of the wing root nearest the camera)!
 

adt70hk

I know its a bit sad but I like quickbuild kits!!!
SMF Supporter
Joined
Sep 4, 2019
Messages
9,507
Points
113
First Name
Andrew
Does look good Steve. Something about a coat of primer!

ATB.

Andrew
 

stona

SMF Supporter
Joined
Jul 22, 2008
Messages
11,481
Points
113
First Name
Steve
That bloody wing root. I think that the join cracked after I originally made it, because it was fine then! The plastic of the upper wing is pretty thin there and doesn't make a robust join.

Anyway, a bit of superglue and talcum powder mix and a few minutes later it's all better.

P1010636.JPG
 
Last edited:

stona

SMF Supporter
Joined
Jul 22, 2008
Messages
11,481
Points
113
First Name
Steve
Correction on the Sky band in post #81.

It was 18" wide which is 457.2 mm. Divide that by 24 and you get a scale band at 19.05 mm, call it 19 mm.

The 4" for the prop tips and leading edge stripe is correct in the original post.

To be fair, as soon as I measured my incorrect number it just looked completely wrong.
 

stona

SMF Supporter
Joined
Jul 22, 2008
Messages
11,481
Points
113
First Name
Steve
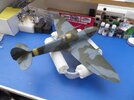
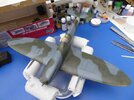
I've applied a first coat of camouflage using the MRP paints.

As an enamel user it's been years since I've had paint drying at the tip, even necessitating stripping and cleaning the airbrush half way through a job, but I've done it today...several times It was so bad that I switched to a brush with a smaller cup (this is a 1/24 scale model) and flushed between cups. Spraying a camouflage pattern like this freehand, as I've done, is nigh on impossible if your paint/airbrush don't work properly, neither can you rush it for fear of the paint going off in the airbrush.

Rather depressingly I'll have to do it all again, probably tomorrow, as the Dark Green has dried not looking too clever, but it's too late to change now ):

cam0_1.jpg
 

tr1ckey66

SMF Supporter
Joined
Mar 6, 2009
Messages
3,686
Points
113
First Name
Paul
What’s wrong with the Dk Green Steve? It looks fine to my eye. Is it the pattern edge or paint coverage/color?
From the pic I honestly couldn’t say there was anything wrong :thinking:
Anyway, whatever it is, I have every faith that you’ll crack it.
Cheers
Paul
 

stona

SMF Supporter
Joined
Jul 22, 2008
Messages
11,481
Points
113
First Name
Steve
What’s wrong with the Dk Green Steve? It looks fine to my eye. Is it the pattern edge or paint coverage/color?
From the pic I honestly couldn’t say there was anything wrong :thinking:
Anyway, whatever it is, I have every faith that you’ll crack it.
Cheers
Paul
It's just a matter of coverage. I'll give it another coat and it should be fine. I won't be making any touch-ups around the colour boundaries until that's done.

I quite like the paints, but the drying at the nozzle is really irritating! I would happily use them to spray other, smaller, things, just not a freehand camouflage pattern on a model this big :smiling3:
 

stillp

SMF Supporter
Joined
Nov 17, 2016
Messages
7,228
Points
113
Location
Rugby
First Name
Pete
That's the first time I've heard anyone complain about tip drying with MRP.
Pete
 

stona

SMF Supporter
Joined
Jul 22, 2008
Messages
11,481
Points
113
First Name
Steve
That's the first time I've heard anyone complain about tip drying with MRP.
Pete
Definitely happening, on the needle/in the nozzle. This is not a particularly fine nozzle, 0.3mm.
It dries in the cup too. I don't like to rush and for longwinded jobs requiring finesse it will be back to enamels.
I could have done that paint job with Color coats and never disassembled an airbrush. It would just have taken a few hours longer, but then they cover better too.
If you are spraying to masking or spraying something one colour, then MRPs are fine. That doesn't take long.
 

Andy T

SMF Supporter
Joined
Apr 26, 2021
Messages
1,977
Points
113
Location
Sheffield
First Name
Andy
That's the first time I've heard anyone complain about tip drying with MRP.
Pete
Same here. In fact the lack of it is one of the things I like best about mrp, despite only having a few.

Sorry to hear about the trouble it's caused Steve and hope you get to the bottom of it.
 

adt70hk

I know its a bit sad but I like quickbuild kits!!!
SMF Supporter
Joined
Sep 4, 2019
Messages
9,507
Points
113
First Name
Andrew
That's turned out very nicely Steve, despite the problems.

I've never used them but I've never heard anyone ever complain about MRP and dry tip either.

Looking forward to the markings.

ATB.

Andrew
 

Jack L

SMF Supporter
Joined
Jul 25, 2018
Messages
1,008
Points
113
First Name
Jack
It's just a matter of coverage. I'll give it another coat and it should be fine. I won't be making any touch-ups around the colour boundaries until that's done.

I quite like the paints, but the drying at the nozzle is really irritating! I would happily use them to spray other, smaller, things, just not a freehand camouflage pattern on a model this big :smiling3:
Another one here who’s never had issues with MRP drying on the tip. I’ve come back to a model an hour later and it’s continued to spray fine (surprisingly, and only down to me forgetting to clean the airbrush through).
 

Tim Marlow

Little blokes aficionado
SMF Supporter
Joined
Apr 27, 2018
Messages
16,797
Points
113
Location
Somerset
First Name
Tim
Never tried MRP, but if it’s drying in the cup perhaps try fitting a cup cover to minimise evaporation? If the AB doesn’t come with one some clingfilm with a hole pricked in it to let the pressure equalise will work…..
 
Top