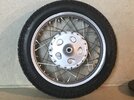
Aoshima Yamaha SR400

simontie

SMF Supporter
Joined
Jan 13, 2010
Messages
997
Points
93
Location
Morayshire Scotland
First Name
simon
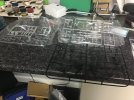
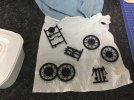
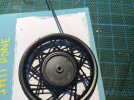
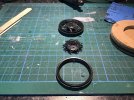
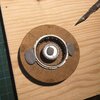
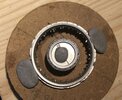
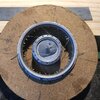
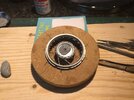
Ok as promised, heres the kit all i have done so far is cut out thechrome wheel parts and stripped them down.
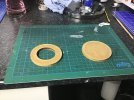
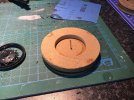
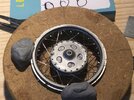
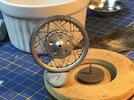
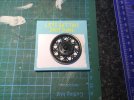
also i made this jig 2 round 6mm hardboard circles (just easier to cut) now i plan to bond one on to the other and this should hold the wheel parts in place while i re spoke them thats the plan anyway idea is it will keep it square while the glue sets
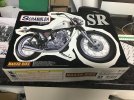
image.jpgimage.jpgimage.jpgimage.jpg
simon
 
Last edited by a moderator:
simontie

SMF Supporter
Joined
Jan 13, 2010
Messages
997
Points
93
Location
Morayshire Scotland
First Name
simon
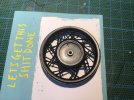
Part one no shaky hands here!! ok so first off i marked the valve position on the hub & the rim although im not cutting it out, then i scribed the direction of each spoke inner and outer L&R both sides that was fun next up i drilled a .8mm hole in the centre rim by squaring across the diagonal line from the spoke, starting the hole and stopping just after to turn the wheel slightly so i could follow the correct angle or as near as dam it, once drilled i cut away the remainder of the spoke and tested with the nipple tube testing all holes as iwent that they were clean and true (ish)
F3C36B69-9A45-4AB0-89FE-F4AE3EFA0161.jpeg21C93F87-60E9-48E0-9D70-C4256DBC7A14.jpeg988D99A3-DF9B-46D3-A773-3A43502D922D.jpegEFF564D2-FFF5-4B21-A091-3F83DED8A128.jpeg
i should say I’v never done this before so its a learning curve for me, but no disasters yet anyway
simon
 
Last edited by a moderator:
Joined
Aug 12, 2022
Messages
8
Points
3
Location
Petaling Jaya, Malaysia
First Name
Khairul
Hi Simon,

How do you find the quality of the Aoshima kit? I'm looking to get some in the near future as their prices locally are quite attractive.

Also, why and how did you strip the wheels down?

Khairul
 
  • Like
Reactions: JR

simontie

SMF Supporter
Joined
Jan 13, 2010
Messages
997
Points
93
Location
Morayshire Scotland
First Name
simon
Hi Simon,

How do you find the quality of the Aoshima kit? I'm looking to get some in the near future as their prices locally are quite attractive.

Also, why and how did you strip the wheels down?

Khairul
Quality is quite good even though this is an old kit, stripping it down to remove the chrome plating (soaking it in bleach 50/50 mix works fine) it looks better repainted and adhesion is better when glued, stripping the wheel down was a challange to see how its done but also i believe the result will be more realistic.
simon
 
Last edited:

Ian M

Administrator
Staff member
Administrator
Moderator
SMF Supporter
Joined
Dec 14, 2008
Messages
19,721
Points
113
Location
Falster, Denmark
First Name
Ian
Off to a good start Simon.
I edited your post so the photos are Full Image and not thumbnails. ;)
 

simontie

SMF Supporter
Joined
Jan 13, 2010
Messages
997
Points
93
Location
Morayshire Scotland
First Name
simon
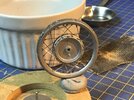
Ok well apart from some dodgy drilling rim is now free of the hub and primed, will top coat silver.
hub to cut out and drill remove the moulded spokes and clean up
i put a centre pin in the jig to line up the hub and rim but i made a small mistake by not measuring the dish of the wheel but i think (correct me if I'm wrong) if i split the difference width wise of the hub and pack up off the centre pin this should give me a reasonably accurate dish?
simon
9420617F-DF3B-4FB4-9293-DE7BF995184F.jpeg7E630E3C-4107-4BD3-85F7-BA45B217E1E1.jpegACAFD250-DF36-4FA0-A17E-13DB28DC9BD2.jpeg
 

Ian M

Administrator
Staff member
Administrator
Moderator
SMF Supporter
Joined
Dec 14, 2008
Messages
19,721
Points
113
Location
Falster, Denmark
First Name
Ian
Th dish on the wheel being equal depends on a couple of things. Type of brake. Drum or disc. also rear wheel shaft of sprocket the one side and disc the other or drum.
So if you have a rear wheel with chain drive the dish will compensate for the sprocket if there is a disc brake the other side that will even it out a bit. same with the front wheel depending if a drum; even dish. Single disc; shallower on the disc side. Two discs; even but shallow.

I did suggest the easy way was to take a few spokes at a time, then you have the pitch, the dish and the lacing to follow as you go. A bif of a faff stopping and starting all the time but hey, that's what we do all the time. Glue a bit, wait, paint a bit wait, glue a bit more, paint a bit more.
 

simontie

SMF Supporter
Joined
Jan 13, 2010
Messages
997
Points
93
Location
Morayshire Scotland
First Name
simon
Th dish on the wheel being equal depends on a couple of things. Type of brake. Drum or disc. also rear wheel shaft of sprocket the one side and disc the other or drum.
So if you have a rear wheel with chain drive the dish will compensate for the sprocket if there is a disc brake the other side that will even it out a bit. same with the front wheel depending if a drum; even dish. Single disc; shallower on the disc side. Two discs; even but shallow.

I did suggest the easy way was to take a few spokes at a time, then you have the pitch, the dish and the lacing to follow as you go. A bif of a faff stopping and starting all the time but hey, that's what we do all the time. Glue a bit, wait, paint a bit wait, glue a bit more, paint a bit more.
I did say it was a learning curve, & i wanted to paint the hub x11 by air brush without the nipples in place looking at the origional pictures i have its quite evempnly balanced and i think i can true it up once its together, it's a bit more of a challenge but I’ll see how it progress thanks
simon
 
Joined
Apr 12, 2019
Messages
2,215
Points
113
Location
Selkirk
First Name
Andy
Having rebuilt a few full size motorcycle spoked wheels the trick is to measure the dish/offset before you start taking it apart. Of course, if you get it wrong it is just a bit time consuming to get it sorted, not so with a plastic model wheel but I should think you will be OK.

Andy.
 

JR

Member of the Rabble and Pyromania Consultant
SMF Supporter
Joined
May 26, 2015
Messages
17,275
Points
113
Location
lincs
First Name
John
That's some serious work there Simon, love the jig ,most impressive.
 

simontie

SMF Supporter
Joined
Jan 13, 2010
Messages
997
Points
93
Location
Morayshire Scotland
First Name
simon
That's some serious work there Simon, love the jig ,most impressive.
Thanks john it was hard on the eyes too, but once started it came together quite well hooking the inner spokes is the hard bit outer’s were less difficult as you can see the hole. (Just)
 

Ian M

Administrator
Staff member
Administrator
Moderator
SMF Supporter
Joined
Dec 14, 2008
Messages
19,721
Points
113
Location
Falster, Denmark
First Name
Ian
Nice!
It is both a mental and physical challenge.
You nailed it!
 

The Smythe Meister

Born to be WILD....... until about 9pm
SMF Supporter
Joined
Jan 30, 2019
Messages
5,730
Points
113
Location
Devon
First Name
Andy
Wow!! Lovely stuff :smiling3:
I'm considering respoking the wheels for my Italeri 1/9 Zundapp Combi, so your work here I am shamelessly going to copy!! ;)
That really does look most excellent,painstaking, but CERTAINLY worth it if you can get that kind of result :smiling3:
Andy
 

simontie

SMF Supporter
Joined
Jan 13, 2010
Messages
997
Points
93
Location
Morayshire Scotland
First Name
simon
Wow!! Lovely stuff :smiling3:
I'm considering respoking the wheels for my Italeri 1/9 Zundapp Combi, so your work here I am shamelessly going to copy!! ;)
That really does look most excellent,painstaking, but CERTAINLY worth it if you can get that kind of result :smiling3:
Andy
your welcome, a few pictures are the key, for the pattern & once the first couple of inner ones are fixed its easy enough to follow but .3 wire in a .4 hole blind is fun while holding in place and appling super glue...
i also found that using an off cut of the 0.3 and sliding this through the nipple hole helped guide the nipple in to place,
i was planning on doing the back wheel slightly differantly, on the outter side of the rim where the tyre seats i was going to centre drill it out and push the tube through to the desired length and cutting it off once in position, i was left with a few ragged ends, very hard to clean up but will see how it works out

simon
 
Top