Bandai 1/16 Rolls Royce Silver Ghost 1908 - "Balloon Car"

Jim R

SMF Supporter
Joined
Apr 27, 2018
Messages
13,724
Points
113
Location
Shropshire
First Name
Jim
Now to a part of the build I was rather worried about.
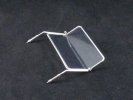
Part C2 is the frame for the windscreen. The lower half is clear part H8.
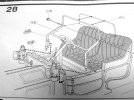
P1070611.JPG

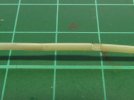
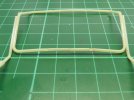
The bottom of the frame was broken although the missing section, about 1cm long, was in the bag. I tried to glue the missing section in place - hopeless!!
P1070608.JPG

P1070609.JPG

It just wasn't straight. So I decided to replace the whole of the bottom frame.
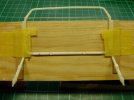
I built a jig from scrap wood and cut out the bottom frame.
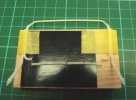
P1070612.JPG

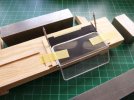
I then dry fitted the clear part H8 to ensure the frame was the right size. I glued two small pieces of wood to the sides to keep everything in place.
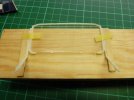
P1070613.JPG

I cut a piece of rod and cut out the two notches which locate H8.
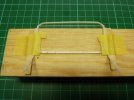
P1070614.JPG

Glued it in place.
P1070615.JPG

Removed the frame from the jig and took out H8
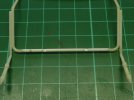
P1070616.JPG

Strengthened the joins with CA and hopefully it will work.
I'm not a scratch builder like Mike, Jakko et al but I must confess to being quite pleased :smiling:
 

Allen Dewire

Proud Rabble Member
SMF Supporter
Joined
Apr 27, 2018
Messages
4,105
Points
113
Location
Bamberg
First Name
Allen
I fell behind on this beauty, Jigs and it seems you have overcome all the probs with flying colors Sir. It is also amazing that you are the only person I can think of, who knits his own wheels! Now that's really cool and tribute to your skills. Love the upolstery job on the seats too, Jim...

Prost
Allen
 

Jim R

SMF Supporter
Joined
Apr 27, 2018
Messages
13,724
Points
113
Location
Shropshire
First Name
Jim
So where are we at :thinking:
Actually quite a bit of progress. I've lost a bit of momentum with this. It's just not a good kit and my skills are not really up to dealing with the issues. But I've come so far so it will get finished.

The mended windscreen frame worked OK. It needed a jig, clamps and weights to hold the glass in position. That Canopy Glue that Tim recommended is a real life saver.
P1070617.JPG

P1070627.JPG

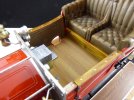
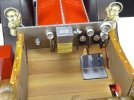
The woodwork on the door tops and in the cab was painted and fitted.
P1070621.JPG

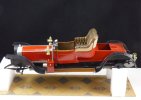
The body was fixed to the chassis. The fit is the best I could manage but is not perfect.
P1070620.JPG

P1070622.JPG

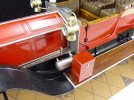
Battery box and some kind of tank on the left hand running board.
P1070623.JPG

The canvas hood painted. I have tried to get a bit of variation into it.
P1070624.JPG

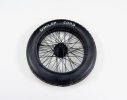
And I've painted the writing on the tyres. My hand is not that steady. I should have sent them to Tim or Paul who manage to paint detail on those miniscule figures! :tongue-out3:
P1070618.JPG

Onwards and upwards and thanks for your support. It is truly appreciated.
 

PaulinKendal

SMF Supporter
Joined
Jul 13, 2021
Messages
1,059
Points
113
Location
The Lake District
First Name
Paul
She's looking lovely. I'd've been tempted to leave the lettering in black. Although you've done a perfectly good job of it.
 

Ian M

Administrator
Staff member
Administrator
Moderator
SMF Supporter
Joined
Dec 14, 2008
Messages
19,721
Points
113
Location
Falster, Denmark
First Name
Ian
I mean like WOW that is some amazing work! It is possible to make a silk purse from a sow's ear.
All the paint work is great but that leather and wickerwork!
 

yak face

Wossupwidee?
Staff member
Moderator
SMF Supporter
Joined
Jun 13, 2009
Messages
12,398
Points
113
Location
sheffield
First Name
tony
Superb work Jim , the wood is lovely . Windscreen repair is perfect and those wheels are unbelievable . The lettering looks fine . Your skills are definitely up to dealing with the issues its thrown at you , your patient methodical approach has overcome all thats arisen ( and it was quite a bit !) and the end result is going to be stunning . Cheers tony
 
Top