You are using an out of date browser. It may not display this or other websites correctly.
You should upgrade or use an alternative browser.
You should upgrade or use an alternative browser.
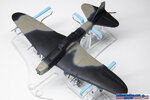
Il-2M3 Shturmovik (Tamiya, 1:72)
- Thread starter InFlames
- Start date
rtfoe
SMF Supporter
Wonderful Seb, putting your skills from 1/700 to 1/72 makes details stand out even more. The large wing of the Sturmovic is so similar to the Heinkel 111 and needs the rivet detail to add interest.
Cheers,
Richard
Cheers,
Richard
- Joined
- Feb 29, 2012
- Messages
- 442
- Points
- 63
- First Name
- Sebastijan aka Seb
Yeah they are great, although I guess they come more to the front in some modern aircraft with multiple switches, knobs, MFDs and what not and less so with rather simplistic WW2 cockpits. I'll have to give them a try on something more modern one day. Which kit did you use as a base?
Well actually it is the other way around... I've been building 1:72 for my entire life and just recently (in the last few years) start to play a bit with ship models in 1:700. And yeah, the wings are rather huge and would be rather bland without riveting detail.Wonderful Seb, putting your skills from 1/700 to 1/72 makes details stand out even more. The large wing of the Sturmovic is so similar to the Heinkel 111 and needs the rivet detail to add interest.
Cheers,
Richard
The Zvezda Il2 m seb , a simple little kit but perfect for what i had in mind https://www.scale-models.co.uk/threads/ilyushin-il2-m82-cut’n’shut-simon-t-tribute-gb.36448/.Which kit did you use as a base?
Cheers tony
- Joined
- Feb 29, 2012
- Messages
- 442
- Points
- 63
- First Name
- Sebastijan aka Seb
Wow great job, Tony! I know of the M82 powered Il-2 but I think yours is the first model I have ever seen of it!The Zvezda Il2 m seb , a simple little kit but perfect for what i had in mind https://www.scale-models.co.uk/threads/ilyushin-il2-m82-cut’n’shut-simon-t-tribute-gb.36448/.
Cheers tony
- Joined
- Feb 29, 2012
- Messages
- 442
- Points
- 63
- First Name
- Sebastijan aka Seb
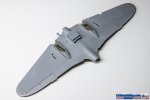
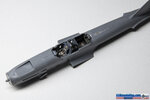
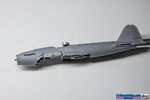
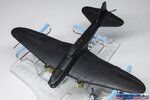
Now that I am feeling a little better, I've made some major progress. Unfortunately the join between fuselage and wings wasn't the best so some surgery was required there. Machine gun barrels were replaced with insulin injection needles while the 23mm gun barrels and pitot tube were made of brass tubing from Albion Alloys. She's now ready for some paint under the coat of MrSurfacer 1500.

Quite possibly my all time favourite WW2 plane, looking good so far.
- Joined
- Feb 29, 2012
- Messages
- 442
- Points
- 63
- First Name
- Sebastijan aka Seb
Thank you Karl! It is an imposing bird for sure and was lucky enough to actually see it flying in 2019 at MAKS.Quite possibly my all time favourite WW2 plane, looking good so far.
Don't often get jealous but.......Thank you Karl! It is an imposing bird for sure and was lucky enough to actually see it flying in 2019 at MAKS.
Cracking work so far Seb, looking very good indeed.
Geoffers
SMF Supporter
Very nice Seb 
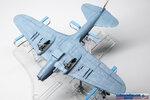
Just catching up with your build, I really like the cockpit and the underside paint looks spot on.
Geoff.

Just catching up with your build, I really like the cockpit and the underside paint looks spot on.
Geoff.
- Joined
- Feb 29, 2012
- Messages
- 442
- Points
- 63
- First Name
- Sebastijan aka Seb
- Joined
- Apr 28, 2018
- Messages
- 10,861
- Points
- 113
- First Name
- Jakko
I find that statement slightly odd, given you started with a black base coatAs I always paint from lightest to darkest colour
 “Start with the lightest colour” is good advice over a light base (because then you probably won’t have issues with the paint not covering that underneath well enough), but when the model is black I kind of think doing it the other way would be better?
- Joined
- Feb 29, 2012
- Messages
- 442
- Points
- 63
- First Name
- Sebastijan aka Seb
actually the reason for it is the light feathered overspray. doing it light to dark, you get much better looking feathered edge than the other way around.I find that statement slightly odd, given you started with a black base coat“Start with the lightest colour” is good advice over a light base (because then you probably won’t have issues with the paint not covering that underneath well enough), but when the model is black I kind of think doing it the other way would be better?
rtfoe
SMF Supporter
Yup...that works for me even for my illustration days...less dustier effect.actually the reason for it is the light feathered overspray. doing it light to dark, you get much better looking feathered edge than the other way around.
Cheers,
Richard

