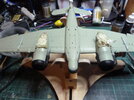
Pete's Beaufighter

stillp

SMF Supporter
Joined
Nov 17, 2016
Messages
7,228
Points
113
Location
Rugby
First Name
Pete
Regarding the prop, could you pin the two parts together then fill the join?
Assuming you have both parts.
A pin would be good Karl, but there isn't really enough 'meat' to drill into.
I've heard about tape being used but never tried it. Does it work very well?
Did you mean BMF Andrew? If so then yes, it's very good. It's very thin so doesn't obscure the frame, and being metal it can be burnished down with a cotton bud. I usually finish off with a cocktail stick into the corners. Can be a bit tricky to peel off though.

Thanks for your comments chaps.
Pete
 

adt70hk

I know its a bit sad but I like quickbuild kits!!!
SMF Supporter
Joined
Sep 4, 2019
Messages
9,506
Points
113
First Name
Andrew
A pin would be good Karl, but there isn't really enough 'meat' to drill into.

Did you mean BMF Andrew? If so then yes, it's very good. It's very thin so doesn't obscure the frame, and being metal it can be burnished down with a cotton bud. I usually finish off with a cocktail stick into the corners. Can be a bit tricky to peel off though.

Thanks for your comments chaps.
Pete
Sorry yes.... Changed my original post. Thanks
 

stillp

SMF Supporter
Joined
Nov 17, 2016
Messages
7,228
Points
113
Location
Rugby
First Name
Pete
Certainly taking shape now Pete:thumb2:,
Looking very nice indeed,some lovely detail on the surfaces aren`t there?...... any progress on "Propgate" ?:thinking:
Andy
Yes, it doesn't look too bad, as long as you don't look too closely! I'll put a photo up when I've got some paint on them.
Pete
 

Tim Marlow

Little blokes aficionado
SMF Supporter
Joined
Apr 27, 2018
Messages
16,797
Points
113
Location
Somerset
First Name
Tim
Looking good Peter. Nice use of BMF for masking. I’ve only ever used that stuff on car build chrome trim, for which it is excellent. Doesn’t the glue bond get stronger with time though? Just wondered because I can imagine a time in a protracted build where the foil becomes impossible to remove cleanly at all.
 

stillp

SMF Supporter
Joined
Nov 17, 2016
Messages
7,228
Points
113
Location
Rugby
First Name
Pete
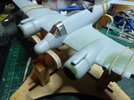
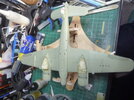
Added some more clear bits:
P1170438.JPG
The landing light went in easily. The wingtip lights were a pain though - they're tiny, and the shape is difficult to hold. Got them on after a bit of a struggle. Using the Formula 560 canopy glue that I found in an "everything £1" box at the St Ives show. It's runnier than the Gator's Grip I usually use, but Gator's is an endangered species of glue since the California wildfire. :disappointed2:
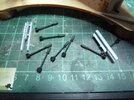
Also painted up the rockets and assembled the rocket rails, which will get a coat of paint tomorrow with a bit of luck.
P1170439.JPG
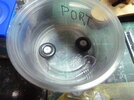
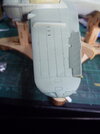
The main gear wheels are already painted:
P1170440.JPG
I removed the navigator's canopy and masked his cockpit with wet tissue instead. I haven't decided whether to use the closed undercarriage doors as a mask for the u/c bays, or to fill the bays with wet tissue.
Pete
 

Jim R

SMF Supporter
Joined
Apr 27, 2018
Messages
13,746
Points
113
Location
Shropshire
First Name
Jim
Looking the part now Pete. Providing it doesn't prove too difficult to remove that Bare Metal Foil masking looks good - very neat.
 

stillp

SMF Supporter
Joined
Nov 17, 2016
Messages
7,228
Points
113
Location
Rugby
First Name
Pete
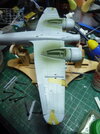
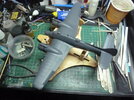
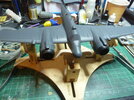
Starting to splash some paint on:
P1170442.JPG
Masked with a mix of tape, wet tissue, foil, and masking fluid. Got a bit carried away with the fluid though:
P1170441.JPG
Spot the mistake?
The rearmost light on the wingtip is a recognition light, and only the small cylindrical part that sticks out at the back should be clear, the rest is shrouded so didn't need masking. The fluid (Mr Masking Sol R) came off alright, but the clear lens came away from the wing, so no more painting until the glue sets on that!
Pete
 

The Smythe Meister

Born to be WILD....... until about 9pm
SMF Supporter
Joined
Jan 30, 2019
Messages
5,739
Points
113
Location
Devon
First Name
Andy
I'd hoped to make a more interesting post tonight, but spotted some areas of the EDSG that needed a touch-up, so the masking will stay on for now. Here it is before I spotted the faulty areas:
View attachment 467858
Pete
STILL looks good to me P ...
... See what I did there?!! ;)
I just like these planes,and I think it's coming threat :smiling3:
 

JR

Member of the Rabble and Pyromania Consultant
SMF Supporter
Joined
May 26, 2015
Messages
17,275
Points
113
Location
lincs
First Name
John
Bmf, can any one explain what and how it's used, never heard of it before ( I live a sheltered life ;) don't think there's any call for it in Russian Armour of WW2 )
 

Tim Marlow

Little blokes aficionado
SMF Supporter
Joined
Apr 27, 2018
Messages
16,797
Points
113
Location
Somerset
First Name
Tim
Bmf, can any one explain what and how it's used, never heard of it before ( I live a sheltered life ;) don't think there's any call for it in Russian Armour of WW2 )
It is more or less exactly what it sounds like John. BMF is a self adhesive thin metal foil.
It’s primary use is for recreating chrome trim on model cars. You cut a suitably sized piece out, stick it over the trim area, burnish it smooth with cotton buds and blunt implements, then trim off the excess with a new scalpel blade. It is actually much simpler than it sounds and is very effective, much more so than trying to paint the trim. You get a sharper and more “chrome like” appearance using it. It comes in several colours as well.
Pete is using it here in a similar fashion to mask the cockpit glazing. Far easier to get it into the corners than using masking tape, and it cuts cleaner when in place.
 

KarlW

Mediocre modeller extraodinaire.
SMF Supporter
Joined
Jul 2, 2020
Messages
1,433
Points
113
Location
Cushendall, Co. Antrim
First Name
Karl
It is more or less exactly what it sounds like John. BMF is a self adhesive thin metal foil.
It’s primary use is for recreating chrome trim on model cars. You cut a suitably sized piece out, stick it over the trim area, burnish it smooth with cotton buds and blunt implements, then trim off the excess with a new scalpel blade. It is actually much simpler than it sounds and is very effective, much more so than trying to paint the trim. You get a sharper and more “chrome like” appearance using it. It comes in several colours as well.
Pete is using it here in a similar fashion to mask the cockpit glazing. Far easier to get it into the corners than using masking tape, and it cuts cleaner when in place.
Also used to be the best way of recreating natural metal finishes on aircraft. (Maybe it still is.) You can scuff some panels and polish others to create differing sheens.
 

JR

Member of the Rabble and Pyromania Consultant
SMF Supporter
Joined
May 26, 2015
Messages
17,275
Points
113
Location
lincs
First Name
John
It is more or less exactly what it sounds like John. BMF is a self adhesive thin metal foil.
It’s primary use is for recreating chrome trim on model cars. You cut a suitably sized piece out, stick it over the trim area, burnish it smooth with cotton buds and blunt implements, then trim off the excess with a new scalpel blade. It is actually much simpler than it sounds and is very effective, much more so than trying to paint the trim. You get a sharper and more “chrome like” appearance using it. It comes in several colours as well.
Pete is using it here in a similar fashion to mask the cockpit glazing. Far easier to get it into the corners than using masking tape, and it cuts cleaner when in place.
Thanks Tim, the first time and last I had to add chrome I used one of those pens.
 

Jakko

Way past the mad part
SMF Supporter
Joined
Apr 28, 2018
Messages
10,834
Points
113
First Name
Jakko
I must admit it took me some thought to work out what BMF was supposed to be when I first read it in this thread, and then I remembered that a lot of the old modelling handbooks mentioned “bare-metal foil” for the purposes Tim and Karl described, and the penny dropped :smiling3:
 
Top