You are using an out of date browser. It may not display this or other websites correctly.
You should upgrade or use an alternative browser.
You should upgrade or use an alternative browser.
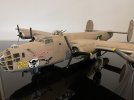
The HobbyBoss 1/32 B24D Liberator.
- Thread starter BarryW
- Start date
Actually, bear in one that I am not looking for a solid colour and want some subtle variations in tone, spraying slowly bit by bit at a time is the way to go. The Colani is perfect for thisWith something that size a mini spray gun like my Iwata lph80 would be a help funnily enough.
My biggest 'gun has a 2.5mm tip. That would obliterate it
All masked up ready to paint the sand.
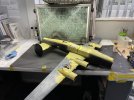
To paint this requires more contortions than I have ever tried before. First I did areas best acceded froM below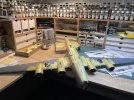
Then I turn it over….
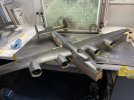
And finished.
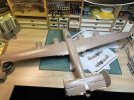
For the first time since using MRP I did get some splatter toward the end of the session. Bear in mind that this was my longest ever paint session without even a colour change clean up. This was not the fault of the airbrush or the paint.
Next I will remove the masking and do some inevitable touch ups before masking again to paint some detail like the wing leading edges.

To paint this requires more contortions than I have ever tried before. First I did areas best acceded froM below

Then I turn it over….

And finished.

For the first time since using MRP I did get some splatter toward the end of the session. Bear in mind that this was my longest ever paint session without even a colour change clean up. This was not the fault of the airbrush or the paint.
Next I will remove the masking and do some inevitable touch ups before masking again to paint some detail like the wing leading edges.
Airborne01
SMF Supporter
Blurrie 'ell - very large and very nice!
Steve
Steve
Jim R
SMF Supporter
Lovely paint job.
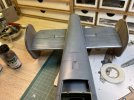
I have got in with some detail painting. After masking up I sprayed the wing, tail and stab leading edges with steel.
Also I sprayed the exhausts with Pale Burnt Metal then shaded them with Burnt Iron.
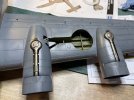
These need some more work with washes and pigments. That will need to wait a bit and, next I need to do some touching up then the decals.

Also I sprayed the exhausts with Pale Burnt Metal then shaded them with Burnt Iron.

These need some more work with washes and pigments. That will need to wait a bit and, next I need to do some touching up then the decals.
Beautiful. Your finishes are always top notch.
I have applied the decals but it did not go as planned. Originally I wanted to do the ‘Squaw’ markings from Kits World however, for the first time ever, Kits World let me down. First the roundels were beautifully thin but they curled at the edges and I had a hell of a job to ‘uncurl’ them. In the end I decided to use the kits roundels instead, the kit blue looked a better colour to me anyway. Then another all time first, the HobbyBoss produced decals actually went down really well with no cracking and splintering and they bedded in to detail beautifully…
So, I attempted the Squaw nose art and being such a large decal, with a complex shape I just could not work it into position! In a way, my fault, as I should have cut that decal up into three of four parts to apply. In the end I dropped that idea and reverted to the kit markings and they went down perfectly.
After a few coats of solution these looked just right. I then sealed the lot with a gloss varnish ready to apply a wash. I have decided on a Flory Dark Dirt clay wash.
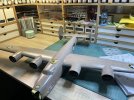
Here she is all decalled and gloss varnished. Incidentally, I did not bother to gloss the paint before applying decals as MRP is glossy enough.


peterairfix
SMF Supporter
Plenty of progress and now on the home run.
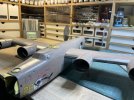
I applied a Flory surge wash overall to bring out the panel lines and to tone down the clean paint look and followed up with matt coats.
After the matt coat I got on with more weathering.
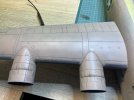
Exhaust wash on the exhausts and airbrushed some exhaust smoke. Plus some weathering pencil work on streaking.
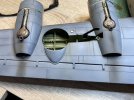
Looking at the photos I only did some light streaking on top of the cowlings.
Undercarriage went on easily.
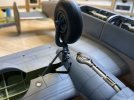
And then, she is on her three legs for the first time.
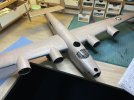
More final fixings to do.
I applied a Flory surge wash overall to bring out the panel lines and to tone down the clean paint look and followed up with matt coats.
After the matt coat I got on with more weathering.
Exhaust wash on the exhausts and airbrushed some exhaust smoke. Plus some weathering pencil work on streaking.

Looking at the photos I only did some light streaking on top of the cowlings.

Undercarriage went on easily.

And then, she is on her three legs for the first time.

More final fixings to do.
Scratchbuilder
SMF Supporter
- Joined
- Jul 2, 2022
- Messages
- 1,943
- Points
- 113
- First Name
- Mike
Admiration all round...
I said to SWMBO "Look, can I have one of those...?"
She said "What, a clean and tidy work room devoid of dust..."
You just cannot win.....
I said to SWMBO "Look, can I have one of those...?"
She said "What, a clean and tidy work room devoid of dust..."
You just cannot win.....
Almost there …
Only the front greenhouse to position with the guns inside.
A bit of a delay though as I found that my non-fogging c.a. has dried up! At this time of year I cannot quickly get a replacement which means I need to use pva glue that has no ‘bite’ and takes time to dry. It won’t grip as well either. So first I need to fit the guns inside the canopy and be patient while the pva dries and do that one by one. As there is not a positive location for the transparency fixing that will be more awkward and will involve taping it into position while it dries. A real pain in the neck, if the ca had not dried I would be finished right now.
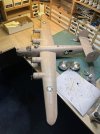
These things come to try us….
Only the front greenhouse to position with the guns inside.
A bit of a delay though as I found that my non-fogging c.a. has dried up! At this time of year I cannot quickly get a replacement which means I need to use pva glue that has no ‘bite’ and takes time to dry. It won’t grip as well either. So first I need to fit the guns inside the canopy and be patient while the pva dries and do that one by one. As there is not a positive location for the transparency fixing that will be more awkward and will involve taping it into position while it dries. A real pain in the neck, if the ca had not dried I would be finished right now.

These things come to try us….
therapy
SMF Supporter
She's looking excellent Barry...
Nick
Nick
Jim R
SMF Supporter
Another stunning result Barry. The weathering looks spot on.
I dug down through it thinking that, nothing usable. Anyway, all is done now with pva and I am hoping to get some photos done tomorrow.Perhaps there is still some deep in the tube that you can get to by cutting it open? That, of course, spoils everything you can’t use right away, but it may be worth a try.
In the New Year I will start the Border Lancaster. Another biggie, but not quite as big as this one.
Airborne01
SMF Supporter
Very nice indeed!
Steve
Steve


