Tonys Tamiya 1/48 A6M2 Zero

The Smythe Meister

Born to be WILD....... until about 9pm
SMF Supporter
Joined
Jan 30, 2019
Messages
5,788
Points
113
Location
Devon
First Name
Andy
Excellent stuff in that cockpit Tony. :smiling3:
The engine is shaping up to be a feature all of it's own...... looking forward to seeing it develop ;)
 

yak face

Wossupwidee?
Staff member
Moderator
SMF Supporter
Joined
Jun 13, 2009
Messages
12,426
Points
113
Location
sheffield
First Name
tony
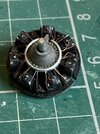
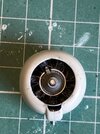
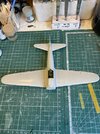
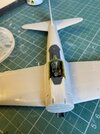
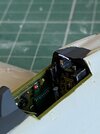
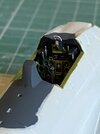
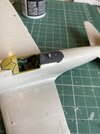
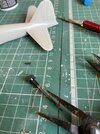
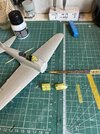
Got the engine all wired up and painted now . Its had a dark grey oil wash and is now fitted into the cowling . The wing tops have been glued on now , as have the tailplanes , these both just needing a smear of acrylic putty to smooth any joints . The wing top to wing bottom joint had a tiny overlap at the wingtip , a result of cutting off the locating pins and getting a tight joint at the wingroot , but this was an easy job - far easier than trying to fill and sand a wingroot ! Next job is sorting the canopy out. The kit gives you a full closed canopy or a three piece open option . I think im going to go for the open one , so its got to get masked up before fitting. IMG_2556.jpegIMG_2557.jpegIMG_2558.jpegIMG_2559.jpeg
 

yak face

Wossupwidee?
Staff member
Moderator
SMF Supporter
Joined
Jun 13, 2009
Messages
12,426
Points
113
Location
sheffield
First Name
tony
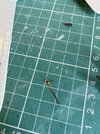
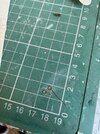
Got a few final bits added to the cockpit before I can start getting the canopies on ( masking these up is a job i really dont like ! ) . The throttle ( strangely missing , as on a lot of kits !?) was added from a bit of rod and a knob just behind it from the nail art caviar balls . I tarted up the gun breeches with a couple of priming levers and fitted a piece of holographic confetti , cut to shape , for the gunsight reflector .
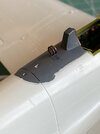
The areas in front of the instrument panel and the rear deck under the canopy were painted black grey - i read that they started off black but quickly faded . The kit supplied DF loop was fitted , and subsequently removed after I found some pics of this area which showed two dark copper coloured df loops close together . I decided to use copper wire bent round a suitably sized pin to get the shape and heated them up with a lighter to get the dark effect. IMG_2563.jpegIMG_2565.jpegIMG_2566.jpegIMG_2570.jpegIMG_2571.jpegIMG_2572.jpegIMG_2573.jpegIMG_2574.jpegIMG_2577.jpeg
After a mammoth breath holding session , the canopies are now masked . The middle sliding section will be added last off . IMG_2561.jpegIMG_2569.jpeg
 

yak face

Wossupwidee?
Staff member
Moderator
SMF Supporter
Joined
Jun 13, 2009
Messages
12,426
Points
113
Location
sheffield
First Name
tony
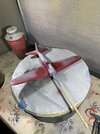
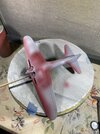
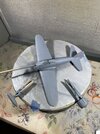
Got the airframe primed with Halfords finest , doesn't look like theres much to sort at all before the paint starts to go on . I might give it a bit of red oxide colour on the leading edges of the wings and round the cockpit and then hairspray it . I can then do a bit of light chipping after the top coat has gone on . The naval zeroes ( and other naval aircraft ) had a red oxide primer under the top coat as extra protection against the sea air , but at this early stage of the war aircraft would have been only lightly weathered so its going to be quite restrained . IMG_2585.jpeg
 

yak face

Wossupwidee?
Staff member
Moderator
SMF Supporter
Joined
Jun 13, 2009
Messages
12,426
Points
113
Location
sheffield
First Name
tony
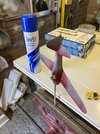
Got some more layers on this today , first it got silver on the leading edges of the wings and tail plus any areas where wear might occur ( gun covers , cockpit sides , wingroots etc )
Then a red oxide colour over the top of this , and finally once this had dried , a misting of hairspray .
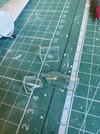
The final colour can go on now , a mixture of Tamiya paints . The colour of early naval zeros is about as conflicting and contentious as the endless arguments about sky type S or olive drab , there being endless viewpoints on the net all claiming theyre right. After looking at a lot of info , i decided this guys formula ( based on actual samples of aircraft ) was good enough for me . He gives a fairly fiddly mix of Tamiya colours to get the caramel brown / beige colour . I mixed this as per the ratios and it gives a good colour . Once I had this colour I could now match with my own simpler mix . IMG_2588.jpegIMG_2589.jpegIMG_2590.jpegIMG_2591.jpegIMG_2578.png
My recipe is 5 parts Tamiya xf 14 JA grey to 1 part Tamiya xf 49 Khaki . Of course as with any historical colour no one can say anything is definitely right as fading , light conditions , different paint suppliers etc all screw with the colour , so the upshot is if it looks right to you then thats fine by me - dont let the rivet counters/ colour police bother you .
 

langy71

SMF Supporter
Joined
Apr 27, 2018
Messages
1,563
Points
113
Location
Nottingham
First Name
Chris
, so the upshot is if it looks right to you then that's fine by me - don't let the rivet counters/ colour police bother you .
A perfect way to deal with colours such as this,

One thing I do find is that some of these experts base their 'god given facts' on colour swatches that are nearly 80 odd years old and haven't been kept in a hermetically sealed box for all those years,

The 'so called correct shade' of paint has already started to 'degrade' within minutes of being applied... then cover this up with a lacquer to protect it and the lacquer also begins to degrade thus resulting in many variations of the base colour which nobody can ever decipher ... (dunklegelb anybody ??), so as you say go with what looks correct to you..

One point to note though is that as far as I'm aware there was never a white/grey colour for the zero's, this is down to faded paintwork being misconstrued as white/grey...a fact that model manufacturers have been getting it wrong all those years .....also given the attrition rate of zero's, they hardly lasted long enough to fade to a pure white/grey colour unless they were crashed wrecks found after the conflict had ended, and it's all down to how the light falls on the subject, you wouldn't believe the amount of beautiful zero builds that are painted white/grey......
 

yak face

Wossupwidee?
Staff member
Moderator
SMF Supporter
Joined
Jun 13, 2009
Messages
12,426
Points
113
Location
sheffield
First Name
tony
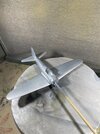
Got the top colour mixed and sprayed , just the control surfaces to do in the grey colour . Now its time to start scrubbing ! IMG_2593.jpegIMG_2594.jpegIMG_2595.jpeg
 
Top