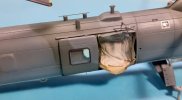
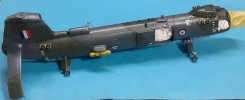
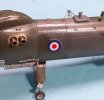
Oh dear it's a 1/72 Bristol Beveldere

The Smythe Meister

Born to be WILD....... until about 9pm
SMF Supporter
Joined
Jan 30, 2019
Messages
5,743
Points
113
Location
Devon
First Name
Andy
Just had a good catch up Richard,
Coming along a treat now.... really like the camo colours,they definitely look the part :thumb2:.
 

Allen Dewire

Proud Rabble Member
SMF Supporter
Joined
Apr 27, 2018
Messages
4,105
Points
113
Location
Bamberg
First Name
Allen
Good job Wabble!!! Looks like nothing pinged off too...At least I didn't hear any foul words over here if they did!!! Your soundproofing must work well Sir...

Prost
Allen
 

boatman

SMF Supporter
Joined
Nov 8, 2018
Messages
12,933
Points
113
Location
NORFOLK UK
First Name
christopher
YES i like these big multi engine choppers an has anybody thought about building a fairy rotordyne ? as i liked them as well
chrisb
 

rtfoe

SMF Supporter
Joined
Apr 29, 2018
Messages
7,518
Points
113
Location
Malaysia
First Name
Richard
Thanks Jim, Andy, Andy T, Allen, Doug and Chris,
Looking great Richard.
Just had a good catch up Richard,
Coming along a treat now.... really like the camo colours,they definitely look the part :thumb2:.
Great looking paintwork Richard, in line with the rest of the modelling.
Good job Wabble!!! Looks like nothing pinged off too...At least I didn't hear any foul words over here if they did!!! Your soundproofing must work well Sir...

Prost
Allen
Just awesome Richard. Looking great with the camo.
YES i like these big multi engine choppers an has anybody thought about building a fairy rotordyne ? as i liked them as well
chrisb
So far everythings peachy, glad the camo turned out well with no cursing and swearing to be heard. I've seen a Rotordyne built on Youtube.
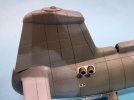
There's always something that crops up and this regarding the right side of the tail where I continued the dark green across it.

20231112_003235.jpg
The suppositories now are looking like minions...banana!!!!
20231112_003335.jpg
Thanks for following this far...fingers crossed the decals don't disappoint.

Cheers,
Wabble
 

rtfoe

SMF Supporter
Joined
Apr 29, 2018
Messages
7,518
Points
113
Location
Malaysia
First Name
Richard
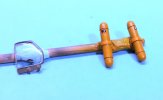
I just had to do it...the spindly things on the rotor hub. Not very uniformed but passable once painted and glued on.

20231115_005549.jpg
Made of copper wire and a tiny knob of putty. Letting it cure overnight before attaching to the hub.

Cheers,
Wabble
 

colin m

Moderator
Staff member
Moderator
SMF Supporter
Joined
Dec 26, 2008
Messages
8,604
Points
113
Location
Stafford, UK
First Name
Colin
I got trapped in the real world for a while, and on my return your your build is continuing, 18 pages wow. God bless your determination Sir. Mind you, your efforts are truly paying off, she's looking splendid.
 

rtfoe

SMF Supporter
Joined
Apr 29, 2018
Messages
7,518
Points
113
Location
Malaysia
First Name
Richard
I knew you would :tongue-out3:
We scratchees think alike :smiling6: ...just can't leave things well alone can we?
I got trapped in the real world for a while, and on my return your your build is continuing, 18 pages wow. God bless your determination Sir. Mind you, your efforts are truly paying off, she's looking splendid.
Thank you Colin...God blessed me with a sinus and cough as a test I guess. Still going at it. Photos later.

Cheers,
Wabble
 

rtfoe

SMF Supporter
Joined
Apr 29, 2018
Messages
7,518
Points
113
Location
Malaysia
First Name
Richard
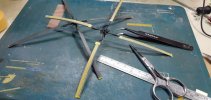
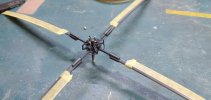
As I said earlier here are some of todays progress pictures. Masking the prop blades after painting the tips with a base of white then yellow. Don't know if the blades had de-icing boots but in references the tips were painted black.
20231115_191249.jpg
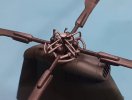
Then fitted the fiddly things on the prop hub...so I can cover the blades and the fiddly bits in black.
20231115_223008.jpg
Earlier I tidied up loose ends on the rear end of the chopper where some overspray had crept onto the supporting pylon and under the tail wing. No pictures though.

Cheers,
Wabble
 

Waspie

SMF Supporter
Joined
Mar 13, 2023
Messages
2,515
Points
113
Location
Portland - Dorset
First Name
Doug
As I said earlier here are some of todays progress pictures. Masking the prop blades after painting the tips with a base of white then yellow. Don't know if the blades had de-icing boots but in references the tips were painted black.
View attachment 495399
Then fitted the fiddly things on the prop hub...so I can cover the blades and the fiddly bits in black.
View attachment 495400
Earlier I tidied up loose ends on the rear end of the chopper where some overspray had crept onto the supporting pylon and under the tail wing. No pictures though.

Cheers,
Wabble
'De-icing boots'. Not a term I'm familiar with. Do you have any more info Richard!! Ice accretion or build up on rotors was always a worry when flying in icing or potential icing conditions. Ice not only adds weight but deforms the aerodynamic profile of the lift element. (We call it crashing!!!)
 

Jakko

Way past the mad part
SMF Supporter
Joined
Apr 28, 2018
Messages
10,837
Points
113
First Name
Jakko
De-icing boots are inflatable bladders along the front edge of a wing, to break up any ice there. IIRC, it’s mainly an American term.
 

Waspie

SMF Supporter
Joined
Mar 13, 2023
Messages
2,515
Points
113
Location
Portland - Dorset
First Name
Doug
De-icing boots are inflatable bladders along the front edge of a wing, to break up any ice there. IIRC, it’s mainly an American term.
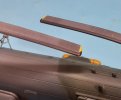
Never in 25 years of rotary wing experience as both a maintainer and aircrew have I heard of that. Certainly we had 'sacrificial strips' (thick 3M sellotape in basic terms), on the leading edges of the rotors. An inflatable 'boot' on a rotor would change the aerofoil section and therefore the lift!!
Some rotary wing have pressurised nitrogen in the leading edge spars but that is for crack detection. At the hub end of the blades there is an indicator which will show when a crack has developed. BIM indicators I believe they are called. Maybe Rick is more up to date on it. The system was on Sea Kings but not on Wessex or Wasps. (Limited experience with the Lynx so can't comment on their system).
I could see the application working on fixed wing as they have more leeway with control surfaces/weight etc. Moveable leading edge slats and such!!
 
Last edited:

rtfoe

SMF Supporter
Joined
Apr 29, 2018
Messages
7,518
Points
113
Location
Malaysia
First Name
Richard
Here are ze photos compadres, not much happening at the hub, still needs some brown grease to add color.
20231116_234458.jpg
The blade tips...followed the way the black overlaps the yellow tip.
20231116_234515.jpg
Took off the masking temporarily to see if the black booting around the window was okay. Behind the window is blutac.
20231116_234553.jpg
Now to secure two tiny stands for wire antennae that is attached across then up to the tail and down the other side into the fuselage. The wire will be the last to apply.

I need to find out if the serial numbers on the camoflaged fuselage were always white or could they have been black also. I know in WW2 they were in either black on camo or red on black surfaces. It's because I can't find any white substitutes in my stash.

Cheers,
Wabble
 

rtfoe

SMF Supporter
Joined
Apr 29, 2018
Messages
7,518
Points
113
Location
Malaysia
First Name
Richard
Hi Guys,
The decaling went well after a coat of Future. Only realised that the roundels white backing print had misaligned.

20231120_164936.jpg
The misalignment was still showing even after I had sliced it away as the Mark Softener had reacted the paint or Future. I will cut a mask and spray over no problem.
20231120_165114.jpg
The nose bubble center joint obviously stood out like a sore thumb so I temporarily masked and painqted black over it for this coming club GB but will consider vacforming a replacement. Doesn't look right with the spine down the middle. I'll go over with green and grey so it doesn't look so stark with the black on. Couldn't take pictures as I had already masked over for the Future spray coating.

Cheers,
Wabble
 
Top