- Home
- Forums
- Military Vehicles
- Military Vehicles Under Construction
- Armoured Vehicles Under Constuction
You are using an out of date browser. It may not display this or other websites correctly.
You should upgrade or use an alternative browser.
You should upgrade or use an alternative browser.
Tamiya 1/35 Churchill Mk VII Tank
- Thread starter SteveT
- Start date
Waspie
SMF Supporter
Sounds like common sense to me!!!!I spent so much time on the last kit looking at the sprues trying to figure which was which (my eyesight is not sharp)
so I figured I'd solve this by getting the dymo out and making some labels this time.
Cheating? maybe, but I don't care.
View attachment 503746

- Joined
- Apr 28, 2018
- Messages
- 10,891
- Points
- 113
- First Name
- Jakko
I do something similar, but approaching it from the other side, with any paint that doesn’t have a cap or lid in the (approximate) colour of what’s inside: paint it with the contents.sticking labels to the top of my Tamiya paints so I can tell what they are without having to take them out of their box.
That works up to a point, but the label also states the colour number and if it’s already diluted for spraying Jakko.I do something similar, but approaching it from the other side, with any paint that doesn’t have a cap or lid in the (approximate) colour of what’s inside: paint it with the contents.
Waspie
SMF Supporter
Hope your not Q jumping Mr JR??Seat please Steve.
Front row if possible , with coffee and of course biscuits.

Certainly not, sorry I didn't see you there Doug . Why are you lying on the floor ?Hope your not Q jumping Mr JR??
")
Ohhh! This seems ideal, thank you so much!
Just remembered (unless I'm thinking of another of this guy's builds). Apparently the early versions of this kit had rubber band tracks which needed to be welded together by melting the tracks. I wouldn't bother. As the top run is hidden behind the hull sides, just use a couple of staples.
Scratchbuilder
SMF Supporter
Sensible, saves all that time searching through the sprues, says he who never labels his....I spent so much time on the last kit looking at the sprues trying to figure which was which (my eyesight is not sharp)
so I figured I'd solve this by getting the dymo out and making some labels this time.
Cheating? maybe, but I don't care.
View attachment 503746
SteveT
SMF Supporter

Mark1
SMF Supporter
You may find some colours will require a bit more or less thinners than others so i would just mix as i need.
It’s a good starting point, but overfilling like that makes mixing a bit difficult. I dilute to the shoulder of the bottle, mix thoroughly, then adjust the mix in the airbrush cup to make it properly spray friendly. As the guys say above, each colour will need its own adjustment to spray as you want it to.
andy55
SMF Supporter
I find that the vallejo model air are very good in the AB straight from the bottle, tried adding thinners to vallejo model color and a bit hit and miss (thats down to me). Its the old adage, take as much advise as you can get, then use the bits that suit you. The guys and gals on here are very knowledgeable.
SteveT
SMF Supporter
Working on the build and I need a little advice.
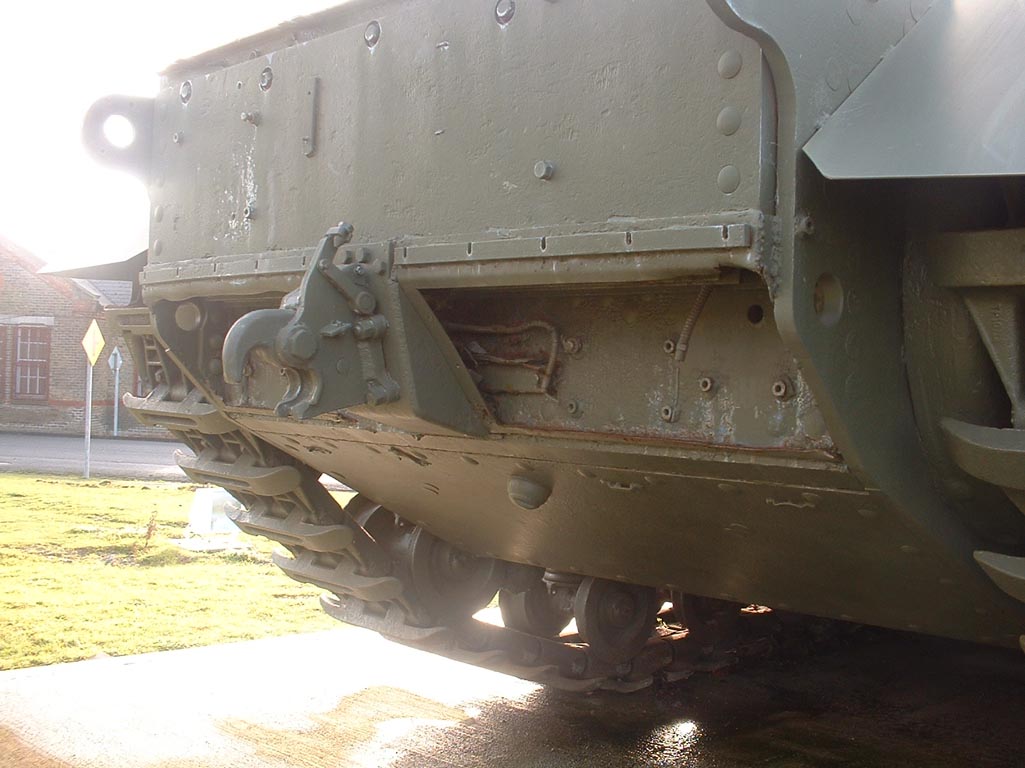
Looking at this section, there are two small box-like objects (B8) that glue onto the rear of the tank.
These sit on two pins, however along with the two pins they sit on, there are also six other smaller pins surrounding it
which means the boxes will not sit flush.
My question is this, should I trim off the smaller pins so these fit flush? or am I supposed to leave a horrible gap?
langy71
SMF Supporter
If memory serves the pins are there to bring small boxes out in order to sit flush with the rear plate.
Mark1
SMF Supporter
How does it look with b9 fitted
- Joined
- Apr 28, 2018
- Messages
- 10,891
- Points
- 113
- First Name
- Jakko
Those boxes B8 are smoke emitters (inside each are two smoke candles that are set off electrically from inside the tank), and they look like they should sit on top of the little pins, which are most likely the lugs they bolt onto on the real tank.
(source)
So no, don’t trim them off, and yes, leave a small gap between B8 and the hull plate
(source)
So no, don’t trim them off, and yes, leave a small gap between B8 and the hull plate
SteveT
SMF Supporter
Thanks, that's sorted now.
The next phase is the wheels/tracks. Now I'm not sure about this. Do I prime all the parts separately and then build, or build it and then prime it.
or does it not matter about the order you do it?
also, any tips for getting rid of moulding (molding?) lines in curved and weird shaped parts? this is proving to be very tricky indeed!
Last edited: