Tamiya 1/35 Churchill Mk VII Tank

Steve-the-Duck

SMF Supporter
Joined
Jul 3, 2020
Messages
1,214
Points
113
Location
Medway Towns
First Name
Chris
On the real thing, you mean? That depends. American tools generally got dip-painted olive drab at the factory, either the tool factory or the vehicle factory (I’m not sure), and only then added to the already-painted vehicle. The Germans, when they camouflage-painted their tanks, tended to leave the tools on so those would just be painted along, and the Americans did much the same in those units that applied (usually black) patches to their vehicles. This helps the camouflage, of course, because now the tools will stand out less than if they’re a different colour than the vehicle they’re on.
Y'know, I have NEVER thought about painting the tools to match the vehicle before, so they always stand out on mine. But then, it would be typical of us Brits to NOT paint the tools. And besides that, I'm usually doing early war stuff anyway, so the metal parts are black or gunmetal
Hmmm...
 

Jakko

Way past the mad part
SMF Supporter
Joined
Apr 28, 2018
Messages
10,890
Points
113
First Name
Jakko
Like everything if you aim for accurate models, you need to look at how it was done IRL :smiling3: I don’t know about the tools on British vehicles, though — bit looking at a few photographs should give examples quickly enough.
 

Scratchbuilder

SMF Supporter
Joined
Jul 2, 2022
Messages
1,987
Points
113
Location
Luton
First Name
Mike
If you are going to use rattle can primer, try Hycote acrylic car primer, heck of a lot cheaper and lasts a lot longer, available from Azon.
Tools would normally come with the vehicle, these would be in natural state, ie bare wooden shafts/handles, then later would get a few coats of paint which would wear with use, Tow cables would be covered with grease originally to prevent rust and depending on how often they were used depended on the wear. I saw tow cables in my regiment the went from rust to NATO Green to Bronze Green to black.
 

SteveT

SMF Supporter
Joined
Jan 18, 2024
Messages
305
Points
93
Location
Lancashire
First Name
Steve
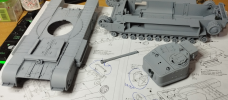
Little update. Primer just came and I'm waiting for the tracks to fully dry before priming them.
I've tried to cover the seams on the turret where the front plate joins, it looks okay so far.
unfortunately there are still seams in places on the gun barrel.

So my job tonight is to try and fix that and fit the tracks.
tank_4.png
 

Graeme C.

SMF Supporter
Joined
Apr 29, 2018
Messages
1,485
Points
113
First Name
Graeme
Just found your build Steve, it's coming along nicely.
 

SteveT

SMF Supporter
Joined
Jan 18, 2024
Messages
305
Points
93
Location
Lancashire
First Name
Steve
Thanks everyone.

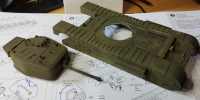
Small update. I've been spraying it a couple of coats of Olive Drab. This is only the 5th-6th time of using my airbrush so I'm still getting used to it.
also this is the first time I've used Tamiya acrylics with it. So here we are so far.

as you can see it's FAR from perfect but that's mostly down to my newbie skill level with my airbrush. (and yes it's still looking 'patchy' after two coats, that particular
problem I will put down to a mix of my low airbrush experience and the poor light level in my spraying room as it can be quite hard to see what bits I've hit and which i've not)

I'm STILL having issues with the damn barrel and one seam line that will not go, I've scraped it and sanded it several times but the thing will not vanish.
I've not given up yet, I'll have another go but good grief it's a stubborn little thing!

Quite frankly I really HATE the way I ruin my models when it gets to the painting stage, I dread it knowing it's going to ruin them and yes it does.

tank_5.png
 

Jakko

Way past the mad part
SMF Supporter
Joined
Apr 28, 2018
Messages
10,890
Points
113
First Name
Jakko
Don’t be too harsh on yourself, painting is a skill, and airbrushing even more so. The more you do it, the better you will get at it. But it will probably also help to invest in (or take from somewhere else in your house :smiling3: ) a decent lamp to put over the place where you spray your models. Poor lighting means you’ll probably mistake areas that haven’t been painted well enough for shadows or highlights, for example, but that will generally only become obvious once you’re done and view the model in better light.
 

Steve-the-Duck

SMF Supporter
Joined
Jul 3, 2020
Messages
1,214
Points
113
Location
Medway Towns
First Name
Chris
Y'know, I actually quite like the effect you've got there. It's, to me, a rather interesting shading effect rather than simple solid colour
There's honestly a lot to be said for 'happy' accidents... but it's wether YOU are happy with the outcome
Or not
 

Gern

'Stashitis' victim
SMF Supporter
Joined
May 17, 2009
Messages
9,707
Points
113
Location
Stourbridge
First Name
Dave
There's quite a few guys who use CA mixed with fine powder (baking powder, weathering pigments etc.) to fill stubborn seam lines.
 

Jakko

Way past the mad part
SMF Supporter
Joined
Apr 28, 2018
Messages
10,890
Points
113
First Name
Jakko
To be fair many, including myself, go to great lengths to get some kind of variation in their paint job rather than a solid block of colour, as it adds a bit of interest. I'd see it as a happy accident.
There is that, of course :smiling3: I, too, try to add colour variation to my models, but do it by first spraying the model a solid colour and then adding a lighter colour over it. Trying to rely on happy accidents is not going to work in the long run, I think :smiling3:
 

Dave Ward

Still Trying New Things
SMF Supporter
Joined
Apr 27, 2018
Messages
8,683
Points
113
Location
South Gloucestershire
First Name
David
Thing about operational tanks............................ they're driven on dusty roads, on wet roads, across muddy ploughed fields, across standing crops, through hedges and narrow streets and bridges, are in sunlight, pouring rain, blizzards, parked in the open, or under trees, crewed by men who are tired, and will do essential maintenance only. - and that's not thinking about any effects of action!
A tank may start Olive Drab, but after a few weeks' operations, it won't look like that!
Dave
 

Scratchbuilder

SMF Supporter
Joined
Jul 2, 2022
Messages
1,987
Points
113
Location
Luton
First Name
Mike
Steve,
Painting - you are being way too hard and critical on yourself.

Now imagine that being the full size vehicle, three crew members are set to paint the vehicle - sorry but the magic spray gun does not come along and if it did then a crew from another tank broke it messing about - so all you are left with are cans of paint, a 5 gallon can of petrol and three paint brushes plus some cotton waste. You get hold of the bucket throw in what you think is the right amount of paint, add the petrol as thinners, get a stick that was uses to grease the suspension, wipe it off with a bit of cotton waste and use it to stir the mix to a useable state. This then is poured back into the tins and each member is off to paint their little area... Slap it on, cover up dirt in corners, patches of rust and work away untill the paint in the can is used, then off for a refill from the bucket, looks a bit thick so throw in some more petrol, not knowing that your mate has just added some - and you keep going untill the job is done....

Does it all look nice and neat, not a chance, from about 50 feet ok, from 5 feet it looks like you painted it with a sweeping brush, and in the squaddies eye it is get it done either as fast as you can and get longer in the NAAFI, or longer to miss the next parade.... And if it is parade time, then the whole vehicle is gone over with cotton waste rags dipped in diesel to give the vehicle that polished look....

And I talk from experience....

So what is actually wrong with your model - nothing, it looks like it has been painted by a crew of tankies and not art students... The rescue of a poor paint job in modelling comes with the weathering and aging of the model...

20231205_100304_HDR.jpg
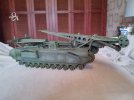
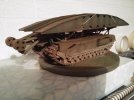
Just look at this for example, there are more greens there than on a grass field, a tot ally bu.......d up paint job, but after the weathering process....
20240116_192241_HDR.jpg
There is the difference....

So stop the criticism, be objective, yes, criticism leads to doom and gloom and a disinterest in the hobby.

Airbrush, Yes the tool that turns you from a three fingered bricklayer to Picaso in one easy lesson, and all it is, is a tool, you learn to drive a car, so you learn to use an airbrush. In my collection of airbrushes I have examples of the top brands H&S etc etc, did they make me into a better painter - NO! They all sit in the drawer in their cases or boxes glowering in envy at the cheap Chinese knock-off I have been using for months, that and an Iwata Neo, but it seems that the Chinese one is my go to airbrush.
If we were to be painting with an airbrush every day then we would fly through the paint mixes, air pressures and do the calculation on fingers and toes before any phone computer, because like a pen it is their tool....
Our practice comes from the moment we decide to paint the model, there is no limbering up, no muscle stretching, it is just mix up the paint, power up the compressor, pour the paint into the cup and a swift prayer to the god of air pressure and needle tip blocking and away we go...

Do I practice, I should and I could, but I am far too lazy, I like the building, priming and weathering - notice I missed out the painting part.

So your next job is to add a coat of satin or gloss, add your decals, seal with another coat of gloss and perform your weathering. I can only reccoment Martin Kovacs and his NIght Shift armour modelling tutorials on YT. There are other just as talented modellers, but he seems to tackle those problems we seem to come up against, so have a look and see what he does.
 

SteveT

SMF Supporter
Joined
Jan 18, 2024
Messages
305
Points
93
Location
Lancashire
First Name
Steve
Steve,
Painting - you are being way too hard and critical on yourself.

Now imagine that being the full size vehicle, three crew members are set to paint the vehicle - sorry but the magic spray gun does not come along and if it did then a crew from another tank broke it messing about - so all you are left with are cans of paint, a 5 gallon can of petrol and three paint brushes plus some cotton waste. You get hold of the bucket throw in what you think is the right amount of paint, add the petrol as thinners, get a stick that was uses to grease the suspension, wipe it off with a bit of cotton waste and use it to stir the mix to a useable state. This then is poured back into the tins and each member is off to paint their little area... Slap it on, cover up dirt in corners, patches of rust and work away untill the paint in the can is used, then off for a refill from the bucket, looks a bit thick so throw in some more petrol, not knowing that your mate has just added some - and you keep going untill the job is done....

Does it all look nice and neat, not a chance, from about 50 feet ok, from 5 feet it looks like you painted it with a sweeping brush, and in the squaddies eye it is get it done either as fast as you can and get longer in the NAAFI, or longer to miss the next parade.... And if it is parade time, then the whole vehicle is gone over with cotton waste rags dipped in diesel to give the vehicle that polished look....

And I talk from experience....

So what is actually wrong with your model - nothing, it looks like it has been painted by a crew of tankies and not art students... The rescue of a poor paint job in modelling comes with the weathering and aging of the model...

View attachment 504160
Just look at this for example, there are more greens there than on a grass field, a tot ally bu.......d up paint job, but after the weathering process....
View attachment 504161
There is the difference....

So stop the criticism, be objective, yes, criticism leads to doom and gloom and a disinterest in the hobby.

Airbrush, Yes the tool that turns you from a three fingered bricklayer to Picaso in one easy lesson, and all it is, is a tool, you learn to drive a car, so you learn to use an airbrush. In my collection of airbrushes I have examples of the top brands H&S etc etc, did they make me into a better painter - NO! They all sit in the drawer in their cases or boxes glowering in envy at the cheap Chinese knock-off I have been using for months, that and an Iwata Neo, but it seems that the Chinese one is my go to airbrush.
If we were to be painting with an airbrush every day then we would fly through the paint mixes, air pressures and do the calculation on fingers and toes before any phone computer, because like a pen it is their tool....
Our practice comes from the moment we decide to paint the model, there is no limbering up, no muscle stretching, it is just mix up the paint, power up the compressor, pour the paint into the cup and a swift prayer to the god of air pressure and needle tip blocking and away we go...

Do I practice, I should and I could, but I am far too lazy, I like the building, priming and weathering - notice I missed out the painting part.

So your next job is to add a coat of satin or gloss, add your decals, seal with another coat of gloss and perform your weathering. I can only reccoment Martin Kovacs and his NIght Shift armour modelling tutorials on YT. There are other just as talented modellers, but he seems to tackle those problems we seem to come up against, so have a look and see what he does.
It must have taken you an age to type all that up but I thank you so very much for doing so. I found that very helpful and motivating, in fact I've just printed it out. So thanks again!

This morning I tried to give it another light coat to see if it helps. once this is fully dry I'll do the coat of gloss and move on from there. I really appreciate the advice.
 

Richard48

SMF Supporter
Joined
Apr 27, 2018
Messages
1,406
Points
113
Location
Clacton on sea
First Name
Richard
Sound advice from the guys.If the seam is still visible maybe a piece of camo net made from gauze bandage would solve this fella.Just focus on doing the best you can.Enjoy the build and your hobby always.Each build will be better as you evolve your own way of doing things on your models.
Happy modelling.
Rich
 
Top