Tamiya 1/48th Scale Spitfire Mk Vb

SteveT

SMF Supporter
Joined
Jan 18, 2024
Messages
281
Points
93
Location
Lancashire
First Name
Steve
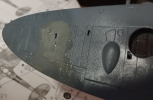
Been doing a bit more and just gave her a coat of gloss varnish. a couple of images for you.
Looking at the decals now but.. I'm a bit puzzled, looking at the instructions some of the decals you put two on in the same place!?!
surely that's going to be too thick?

s_1.pngs_2.pngs_3.png
 
  • Like
Reactions: JR

Scratchbuilder

SMF Supporter
Joined
Jul 2, 2022
Messages
1,946
Points
113
First Name
Mike
Better than my first attempt at canopy’s Steve!! Mine looked about a foot wide. See my 1/72 sea king build!!!
Now I use tape trimmed to fit on larger clear plastic and the liquid variety for smaller areas. I apply the liquid mask with a toothpick. Works a treat using that method.
It was exactly a foot, I sneaked in and measured it....
 

Scratchbuilder

SMF Supporter
Joined
Jul 2, 2022
Messages
1,946
Points
113
First Name
Mike
Tamiya give you a white background to apply first and then the roundel over the top once the white has settled/dried. I would use a spare decal to check the thickness on an old bit of painted area - not the model. If it covers ok then it should be safe to just use the coloured decals. The Yellow/Red ones are for the wing leading edge and the red is supposed to cover the outboard gun ports, there are two styles, just choose the one you need. Or you could just paint the leading edge Yellow...
HTH
Mike.
 

SteveT

SMF Supporter
Joined
Jan 18, 2024
Messages
281
Points
93
Location
Lancashire
First Name
Steve
Tamiya give you a white background to apply first and then the roundel over the top once the white has settled/dried. I would use a spare decal to check the thickness on an old bit of painted area - not the model. If it covers ok then it should be safe to just use the coloured decals. The Yellow/Red ones are for the wing leading edge and the red is supposed to cover the outboard gun ports, there are two styles, just choose the one you need. Or you could just paint the leading edge Yellow...
HTH
Mike.

Never seen two layers of decals before but fine, maybe it's a good idea. As for the yellow/red ones, I was quite happy when I spotted those because I didn't attempt
to mask the leading edge of the wings and paint that in, I figured there was a good chance of messing it up, so was quite pleased when I saw the decals for them.
I'll give those a go for sure. Thanks!
 

Tim Marlow

Little blokes aficionado
SMF Supporter
Joined
Apr 27, 2018
Messages
16,787
Points
113
Location
Somerset
First Name
Tim
Tamiya give you a white background to apply first and then the roundel over the top once the white has settled/dried. I would use a spare decal to check the thickness on an old bit of painted area - not the model. If it covers ok then it should be safe to just use the coloured decals. The Yellow/Red ones are for the wing leading edge and the red is supposed to cover the outboard gun ports, there are two styles, just choose the one you need. Or you could just paint the leading edge Yellow...
HTH
Mike.
I’ve made a few Tamiya warbirds but have never come across that before either. Is it a new thing they’ve done on their more recent kits? I’ve seen/used several sets of decals where the red part of the roundel goes on separately, but not the whole marking.
 

Scratchbuilder

SMF Supporter
Joined
Jul 2, 2022
Messages
1,946
Points
113
First Name
Mike
I’ve made a few Tamiya warbirds but have never come across that before either. Is it a new thing they’ve done on their more recent kits? I’ve seen/used several sets of decals where the red part of the roundel goes on separately, but not the whole marking.
I have only seen it on two of their kits, one was the Spitfire and the other was the F4U Corsair. And I am sure I still have a set of the Spitfire ones in my decal folder.
 

Scratchbuilder

SMF Supporter
Joined
Jul 2, 2022
Messages
1,946
Points
113
First Name
Mike
The Brewster I built a few years ago had white backgrounds for some of the decals too, as I recall mainly for the dragons on the fuselage in one of the British versions.
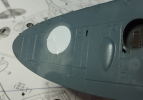
Revell issued a white background to their Stuka with the dragon down the fuselage.
And just checked and I have three sets all the same, so if you get into any problems with them let me know.
 
Last edited:

SteveT

SMF Supporter
Joined
Jan 18, 2024
Messages
281
Points
93
Location
Lancashire
First Name
Steve
Been very excited to start adding decals today but as i'm adding the first one.. I'm so annoyed. Decalfix is taking the paint off and this is after I gave it a gloss coat of varnish last night!!

New image added, I removed the decal and this is what decalfix did.. (I've just wiped it all off and resprayed that wing again) I guess I'll have to make do with no decals on it.

ffs.pngwhat.png
 
Last edited:

Easyrider5258

SMF Supporter
Joined
Dec 31, 2023
Messages
64
Points
33
Location
Cambridgeshire
First Name
Mark
I'm a new returnee as well and things have changed, I had a slight problem with Micro Sol and Set with white staining, but learnt not to react instantly and google the problem before taking any irreversible action, it was recommended that I just left my white stains and they would disappear, they did and after a matt coat was sprayed the decals now look painted on, I googled "Decalfix" and found similar answers to your problem, and of course with google you can get the solution much quicker than on here! ... it looks like you used a lot of solution? I just "paint" the solution on the decal only, don't flood it, are you using the best decal setting solution? Micro Sol / Set seem to be the way to go?
 
Last edited:

Jakko

Way past the mad part
SMF Supporter
Joined
Apr 28, 2018
Messages
10,830
Points
113
First Name
Jakko
I think I … would not use Decalfix at all, if it does that to the paint on the model :sad: I’ve never had any problems with Micro Set and Sol, and would definitely recommend them instead of this.
 

Waspie

SMF Supporter
Joined
Mar 13, 2023
Messages
2,497
Points
113
Location
Portland - Dorset
First Name
Doug
It was exactly a foot, I sneaked in and measured it....
My congratulation at being the only human to get past the integrated security systems!!! Well the pup!!! Now do you mind returning my secret stash of Crunchies - they appear to have gone adrift - or did I eat them????
 
  • Haha
Reactions: JR

Waspie

SMF Supporter
Joined
Mar 13, 2023
Messages
2,497
Points
113
Location
Portland - Dorset
First Name
Doug
Mmmm, re the decals. I haven't used anything other than warm water and cotton buds to affix decals. I am yet to move to the Sol and Set method! YET!!!!!
 
  • Like
Reactions: JR

SteveT

SMF Supporter
Joined
Jan 18, 2024
Messages
281
Points
93
Location
Lancashire
First Name
Steve
Well, last night I repainted that wing and then gave the whole thing two coats of humbrol acrylic gloss varnish. left it all night to dry and
just now I tried applying a decal using just water, no decalfix and.. it took the damn paint off my wing again!

I give up

ffsno.png
 
Last edited:

Scratchbuilder

SMF Supporter
Joined
Jul 2, 2022
Messages
1,946
Points
113
First Name
Mike
My congratulation at being the only human to get past the integrated security systems!!! Well the pup!!! Now do you mind returning my secret stash of Crunchies - they appear to have gone adrift - or did I eat them????
I did not touch your crunchies, I remember leaving the wrappers next to your bed... ooops....
 

Scratchbuilder

SMF Supporter
Joined
Jul 2, 2022
Messages
1,946
Points
113
First Name
Mike
Well, last night I repainted that wing and then gave the whole thing two coats of humbrol acrylic gloss varnish. left it all night to dry and
just now I tried applying a decal using just water, no decalfix and.. it took the damn paint off my wing again!

I give up

View attachment 506032
Problem solved.... You are using acrylic varnish. The decal solution will react to the acrylic varnish, it is best to apply a lacquer gloss varnish eg Mr Color, Tamiya.... The decal solution will in some cases act like a paint remover as will the warm water.
You have done nothing wrong it was the method that was wrong, I suffered the same myself, but unlike you I had to repaint the whole thing as the solution ran amok...
Do not give up - you are in a learning area, I suffered the same problems a decade ago when I came back to modelling and my mistakes were about £100 a time with cast resin armoured vehicles and using the wrong adhesive which melted the resin - and as you can see I am still here and still to this day learning, I have yet to master buildings from foam board despite watching videos on YT, and lord help me when I finally start to tackle 3D printing.....
 

Tim Marlow

Little blokes aficionado
SMF Supporter
Joined
Apr 27, 2018
Messages
16,787
Points
113
Location
Somerset
First Name
Tim
Sound advice from Mike, Dont give up. With your perseverance and our combined hints and tips we‘ll crack this :thumb2: It can be a maddening hobby at times though, and really shouldn’t be this hard :crying:

This is not something I’ve specifically come across before. On the other hand, I’ve had paint come loose under masking tape when I’ve sprayed from too far away, and I’ve had primer come off under some colours and not others on the same build. This sort of thing happens to all of us, and the best you can do is learn how to fix it.

Two questions…..and I apologise if you’ve already mentioned this in your build log.

1. Did the paint strip right back to plastic or was it just to the primer layer?
2. Did you clean the model before priming?

Question 1 tells us where the issue is, and question 2 lets us know if there was any foreign material on the surface that stopped the paint sticking properly. Acrylic paint really doesn’t adhere well to a greasy surface, even finger oils from handling can sometimes give issues. As we all know, oil and water don’t mix, so acrylic paint with its water solvent will just sit on top of the surface oil. Laquer varnish, as mentioned by Mike, doesn’t suffer from this as the solvents in the paint will dissolve the oils on the surface allowing the paint to bond properly.

As to the decal solution, which one are you using? It does sound a bit fierce.
 

SteveT

SMF Supporter
Joined
Jan 18, 2024
Messages
281
Points
93
Location
Lancashire
First Name
Steve
I see.. Well I guess I'm stumped then. I cannot use laquer based varnish as I have no ventilation whatsoever and I know that stuff pongs!

1: it went back to the primer I believe (although that is the same colour as the plastic so I could be wrong)
2: Yes, I cleaned it with soap and water

Decal solution was humbrol decalfix
 

SteveT

SMF Supporter
Joined
Jan 18, 2024
Messages
281
Points
93
Location
Lancashire
First Name
Steve
Problem solved.... You are using acrylic varnish. The decal solution will react to the acrylic varnish, it is best to apply a lacquer gloss varnish eg Mr Color, Tamiya.... The decal solution will in some cases act like a paint remover as will the warm water.
You have done nothing wrong it was the method that was wrong, I suffered the same myself, but unlike you I had to repaint the whole thing as the solution ran amok...
Do not give up - you are in a learning area, I suffered the same problems a decade ago when I came back to modelling and my mistakes were about £100 a time with cast resin armoured vehicles and using the wrong adhesive which melted the resin - and as you can see I am still here and still to this day learning, I have yet to master buildings from foam board despite watching videos on YT, and lord help me when I finally start to tackle 3D printing.....

£100 and it melted it? oh my word I would have been devastated!
 

Jakko

Way past the mad part
SMF Supporter
Joined
Apr 28, 2018
Messages
10,830
Points
113
First Name
Jakko
Which kind of paint did you use on the model, anyway? I ask because I’ve never had model paint run like that from plain water going over it.
 
Top