The Border Models 1/32 Lancaster BI/III

BarryW

SMF Supporter
Joined
Jul 23, 2011
Messages
5,040
Points
113
Location
Dover
First Name
Barry
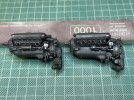
I have completed my little ‘side build’ of the two Merlin’s, a Packard and a Rolls Royce

For those who dont know the B1 Lancaster had Rolls Royce Merlin’s while the BIII Lancaster had Packard built Merlin’s. Given this kit includes both Merlin’s it occurred to me that it would be nice to see how they compare specially as I will build the aircraft ‘buttoned up’.

Some initial thoughts on this model.

1/ I do like the Border plastic. It is soft, but not ‘Airfix soft’, it is a good quality plastic that is easy to sand and work with. It holds fine detail better than that horrible Airfix stuff that is prone to warping.
2/ The instructions are awful. No colour call-outs at all. There are just some colour photos of the interior and exterior, and that’s it. But worse than that they leave some ambiguity over how some smaller parts actually fit. You also cannot easily identify parts by comparing the part to the drawing, so be careful if, like me, you remove parts from the sprue in batches.
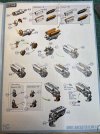
image.jpg
3/ As for the Merlin’s themselves. It is worth comparing them to the excellent Tamiya 1/32 Merlin’s in the Spitfire, Mustang and Mosquito. I have built eight of the Tamiya offerings and I would say that, marginally, the Border ones are slightly better detailed. That said, the Border Merlin’s are, I believe, slightly more under scale than the Tamiya. Remember that all internal details of models needs to be under scale because of the limitations of plastic in order for the external dimensions to be in scale. That even applies to 1/32 scale and is more pronounced in smaller scales.

Here are the two Merlin’s.
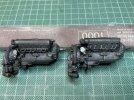
IMG_7398.jpeg
IMG_7395.jpeg
The Rolls Royce is on the left.
 

Neil Merryweather

SMF Supporter
Joined
Dec 29, 2018
Messages
4,424
Points
113
Location
London
First Name
Neil
that was a lucky break, discovering the ropey instructions so early on in the build on something that didn't matter too much!
 

Jakko

Way past the mad part
SMF Supporter
Joined
Apr 28, 2018
Messages
10,801
Points
113
First Name
Jakko
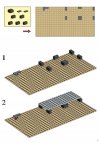
That style of instructions is weird … They look really good, but as you try to follow them, it’s much harder than exploded-view drawings that show which parts go where. Here you essentially have a bunch of drawings showing the assembly steps in order, but it’s left to you to figure out which parts are actually added, and how. It puts me in mind of Lego instructions:

Lego instructions.jpeg

… with the difference that Lego’s are actually clearer :smiling3:
 

Jim R

SMF Supporter
Joined
Apr 27, 2018
Messages
13,729
Points
113
Location
Shropshire
First Name
Jim
The two engines look great. I agree the instructions are not as clear as they could be. I imagine you would have to remove parts well ahead of time to check that positioning an earlier part does not compromise fitting a later part.
 

Gern

'Stashitis' victim
SMF Supporter
Joined
May 17, 2009
Messages
9,701
Points
113
Location
Stourbridge
First Name
Dave
So how many engines are included in the kit? Is it four of each or just a couple to enable you to show an engine with the panels off?
 

Ian M

Administrator
Staff member
Administrator
Moderator
SMF Supporter
Joined
Dec 14, 2008
Messages
19,721
Points
113
Location
Falster, Denmark
First Name
Ian
Those would be good in a spot the difference contest. There is not that many obvious differences than the cylinder blocks...
 

adt70hk

I know its a bit sad but I like quickbuild kits!!!
SMF Supporter
Joined
Sep 4, 2019
Messages
9,498
Points
113
First Name
Andrew
Those engines are nicely done Barry.
 

BarryW

SMF Supporter
Joined
Jul 23, 2011
Messages
5,040
Points
113
Location
Dover
First Name
Barry
I have managed an earlier start than expected, my lady decided to go for a swim in the sea (yes, the sea in December and has been doing so almost daily), she is mad, I know, but it leaves me free to get on the bench.

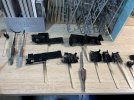
I have built up some of the cockpit sub-assemblies to the stage where I need to paint them.
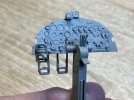
I am not using aftermarket instrument panels, I am using the excellent kit one with supplied decals.
IMG_7406.jpeg

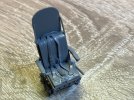
There are two seat options, one with moulded in seatbelts or one without on which you can use with seatbelts (supplied). Given how nicely the seatbelts are rendered I decided on the former and I do believe they will paint up well.
IMG_7407.jpeg
The floor section with various pipes and controls
IMG_7408.jpeg
The control column.
IMG_7409.jpeg

I will spray these soon, detail paint/decal and weather then and will post as I go along.

The fit is good and moulding quality superb so far.
 

Jakko

Way past the mad part
SMF Supporter
Joined
Apr 28, 2018
Messages
10,801
Points
113
First Name
Jakko
a swim in the sea (yes, the sea in December and has been doing so almost daily), she is mad, I know
Better to swim in the sea in December than in May — now it’s still warm from the summer, whereas by the time the weather gets warm again, the sea will be very cold, but your average seaside tourist won’t know that :smiling3:
 

Waspie

SMF Supporter
Joined
Mar 13, 2023
Messages
2,476
Points
113
Location
Portland - Dorset
First Name
Doug
Better to swim in the sea in December than in May — now it’s still warm from the summer, whereas by the time the weather gets warm again, the sea will be very cold, but your average seaside tourist won’t know that :smiling3:
Still getting the effects from the Gulf Stream and very little cooling. Takes the sea months to dramatically change temps and then only a few degrees. Usually only the surface layers as well.
 

BarryW

SMF Supporter
Joined
Jul 23, 2011
Messages
5,040
Points
113
Location
Dover
First Name
Barry
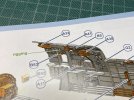
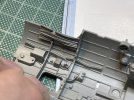
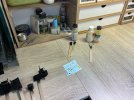
More work on internal subs before I get the airbrush out.

Brilliant detail, but again the instructions leave a lot to be desired.
IMG_7410.jpeg
Part B53 is a light shade that needs to be attached by ‘rigging’ and exactly where it needs to be located is not made clear. I worked out where I thought, drilled a hole and fixed some fishing line to which I will superglue the lampshade after painting.
IMG_7411.jpeg
Here is the lampshade along with an angle poise lamp ready to be painted.
IMG_7415.jpeg

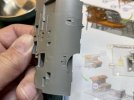
Here is a view of the internal detail with the fishing line dangling.
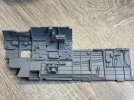
IMG_7412.jpeg

An over view of the internal detial
IMG_7416.jpeg
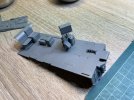
Another sub done, the floor with other subs attached ready for painting.
IMG_7419.jpeg
 

BarryW

SMF Supporter
Joined
Jul 23, 2011
Messages
5,040
Points
113
Location
Dover
First Name
Barry
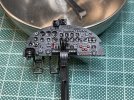
I have been working on cockpit subs and finished the I.p.

I had decided to use the kit individual instrument decals and not get an am part. That was a mistake because although the decals are commendably thin with no carrier film, they curl and don’t hold together well. In the end I only managed to position about a third of the decals and had to resort to some white paint and a cocktail stick to make marks loosely resembling instruments. I then used some enamel varnish to replicate the glass. In the end they are not bad at all and perfectly fine looked at without a magnifier and will look really good through the canopy. I would suggest a Quinta 3D decal set to anyone else building this kit instead though.

IMG_7465.jpeg

More cockpit parts ready for the airbrush.
IMG_7466.jpeg
IMG_7467.jpeg

I will show close ups as I progress.
 

tr1ckey66

SMF Supporter
Joined
Mar 6, 2009
Messages
3,686
Points
113
First Name
Paul
Looking great Barry so far. Having this kit myself, I understand just what an undertaking this build is. And, from the build reviews have read, this is not a kit for the feint of heart. That’s said, if anyone is going to make a showstopper from this it’s you.
Best of luck with rest of the build I’ll be sure to drop by and take notes.
All the best
Paul
 

BarryW

SMF Supporter
Joined
Jul 23, 2011
Messages
5,040
Points
113
Location
Dover
First Name
Barry
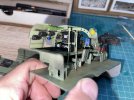
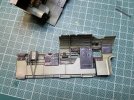
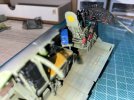
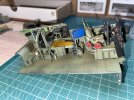
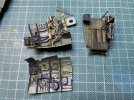
I have had a bit of a slow period, three or four days when my back was too bad for the bench and a few days more when I could only do up to half an hour a day. It has also been slow going detail painting the cockpit and weathering. . .

The decals continue to be utterly useless. I only managed to use a few bits here and there but mostly I had to use paint.

IMG_7542.jpeg
IMG_7540.jpeg
IMG_7539.jpeg
IMG_7538.jpeg

Bomb aimers position
IMG_7541.jpeg
 

tr1ckey66

SMF Supporter
Joined
Mar 6, 2009
Messages
3,686
Points
113
First Name
Paul
Simply stunning Barry.
The interior is looking very detailed and busy. Lovely paintwork, subtle weathering - excellent as always. You’re making me want to start mine!
ATB
Paul
 
Top