You are using an out of date browser. It may not display this or other websites correctly.
You should upgrade or use an alternative browser.
You should upgrade or use an alternative browser.
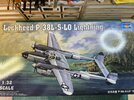
Trumpeter 1/32 Lightning P-38L-5-LO
- Thread starter BarryW
- Start date
Andy the Sheep
SMF Supporter
Pulling a chair, Barry.
Waspie
SMF Supporter
I love twin boomers so I’m in.
Magic carpet Mk7 being fed coordinates right now!!
Magic carpet Mk7 being fed coordinates right now!!
Jim R
SMF Supporter
Ernie
SMF Supporter
Great start, this is going to be great to follow!
A quick update.
I am currently building up the twin booms. Fit is OK, not Tamiya or Zoukei Mura standard but quite acceptable.
I had to use Mr Surfacer 500 all along the seam. Tomorrow will be a day of sanding and scribing.
I don’t know if it’s my phone camera or the system but photos don’t seem to be loading to the site properly. So sorry, none showing. I will try again tomorrow.
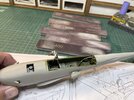
Photos are currently very hit and miss, one has uploaded, the others did not. Tried it several times and yet it still happens. I have no idea what’s happening.
Above is the only one that loaded. I have sanded the seams working through different grades of sanding sponge starting at 400 grit through 600,800,1000,1500,2500. Good surface preparation is particularly important as this will be a natural metal finish. The seams are not done yet. By holding the seam to the light I can still see imperfections. I will be using Mr Dissolved Putty now in areas that need additional treatment.
I will publish whatever photos that actually do upload!
After sanding the Mr Dissolved Putty I did another check by holding up the seams to the light. In spots, here and there, are faint traces of the seam so this time I used black Ammo slow dry c.a. This will be the final seam treatment, the next time will be after a black primer is applied when I expect to find additional treatment needed. As mentioned this will be a NMF so surface prep is even more essential than normal.
I will be engraving panel lines and rivets next.
I have tried taking several photos, all using the normal jpg I have always used, only one of these uploaded.
As below.
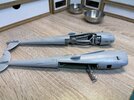
I really have no idea why some load and some don’t. There does not seem to be a pattern and I have tried a whole variety of things but it’s is very random.
I will be engraving panel lines and rivets next.
I have tried taking several photos, all using the normal jpg I have always used, only one of these uploaded.
As below.

I really have no idea why some load and some don’t. There does not seem to be a pattern and I have tried a whole variety of things but it’s is very random.
Waspie
SMF Supporter
I did have a prob with images loading!! Mine was down to size of the pic. (Mb’s).After sanding the Mr Dissolved Putty I did another check by holding up the seams to the light. In spots, here and there, are faint traces of the seam so this time I used black Ammo slow dry c.a. This will be the final seam treatment, the next time will be after a black primer is applied when I expect to find additional treatment needed. As mentioned this will be a NMF so surface prep is even more essential than normal.
I will be engraving panel lines and rivets next.
I have tried taking several photos, all using the normal jpg I have always used, only one of these uploaded.
As below.
View attachment 484558
I really have no idea why some load and some don’t. There does not seem to be a pattern and I have tried a whole variety of things but it’s is very random.
I had to copy the image to the desktop, open in ‘Preview’, resize image which reduced a 4mb image down to under 1mb. ( I use a Mac so it would be different on another OS.
Then!! Upload the new resized image to this site!!
Hope you get it sorted.
Doug
Thanks DougI did have a prob with images loading!! Mine was down to size of the pic. (Mb’s).
I had to copy the image to the desktop, open in ‘Preview’, resize image which reduced a 4mb image down to under 1mb. ( I use a Mac so it would be different on another OS.
Then!! Upload the new resized image to this site!!
Hope you get it sorted.
Doug
In my case all was well until yesterday. I have not changed any settings at all. I have played around this morning with settings without luck so far. I will keep trying.
Excellent work as ever Barry. Looking very, very nice indeed.
I have to admit that the p-38 is sadly lacking from my stash and I don’t really know why. I do like the look of the aircraft especially in a natural metal finish but I simply don’t have a single kit of the type. The Trumpy kit looks pretty good to me (looking at the shots). But then generally I think their kits do build pretty well. Are there any inaccuracies with the kit that you know of? I think I need at least 1 Lightning in the stash!
Paul
Jim R
SMF Supporter
Sorry about the photo woes Barry. Lightning coming on nicely. You attention to the seams will pay off at the painting stages I'm sure.
- Joined
- Apr 28, 2018
- Messages
- 10,801
- Points
- 113
- First Name
- Jakko
Be careful to always either copy the file you’re going to resize, or open the original and click the File menu and then Duplicate (or press ⇧⌘S) before resizing on a Mac! This so you don’t accidentally reduce the original in size. You can most likely get the original size back if you have a Time Machine back-up (or by undoing before you close the Preview window with the image), but it’s far safer to work on a duplicate than having to go do that.I did have a prob with images loading!! Mine was down to size of the pic. (Mb’s).
I had to copy the image to the desktop, open in ‘Preview’, resize image which reduced a 4mb image down to under 1mb. ( I use a Mac so it would be different on another OS. Then!! Upload the new resized image to this site!!
OTOH, when uploading from at least an iPhone or iPad, you can resize on the fly: select the photos you want to upload, and then at the bottom of the screen in which you select them, you can tap on something (I forget what it says, I don’t have my iPad here) that lets you choose whether to upload the photos at their original size, or as small, medium or large. “Large” works well here (and on most other modelling forums), as it sends photos of 1280×960 pixels, which is slightly bigger than what the forum resizes them to (1200 pixels along the longest side) and cuts about 75–90% off the file size. This not only saves upload time for you, but bandwidth for John as wel

Waspie
SMF Supporter
Yup, as Jakko says. (Running a Time Machine backup as I type!!). I have my pics saved in various places including yee 'Cloud'. Which appears to be the saviour of all things. (Until the internet goes down!!)Be careful to always either copy the file you’re going to resize, or open the original and click the File menu and then Duplicate (or press ⇧⌘S) before resizing on a Mac! This so you don’t accidentally reduce the original in size. You can most likely get the original size back if you have a Time Machine back-up (or by undoing before you close the Preview window with the image), but it’s far safer to work on a duplicate than having to go do that.
OTOH, when uploading from at least an iPhone or iPad, you can resize on the fly: select the photos you want to upload, and then at the bottom of the screen in which you select them, you can tap on something (I forget what it says, I don’t have my iPad here) that lets you choose whether to upload the photos at their original size, or as small, medium or large. “Large” works well here (and on most other modelling forums), as it sends photos of 1280×960 pixels, which is slightly bigger than what the forum resizes them to (1200 pixels along the longest side) and cuts about 75–90% off the file size. This not only saves upload time for you, but bandwidth for John as wel
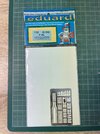
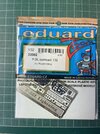
I opened the Eduard photo etch instrument panel set. I did have a go, at least to see if I could use some of it to get a better ip than the kit offers. But, sadly, for me it’s a total waste of time, totally impractical as it requires lots of bending and lots of small etch that need gluing on the edge. With the bending, bits often break off or you cannot get ‘clean’ bends even with my two bending tools. I even tried to work out how I could combine it, or some of it, with the kit parts, ignoring all the instructions, but no, bodging simply won’t work. I truly hate etch sets like this one, a complete waste of money. Unfortunately I could not find a 3D decal or more practical aftermarket ip set so I will be left with the kit one.
This is how I left the utterly useless Eduard
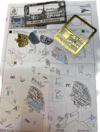
This is how I left the utterly useless Eduard

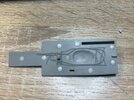
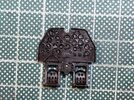
This is the kit ip. A clear plastic part that needs painting black, a piece of film that I have cut to fit and a back panel that will need painting white so, hopefully, the dials will show through. It is a pretty pathetic thing compared to what you can do with other 32 slaw kits and/or 3D Decals.
Well this is the before photo. I will show you what I end up with after.
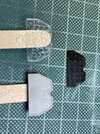
Well this is the before photo. I will show you what I end up with after.


