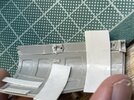
Trumpeter 1/32 Lightning P-38L-5-LO

Jim R

SMF Supporter
Joined
Apr 27, 2018
Messages
13,786
Points
113
Location
Shropshire
First Name
Jim
That IP doesn't look bad at all Barry. Shame about the Eduard set. I have found similar problems with coloured PE seat belts. The instructions say bend but then the coloured layer just cracks off.
 

BarryW

SMF Supporter
Joined
Jul 23, 2011
Messages
5,043
Points
113
Location
Dover
First Name
Barry
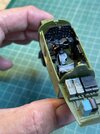
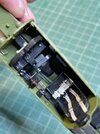
My bench time has been a little limited over the last week so progress is slow. That said the cockpit is largely done, some elements will be needed to be done late in the build.

A couple of pics.
IMG_6790.jpeg
IMG_6789.jpeg

I really do recommend avoiding the Eduard sets for this kit, both the seatbelts and ip. These are the old, horrible type that are a real pain, I managed to get the seatbelts used but, as mentioned, the ip was binned and the kit part used.

I would suggest getting a more generic USAAF seatbelt set, perhaps Eduard’s ‘steel type’ or a HGW set, if you have the ability, unlike me, to make them up.
 

BarryW

SMF Supporter
Joined
Jul 23, 2011
Messages
5,043
Points
113
Location
Dover
First Name
Barry
Fitting the cockpit into the two fuselage halves is a little complex but with some dry fitting to work out how to best fit it, it goes in well with no fit issues whatsoever. Lots of clamping is needed.

IMG_6795.jpeg
IMG_6794.jpeg
 

minitnkr

Rabble & escape committee member
SMF Supporter
Joined
Apr 27, 2018
Messages
6,734
Points
113
Location
Dayton, OH
First Name
Paul
Can never have too many clamps.
 

Ian M

Administrator
Staff member
Administrator
Moderator
SMF Supporter
Joined
Dec 14, 2008
Messages
19,788
Points
113
Location
Falster, Denmark
First Name
Ian
Looking good Barry.
The upload issue: has you camera software updated. I find that photos to the forum are a bit squiffy after an update and some of the setting need fine tuning.
 

BarryW

SMF Supporter
Joined
Jul 23, 2011
Messages
5,043
Points
113
Location
Dover
First Name
Barry
More progress.
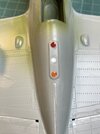
Firstly I paints three coloured lights, red, green and amber. The green one pinged off and I have no idea where it went, so I fixed the other two and used Micro Kristal Klear on the middle one which will dry clear. My plan is that once the model is painted, to paint the middle one green and when dry to use more Kristal Klear to make a lens on top.
IMG_6801.jpeg

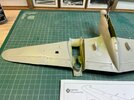
As you can see I have attached the flaps and ailerons, I ignored the daft metal hinges Trumpeter supplied and just cemented them into place.
IMG_6802.jpeg

One of the expected issues is to get the twin booms on straight and properly aligned. I decided to cement one in place, checking both I found that one is a better fit and decided to use that one. Once that boom is fully dried and solid, I will look at how best to approach the other and the tail.
IMG_6803.jpeg
 

adt70hk

I know its a bit sad but I like quickbuild kits!!!
SMF Supporter
Joined
Sep 4, 2019
Messages
9,517
Points
113
First Name
Andrew
Coming on very nicely Barry.
 

BarryW

SMF Supporter
Joined
Jul 23, 2011
Messages
5,043
Points
113
Location
Dover
First Name
Barry
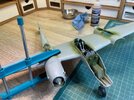
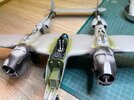
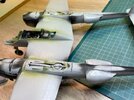
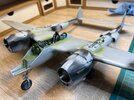
I have not been posting as frequently on this for two reasons, less bench time and it’s slow going cleaning up seams as I go. While the twin boom structure is reasonably strong I cannot sand too rigorously as it creaks and it would be easy to break.

So the main airframe is complete except for the nose gun bay. As you can see a fair bit of weight will need to be added.

I sprayed the seams with primer
to help with the surface prep.
IMG_6809.jpeg
IMG_6810.jpeg
IMG_6811.jpeg

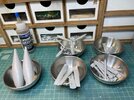
I have also been working on a lot of sub assemblies.
IMG_6812.jpeg

Steady progress if not particularly fast.
 

Andy T

SMF Supporter
Joined
Apr 26, 2021
Messages
2,021
Points
113
Location
Sheffield
First Name
Andy
When I built the 1/48 Tamiya I thought they'd gone overboard with the supplied weights but it turned out to be only just enough. It can still be made to see saw.
 

Jakko

Way past the mad part
SMF Supporter
Joined
Apr 28, 2018
Messages
10,891
Points
113
First Name
Jakko
One advantage I can see here is that you can work out how much weight you need easily enough before having to pack it into the nose.
 

BarryW

SMF Supporter
Joined
Jul 23, 2011
Messages
5,043
Points
113
Location
Dover
First Name
Barry
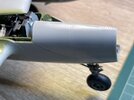
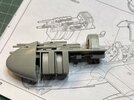
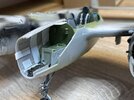
I have started work on the gun bay and nose section. It’s times like this that I am so glad I like to have the panels closed. Dry fitting shows that the gun bay and panels won’t fit at all so I have had to cut parts right back.

At least the panels themselves fit, as long as the internal detail is not there.
IMG_6822.jpeg
That’s a good starting point.

Here is the gun bay dry fitted to the nose.
IMG_6825.jpeg

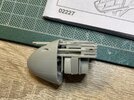
I cut it back to this, still a dry fit and the main cannon is not in place as I will need to slide that in later.
IMG_6826.jpeg
I may have to trim more off later when I fit the nose.

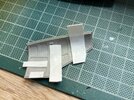
The panels need some plastic sheet to make sure they have a strong join.
IMG_6827.jpeg
The central ‘spine’ could then be fitted, again it needed a bit of trimming with a bulkhead to the rear having to be cut off. That bit of bulkhead prevented the spine from fitting to the fuselage in the right position.
IMG_6828.jpeg

I am leaving that to properly dry before the next stage
 

BarryW

SMF Supporter
Joined
Jul 23, 2011
Messages
5,043
Points
113
Location
Dover
First Name
Barry
A quick one. I measured our 60grams of liquid gravity into a shot glass and balanced that on the nose!
IMG_6829.jpeg
Perfect. I now know how much I need to use. A bit too much to fit into the nose itself (as Trumpy suggest) but it clearly works a bit further back.
 

Tim Marlow

Little blokes aficionado
SMF Supporter
Joined
Apr 27, 2018
Messages
16,831
Points
113
Location
Somerset
First Name
Tim
A quick one. I measured our 60grams of liquid gravity into a shot glass and balanced that on the nose!
View attachment 486435
Perfect. I now know how much I need to use. A bit too much to fit into the nose itself (as Trumpy suggest) but it clearly works a bit further back.
That’s coming on well Barry, looks excellent so far.

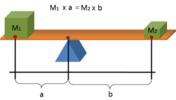
Just remember that as you move the weight back towards the pivot point the turning moment is decreased and you need more weight to generate the same effect Barry. That shot glass is right on the extremity so is exerting the most it can.
It works like this….
012B2B03-FA0B-452A-9393-BEC4997901AE.png
Don’t want to tell you how to suck eggs, but also did want you to zip it all up and find she won’t balance, especially after all this great work you’ve put in.
 

BarryW

SMF Supporter
Joined
Jul 23, 2011
Messages
5,043
Points
113
Location
Dover
First Name
Barry
That’s coming on well Barry, looks excellent so far.

Just remember that as you move the weight back towards the pivot point the turning moment is decreased and you need more weight to generate the same effect Barry. That shot glass is right on the extremity so is exerting the most it can.
It works like this….
View attachment 486436
Don’t want to tell you how to suck eggs, but also did want you to zip it all up and find she won’t balance, especially after all this great work you’ve put in.
Yes Tim, thanks. I am aware. I positioned it there because the instructions say 60gms in the nose cone but there is not really enough room, hence trying it a little further back, where I did.

IMG_6831.jpeg
I have started fitting some ballast and also attached the panel. As you can see it needs those bits of plastic card. I need to fit a bit of a bulkhead to keep the next lot of ballast at that forward point.
 

adt70hk

I know its a bit sad but I like quickbuild kits!!!
SMF Supporter
Joined
Sep 4, 2019
Messages
9,517
Points
113
First Name
Andrew
Coming on nicely Barry.

That liquid gravity looks just like the very smallest lead shot I used for fishing not that I do much... Last time I checked shot size 8 and below could still be lead and I still have some in the fishing box.

Will be interesting to work out which is cheaper....a premium modelling product or cheap lead shot....

ATB

Andrew
 

scottie3158

SMF Supporter
Joined
Apr 27, 2018
Messages
12,751
Points
113
Location
Spalding
First Name
Paul
Barry,
That was a serious amount of internal detail that you had to remove to get everything to fit.
 

Jim R

SMF Supporter
Joined
Apr 27, 2018
Messages
13,786
Points
113
Location
Shropshire
First Name
Jim
There are certainly some serious fit issues to deal with. As you say panels could not be modelled open which is a shame.
Having said that you're doing your usual excellent build.
 

Tim Marlow

Little blokes aficionado
SMF Supporter
Joined
Apr 27, 2018
Messages
16,831
Points
113
Location
Somerset
First Name
Tim
Coming on nicely Barry.

That liquid gravity looks just like the very smallest lead shot I used for fishing not that I do much... Last time I checked shot size 8 and below could still be lead and I still have some in the fishing box.

Will be interesting to work out which is cheaper....a premium modelling product or cheap lead shot....

ATB

Andrew
If you do use genuine lead shot Andrew don’t glue it in with PVA. If you do it turns into Lead acetate, which expands and can crack joints over time. Used to be a common issue amongst loco builders back in the nineties.
 

adt70hk

I know its a bit sad but I like quickbuild kits!!!
SMF Supporter
Joined
Sep 4, 2019
Messages
9,517
Points
113
First Name
Andrew
If you do use genuine lead shot Andrew don’t glue it in with PVA. If you do it turns into Lead acetate, which expands and can crack joints over time. Used to be a common issue amongst loco builders back in the nineties.

Duly noted....is CA ok? Had planned to use that.
 
Top