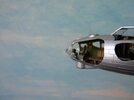
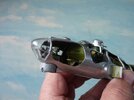
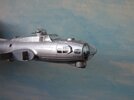
Revell 1/72 B17-G Flying Fortress.

spanner570

SALAD DODGER
SMF Supporter
Joined
May 26, 2009
Messages
13,052
Points
113
First Name
Ron
Sorry Richard, no figures. At over £33 for just 8 crewmen, I should cocoa!

I'm having enough of a headache just trying to build and show the 'empty' interior.

As you write "...but it will still look okay without" I hope it will still look o.k. too! ;)

Ron
 

spanner570

SALAD DODGER
SMF Supporter
Joined
May 26, 2009
Messages
13,052
Points
113
First Name
Ron
Thanks Andrew.
I say Steve, I thought this stuff about saws was put to rest. I used all these 'things' almost every day for the almost 60 yrs. during my time as a joiner/ carpenter - to this present day....... Master?

Anna Eyema Tryina Tafoorgetta.
 
Last edited:

yak face

Wossupwidee?
Staff member
Moderator
SMF Supporter
Joined
Jun 13, 2009
Messages
12,443
Points
113
Location
sheffield
First Name
tony
Just had a good catch up mate , thought I ‘d commented on this one but no. Absolutely love this ron, a superb way of showing off all the otherwise hidden detail . Reminds me of the middle pages of the old Tamiya catalogues , where builds from Francois Verlinden used to feature . He did a few cut out jobbies like this , tanks mainly , he used to paint the edge of the cut out red . Keep up the great work its going to look brilliant . Hope youre back down from the mountain now and drying off , cheers tony
 

spanner570

SALAD DODGER
SMF Supporter
Joined
May 26, 2009
Messages
13,052
Points
113
First Name
Ron
Just had a good catch up mate , thought I ‘d commented on this one but no. Absolutely love this ron, a superb way of showing off all the otherwise hidden detail . Reminds me of the middle pages of the old Tamiya catalogues , where builds from Francois Verlinden used to feature . He did a few cut out jobbies like this , tanks mainly , he used to paint the edge of the cut out red . Keep up the great work its going to look brilliant . Hope youre back down from the mountain now and drying off , cheers tony
Cheers mucker. 4.39am!!! ? :astonished:

Thanks for the nice comments. I had considered the red option. I actually painted one area edges red, but it looked kind'a brash and distracted the eye a tad, so I'm going for a more neutral colour......

Re. last night. Luckily for me it was throwing it down, so the climbing expedition was cancelled. So I'm afraid I just had to stay put on a big sofa and have a gargle or two. :upside:

All the best to you and Helen for 2023.

Ron
 
Last edited:

yak face

Wossupwidee?
Staff member
Moderator
SMF Supporter
Joined
Jun 13, 2009
Messages
12,443
Points
113
Location
sheffield
First Name
tony
Re. last night. Luckily for me it was throwing it down, so the climbing expedition was cancelled. So I'm afraid I just had to stay put in a big sofa and have a gargle. :upside:
I bet you were gutted :rolling:! As for the 4.39 , helen was working at 5 so we didnt do anything last night , early to bed and up early today . All the best to you and justine , cheers tony
 

spanner570

SALAD DODGER
SMF Supporter
Joined
May 26, 2009
Messages
13,052
Points
113
First Name
Ron
Thank you for your kind words and understanding, chaps.... ;)

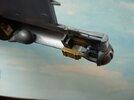
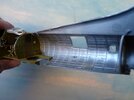
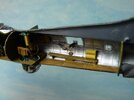
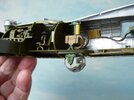
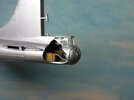
Here's the tail gunner's position all ready to be 'Exposed' As I wrote earlier, all the M.G. barrels are glued on last - into small holes on the outside.

P1350587.JPG

Cheers.
Ron
 

spanner570

SALAD DODGER
SMF Supporter
Joined
May 26, 2009
Messages
13,052
Points
113
First Name
Ron
I've just finished the waist gunner position and fixed the ball turret in place. This offers the best chance of some scratchery as there is very little detail in this area.

Before....
P1350508.JPG


I made up the walkways etc. using plastic card. The long thin strip of board is a rudimentary seat which also acts as a platform to stand on when firing the weapon downwards. The other 'things' are from sprue and my bits bag.
P1350583.JPG


The ball turret in place. The life expectancy in these things was very short!... as was the gunner's stature.
P1350581.JPG


Nearly there and almost ready for the portside fuselage.
P1350547.JPG

Cheers.
Ron
 
Last edited:

spanner570

SALAD DODGER
SMF Supporter
Joined
May 26, 2009
Messages
13,052
Points
113
First Name
Ron
Thanks to Paul, Jim and Paul for your positive comments. :thumb2:


I've chopped up the cockpit frame. Once fitted I'll tidy it all up.
P1350592.JPG


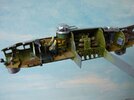
Port side fuselage finally fitted.
P1350593.JPG


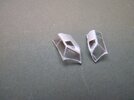
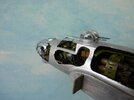
Half cockpit canopy fixed and the big clear nose thingy too.
P1350596.JPG

Not really noticeable, but to add a bit more interest, I've scratched some extra bits to this area.
P1350597.JPG

P1350627.JPG


The good side. I'll leave the full result of the butchery 'till a bit later.
P1350598.JPG

Next up I'll tackle the main wings and engines. Plenty of scope for a bit of fun......

Ron
 
Last edited:

spanner570

SALAD DODGER
SMF Supporter
Joined
May 26, 2009
Messages
13,052
Points
113
First Name
Ron
Jim. There is no detail in between the wing halves, just the normal empty space. So no need to open up them up - Thank goodness!

Andy, thanks for the compliment and good to have you along. :thumb2:

Ron
 

JR

Member of the Rabble and Pyromania Consultant
SMF Supporter
Joined
May 26, 2015
Messages
17,375
Points
113
Location
lincs
First Name
John
Not bad at all for an old wood butcher 570 , remember stitch drilling and a rasp ,followed by much sanding , by far the best thing before modern electric things !

Cheers.
Barry Bucknell.
 
Top