Sounds like a guilty partythey never let you forget your act of transgression
You are using an out of date browser. It may not display this or other websites correctly.
You should upgrade or use an alternative browser.
You should upgrade or use an alternative browser.
Revell 1/72 B17-G Flying Fortress.
- Thread starter spanner570
- Start date
Looks awesome 570.
- Joined
- May 26, 2009
- Messages
- 13,003
- Points
- 113
- First Name
- Ron
Thanks for the comments about the aircraft, chaps. 
I've started the painting. I've noticed that during their bombing campaign, the B-17's became well battered and bruised. I wondered how some even managed to fly.....
As a result of seeing the images, I'm going to have me a bit of fun and try and make my model look a bit like them.
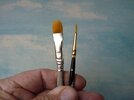
I'm using Vallejo Air, thinned with tap water. All applied with either my favourite 'yard brush' (A cheapo wide flat headed one from the 'W***s', or a No.2 from those Airfix starter packs. Well used, but both have served me well over the years.....
The first image shows a wing all squeaky clean after a brushed on coat of Vallejo Air Aloominum, red and an olive drab.
It was at this stage I decided to 'Go Rough'
Chris. Note the missing engine covers?!
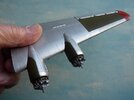
I first introduced some repair work to the wing's skins. For this I added a spot of grey to the aluminium and painted random panels.
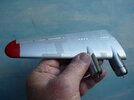
Then I painted over the whole surfaces with a much watered down aluminium and when the paint was tacky, I streaked the surface to follow the wind flow.
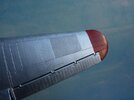
Next, tidying up the demarkation lines, adding the decals and weathering.
Cheers.
Ron

I've started the painting. I've noticed that during their bombing campaign, the B-17's became well battered and bruised. I wondered how some even managed to fly.....
As a result of seeing the images, I'm going to have me a bit of fun and try and make my model look a bit like them.
I'm using Vallejo Air, thinned with tap water. All applied with either my favourite 'yard brush' (A cheapo wide flat headed one from the 'W***s', or a No.2 from those Airfix starter packs. Well used, but both have served me well over the years.....

The first image shows a wing all squeaky clean after a brushed on coat of Vallejo Air Aloominum, red and an olive drab.
It was at this stage I decided to 'Go Rough'
Chris. Note the missing engine covers?!

I first introduced some repair work to the wing's skins. For this I added a spot of grey to the aluminium and painted random panels.

Then I painted over the whole surfaces with a much watered down aluminium and when the paint was tacky, I streaked the surface to follow the wind flow.

Next, tidying up the demarkation lines, adding the decals and weathering.
Cheers.
Ron
- Joined
- May 26, 2009
- Messages
- 13,003
- Points
- 113
- First Name
- Ron
Seems as though the thread is dragging on a bit, so I'll draw it to a close with seemly indecent haste.
The nearly finished wings.
I've brushed on a second and final coat of aluminium. Then went to work finishing them off.
Port. Decals( the black lines were a sod to do as they kept breaking) and replacement panels added and I painted on some near miss flak burns to the paintwork by flicking paint at the wing surface.
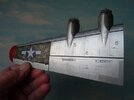
....a bit of streaking to the underside. Most of the wing decals were far too small and couldn't be read anyway, so I used a trick taught to me by my late father. I used a safety pin dipped in black paint and 'Wrote' them myself. Near enough for me - Thanks Dad!
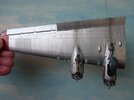
Starboard. Same as above.
Way too clean and smooth, me thinks
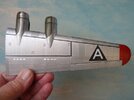
The wheel looks wonky, but it ain't.
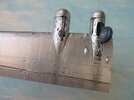
I will add some more muck, wear and tear when they are glued to the fuselage.
Next, I'll tackle the fuselage painting. Put it all together, touch up where required. .....and then take a final look at the aircraft.
Thanks for sticking with the build.
Cheers.
Ron
The nearly finished wings.
I've brushed on a second and final coat of aluminium. Then went to work finishing them off.
Port. Decals( the black lines were a sod to do as they kept breaking) and replacement panels added and I painted on some near miss flak burns to the paintwork by flicking paint at the wing surface.

....a bit of streaking to the underside. Most of the wing decals were far too small and couldn't be read anyway, so I used a trick taught to me by my late father. I used a safety pin dipped in black paint and 'Wrote' them myself. Near enough for me - Thanks Dad!

Starboard. Same as above.
Way too clean and smooth, me thinks

The wheel looks wonky, but it ain't.


I will add some more muck, wear and tear when they are glued to the fuselage.
Next, I'll tackle the fuselage painting. Put it all together, touch up where required.
 .....and then take a final look at the aircraft.
Thanks for sticking with the build.
Cheers.
Ron
Last edited:
It's a big WOW from me Ron!!! That is some great work going on here. Oh, and the pin trick also works well with a shaved down toothpick too. Nice!!!
Prost
Allen
Prost
Allen
Jim R
SMF Supporter
Looking good Ron. Simple techniques to produce very realistic wear and tear.
Thread only drags because you've attracted all the site riff-raff who drift off subject into a discussion on missing clothes pegs and top shelf magazines
Thread only drags because you've attracted all the site riff-raff who drift off subject into a discussion on missing clothes pegs and top shelf magazines

- Joined
- May 26, 2009
- Messages
- 13,003
- Points
- 113
- First Name
- Ron
Thanks Allen and Jim for for your nice and humorous posts.
Allen, good point, see wot I rote there? I found the trouble with a toothpick, is after a few 'Dabs' the point goes all soggy and blunt ( Insert smutty comments here) whereas a safety pin or similar, stays fine and sharp for weeks!
Jim, thank you. Very true about the thread.....
Thanks again for the input chaps. Much appreciated.
Ron
Last edited:
Mark1
SMF Supporter
Coming together nicely 

Airborne01
SMF Supporter
That's a vast improvement (to my mind) Ron!
Steve
Steve
- Joined
- May 26, 2009
- Messages
- 13,003
- Points
- 113
- First Name
- Ron
Thanks for all your encouraging posts, boys. 
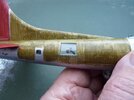
Time to paint the fuselage.
Because this particular B-17G was made up of two badly damaged aircraft, the original colours were left 'as was'. Hence my attraction to the thing in the first place.
I've made a start on one of the seven different colours in the arse end area of the aircraft.
As I only brush paint, I like to lay down the rough areas of the different colours first. Then I cut in a bit neater with each subsequent coat. This way, when working at speed, I know which is which, and my brush doesn't wander into the next colour - Too much. It usually does, but hey ho.
The main thing is to get the paint down quickly and smoothly. Neatness will hopefully come later.
First coat to figure what colour goes where.....
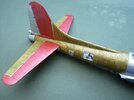
Don't worry if your brush wanders a bit. get the paint on smooth and flat.
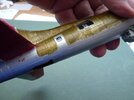
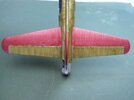
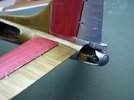
Disgraceful, and mind yer winders!
Cheers.
Ron

Time to paint the fuselage.
Because this particular B-17G was made up of two badly damaged aircraft, the original colours were left 'as was'. Hence my attraction to the thing in the first place.
I've made a start on one of the seven different colours in the arse end area of the aircraft.
As I only brush paint, I like to lay down the rough areas of the different colours first. Then I cut in a bit neater with each subsequent coat. This way, when working at speed, I know which is which, and my brush doesn't wander into the next colour - Too much. It usually does, but hey ho.
The main thing is to get the paint down quickly and smoothly. Neatness will hopefully come later.
First coat to figure what colour goes where.....

Don't worry if your brush wanders a bit. get the paint on smooth and flat.


Disgraceful, and mind yer winders!

Cheers.
Ron
Last edited:
Valeron
SMF Supporter
Nice work Ron.
I kike the effect of changing colour to show repaired panels. I've not come across that before.
I kike the effect of changing colour to show repaired panels. I've not come across that before.
boatman
SMF Supporter
BRILLIANT MODDELING
from the top shelf rifraf
from the top shelf rifraf
- Joined
- May 26, 2009
- Messages
- 13,003
- Points
- 113
- First Name
- Ron
Thanks everyone. Very nice comments much appreciated. 
Mike, The idea just came out of my nut about the repaired panels as I was trying to figure out how to age the aircraft and make the thing look well used. I'm chuffed you like the end result.
Quite right Paul. The pin trick decals work a treat for me and save an awful lot of unnecessary work and foul language. However, I do admire those who persevere with these tiny horrors, but it ain't for me.
On with the painting.
Remember to keep your paints thinned.
Once I was happy what colour went where, I brushed on a second coat and started to tidy things up a bit in the process.
Because I freehand my lines, I don't have to worry about leaving those little paint 'edges' sometimes left through using tape. As a result, I can go over the paint demarcation lines, and as long as I feather off the paint there are no ridges.
I'm not after getting a shiny, factory fresh finish, 'cos I'll be weathering and mucking it up it to hell and back....
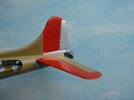
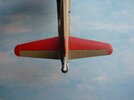
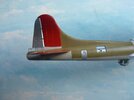
See the scuff marks on the rudder? I don't know where they came from, and I'm not bothered how they got there, but somehow I've got me some unintentional flak damage!
Also, seeing them has given me an idea........
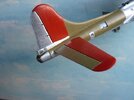
The above second coat will probably suffice. If I decide it will, I'll paint the black leading edges of the stabilizer and tail planes.
Then give the area a last tidy up before adding the decals.
Cheers all and thank you for your continued support and good humoured comments throughout this build.
Ron

Mike, The idea just came out of my nut about the repaired panels as I was trying to figure out how to age the aircraft and make the thing look well used. I'm chuffed you like the end result.
Quite right Paul. The pin trick decals work a treat for me and save an awful lot of unnecessary work and foul language. However, I do admire those who persevere with these tiny horrors, but it ain't for me.
On with the painting.
Remember to keep your paints thinned.
Once I was happy what colour went where, I brushed on a second coat and started to tidy things up a bit in the process.
Because I freehand my lines, I don't have to worry about leaving those little paint 'edges' sometimes left through using tape. As a result, I can go over the paint demarcation lines, and as long as I feather off the paint there are no ridges.
I'm not after getting a shiny, factory fresh finish, 'cos I'll be weathering and mucking it up it to hell and back....


See the scuff marks on the rudder? I don't know where they came from, and I'm not bothered how they got there, but somehow I've got me some unintentional flak damage!
Also, seeing them has given me an idea........

The above second coat will probably suffice. If I decide it will, I'll paint the black leading edges of the stabilizer and tail planes.
Then give the area a last tidy up before adding the decals.
Cheers all and thank you for your continued support and good humoured comments throughout this build.
Ron
