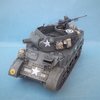
Shenanigans 3: Tamiya mate and Willys Jeep

  • Thread starter Deleted member 6559
  • Start date
D

Deleted member 6559

Guest
John - Thanks and no problem re the insult!

Ralph - Something a bit different.

Lee - Many thanks also.
 

Mike Mortimore

SMF Supporter
Joined
Apr 27, 2018
Messages
147
Points
43
Location
Somerset
First Name
Michael
Hi Peter,
Finally caught up with your number 3..... Stunning for''Out of the Box'' love your painting work......... look forward to your Jeep next..

Cheers Mike :sleeping::sleeping::sleeping::sleeping::sleeping:
 
D

Deleted member 6559

Guest
Cheers Mike.

Here's the jeep so far:

328413328414

Apologies for the indistinct photos. More time consuming than I thought it would be - the seats seemed to take ages. I did include the main bulk of the engine, mainly to give the drive shafts something to connect to and also to add some weight.

I got glue on the windscreen glass, which was too thick anyway, so I replaced it with plastic from some fruit packaging. I would have preferred a solid clear plastic windshield where I could have just painted the surrounds since the inserts look slightly messy from the rear - OK if they're hidden in a cab, but a bit open here..
 

Fernando N

Aviation fan and the Roadrunner, meep meep!
SMF Supporter
Joined
Apr 27, 2018
Messages
1,889
Points
113
Location
Almere, Netherlands
First Name
Fernando
Hi Peter, a bit late in following your next armour project…

The mate looks very nice and clean, great looking stowage too.:thumb2:

Looking forward to see how the Jeep turns out.:smiling:
 

Jakko

Way past the mad part
SMF Supporter
Joined
Apr 28, 2018
Messages
10,951
Points
113
First Name
Jakko
I got glue on the windscreen glass, which was too thick anyway, so I replaced it with plastic from some fruit packaging. I would have preferred a solid clear plastic windshield where I could have just painted the surrounds since the inserts look slightly messy from the rear - OK if they're hidden in a cab, but a bit open here..
You could put a canvas cover over the windscreen and fold it down onto the bonnet.
 

rtfoe

SMF Supporter
Joined
Apr 29, 2018
Messages
7,539
Points
113
Location
Malaysia
First Name
Richard
Peter...you'going so fast that I'm just about to comment on the mate...what's there to comment, it looks just like what the other guys do with armour here but I can see your touches on the storage painting. Nice work.

...now where should I start on the Jeep. :thinking:

Cheers,
Richard
 
D

Deleted member 6559

Guest
Fernando - Many thanks for looking in.

Jakko - Yes, that is an option, and I have done it in the past. However, I hoped that the carbine mounted above the dashboard would cover the worst part of the windscreen, as indeed it has. Phew!

Richard - Thank you. I'm a long way behind the majority of armour modellers here though - it's not easy is it?

I took advantage of better light to re-photograph the mate:

328543328544328545

On to the jeep, and the main build is done:

328546328547328571328572

I started today's session by weathering the basic build before adding the decals and equipment, which were weathered in after fixing to match. As mentioned, the carbine mounted above the dashboard hid the worst of the windscreen fit, which was a relief. I decided to go for the 30 cal option as it adds a bit more interest.

I also decided to use the wire cutter provided. Tamiya just supply one length of triangular bar, and as most seem to have had bracing struts added, I decided to make some from scrap plastic. Most of this type of modification was done in the field using whatever was available, so I've tried to depict it as un-painted and slightly rusty looking.

I also managed to make a couple of bonnet clasps from entrenching tool handles mounted on card plates. Unfortunately I didn't have enough to make the clasps used for securing the windscreen, so perhaps they were never fitted in this case. Also needed was a bit of extra strapping for some of the equipment which was not represented.

Here's how the vehicles look together:

328552

The next stage is to add some stowage to the jeep.
 
Last edited by a moderator:

Mike Mortimore

SMF Supporter
Joined
Apr 27, 2018
Messages
147
Points
43
Location
Somerset
First Name
Michael
Hi Peter,
Brilliant builds. How did you get the weathering to look so subtle. Like a light covering of dust...... Italy campaign......

Regards Mike :sleeping::sleeping::sleeping::sleeping::sleeping:
 
  • Like
Reactions: JR
D

Deleted member 6559

Guest
Thanks Mike - Any 'subtlety' is probably down to timidity, if I'm honest. I've used a whole range of colours, from black, through a range of greens to white, but I think building up the tones gradually has evened out the effect somewhat. However, I've never been a fan of heavy weathering, preferring instead to try and bring out the details of the vehicle.

I've sorted out the stowage for the jeep:

328562

At least a day's work there.
 

Si Benson

SMF Supporter
Joined
Apr 27, 2018
Messages
3,332
Points
113
First Name
Si
Hi Peter,
As I’ve said before, I very much enjoy your subtle style on the Vehicles and the jeep is no exception.
Pure eye candy:smiling4:
 
D

Deleted member 6559

Guest
Many thanks Si. The stowage should lift it a bit.
 

SteveH

SMF Supporter
Joined
Apr 28, 2018
Messages
1,293
Points
113
First Name
Stephen
Morning Peter

Lovely work on the jeep, well done.

Timidity in weathering, shouldn't be an issue, especially if the final result looks so good.

The current Vogue seems to be for extremes in both weathering and chipping, which are the builders prerogative, as it is a hobby.

I guess it will eventually come full circle back to subtle, rather than ""in your face""?

Possibly figures as well as jeep accessories today?

Its all warmer, grey and wet now, up North.

Have a good day with the paint

Regards

Steve H
 

Jakko

Way past the mad part
SMF Supporter
Joined
Apr 28, 2018
Messages
10,951
Points
113
First Name
Jakko
I guess it will eventually come full circle back to subtle, rather than ""in your face""?
Probably, though the chipping trend of the past 15–20 years shows no real signs of abating, if you ask me. I just think it’s usually far overdone for a realistic finish. Dirt and grime, on the other hand, can realistically be as little or as much as you like for a lot of military vehicles.
 
D

Deleted member 6559

Guest
Scottie - Many thanks to another master.

Steve - Very wet and windy here, but warmer. Weathering is a subjective thing and down to the individual. However, there is a bit of pressure to conform to the latest trends, which makes it difficult for the average modeller to achieve a finish they are happy with. Less is definitely more in my opinion.

Jakko - I agree, chipping is one of those 'trends'. As you say, the amount of weathering you go for is a personal thing and I prefer to 'suggest' context rather than overwhelm the vehicle.
 

JR

Member of the Rabble and Pyromania Consultant
SMF Supporter
Joined
May 26, 2015
Messages
17,375
Points
113
Location
lincs
First Name
John
Peter.
One look at those photos shouts out Peter Day, the painting is perfect, the detail brush work on the materail, be it the seats or the tarps and packs is done with finesse. Your hall mark.
I can image how they good look in the flesh just by looking at the figures you sent some time back .
Has to be a :thumb2::thumb2::thumb2::thumb2::thumb2: from me .
John .
 
D

Deleted member 6559

Guest
Very many thanks John - very kind words.

The jeep is finished:

328659328660328661328662

I went for it with the stowage, adding seventeen items to give the thing a cluttered look and to try and bring it to life a bit. Now cross-eyed and half blind.

On to the figures.......
 

minitnkr

Rabble & escape committee member
SMF Supporter
Joined
Apr 27, 2018
Messages
6,746
Points
113
Location
Dayton, OH
First Name
Paul
Well done Peter. Very precise builds. PaulE
 
D

Deleted member 6559

Guest
Thank you Paul.

The figures are ready for painting, bar a bit more cleaning up:

328690
 
  • Like
Reactions: JR
Top