John, just to give you an idea of just how tight it's going to get in there.

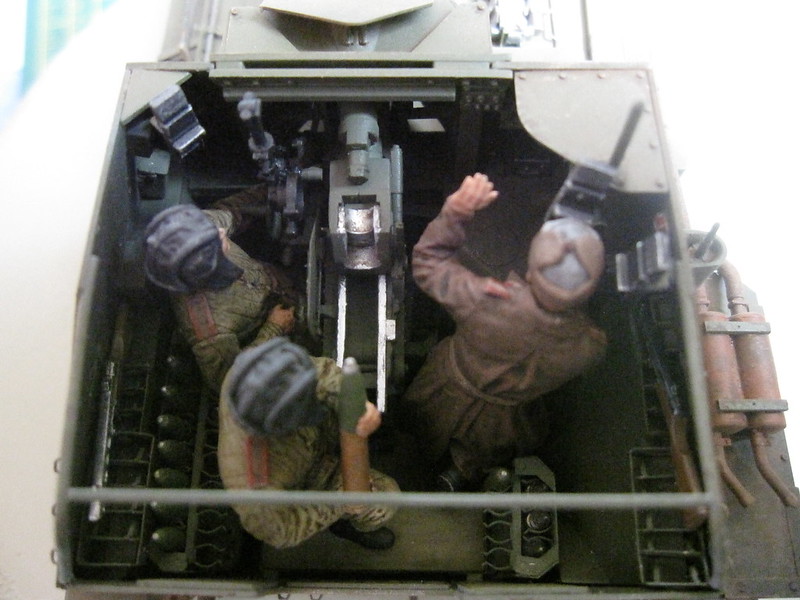
Wow.......,Bob I would't want to be in there when it fired. See what you mean, I checked the doors earlier and they will be ok. Had a bit of flex in them . Thanks for the photo.
Hi John
You're up and running. In my PE experience it either goes right first or second time or it becomes a nightmare. I often use a tiny drop of Gator Glue to fix the part. It gives wriggle time and also if it goes wrong the glue cleans up with water and I can have another go. When the part is fixed I wick thin CA along the join. I pick up the CA on a piece of thin wire.
For seat texture I have had some success with that medical micro porous tape.
View attachment 320527
View attachment 320528
Watch that b****y parrot of Ron's and carry on.
Jim
Hi Jim....... more success today with the CA , more of that later. Yes that's the stuff I meant, hope I can get that sort of look.
Thanks for the photo.
John,
Your off to a great start mate. For applying CA I use a needle with the tip of the eye removed to form a small fork. When it gets blocked I just hold it over a flame but be carefull of the fumes. The needle is held in an old blade handle.
Paul....... I remember you telling me about this a few years ago, unfortunately I mislaid the needle Management supplied. This is what happens when a clean up is instructed.

.
Steve....... suggest you look away when you see my PE, not for the likes of you guys.


.
First I'm going to thank you all for the support, as you know only having one eye for modelling causes several problems, now mostly I can cope and find some things ok. But this PE just gets to me.
For a start I wondered why when I had fitted one of those fantastic minute tips I still had great blobs of glue every where, it soon became apparent after I had glued my thumb and forefinger to the upturned bottle ( Do not laugh at this point ) that the bottle nozzle above the tip connection was leaking. So now firmly glued to the bottle and CA on the bench , I missed the upturned cap, soon managed to perform rapid skin removal. I now have two very pink inner sections of the left thumb and fore finger. The bottle I'm sure could be heard laughing. Bl***y thing.
Once I had recovered from this assault I managed to get some glue onto an lid. Having lost my needle , suitable modified I founs one of those PE glue tools, rather like Pauls needle in appearance. I decided to have another crack at this shiny art form.

Of course I managed to get that dark plate top left on the wrong face
, its now on the other side. I was going to use the kit part, they do look ok , but on the thick side, but having thought I will try again.
There is a little less glue, more than any of you would leave behind but I did it.!!

Just under the shiny plate you will be able to see some remains of glue, now this is the second problem that I face, I just can't see the blob of glue !! until I realise there's too much when it dries. Got to start putting less on, now Jim's idea should work for me so I'm going to get some of that Gator Glue and then wick the CA.
Elsewhere things were moving on , the gap on the sloped front was filled.

Found the best method was to use a damp make up sponge, and lightly take it over the filler, very littlre clean up needed.
That front plate had to be trimmed each side by a nats do da until it just went in. Don't know where I went wrong here, but its all good now. This part had been done before I altered the skin on my finger and thumb.


Having seen from Bob's photo how cramped it is in the gun area most of the little errors will disappear.

This was the gun assembly, one of those black things, ( I 'm not going out side to look ) fits between the two sections, and glue is applied elsewhere, allowing the barrel to elevate.

And here it is fully glued and by jove its not going to move, or come apart.


Well that's today's offering, always fun at Race Towers, can never be said a dull place to be .
Comments welcome, thanks again for the advice.

Hopefully more tomorrow.
Dzhon.

 . I shall attempt this as well .One dat I will find a method that suits. I've tried the needle with the eye part cut out to leave a fork like tool. That was ok, but couldn't find it earlier.

.JPG")
.JPG")

