Scotties Airfix M3A1 Scout car.

Jim R

SMF Supporter
Joined
Apr 27, 2018
Messages
13,857
Points
113
Location
Shropshire
First Name
Jim
A lot of very neat work Scottie. Really looks good. As to whether the the size of the rivets look ok it is difficult to judge until the whole side is tied together with a coat of primer.
 

scottie3158

SMF Supporter
Joined
Apr 27, 2018
Messages
12,781
Points
113
Location
Spalding
First Name
Paul
A lot of very neat work Scottie. Really looks good. As to whether the the size of the rivets look ok it is difficult to judge until the whole side is tied together with a coat of primer.
Cheers Jim, I have tried out some Quinta rivets on the other panel. And I am quite impressed they take a bit of getting used to but I think they look a lot better I will post a comparison picture tomorrow. Trouble is it does mean I have to redo the other side.
 

scottie3158

SMF Supporter
Joined
Apr 27, 2018
Messages
12,781
Points
113
Location
Spalding
First Name
Paul
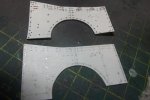
Both sides have now received the Quinta rivets and I think you will agree they look pretty good. The punched ones are the same diameter 0.6mm but they are deeper making them look to large. I have also used 0.4mm for some of the smaller details.

The picture shows the difference between the two.

DSCF4160.JPG

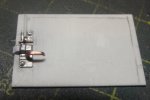
while these were drying I started on the door detail. the door lock is made from pewter, punched nuts ( a lot less painful than it sounds) and copper wire.

DSCF4161.JPG

cheers
Scottie
 
Last edited:

Jakko

Way past the mad part
SMF Supporter
Joined
Apr 28, 2018
Messages
10,968
Points
113
First Name
Jakko
Agreed, the new rivets look better probably because they’re not as tall. As for the lock … if you were to tell people this is a 1:12 model they’ll believe it too.
 

Strenko J

Faithful rabble apprentice
SMF Supporter
Joined
May 1, 2018
Messages
584
Points
93
Location
Pennsylvania
First Name
Joe
Paul such AMAZING detailing going on but I’m still having a bit of trouble focusing while still laughing at your punched nuts comment … that lock is FANTASTIC
 
  • Like
Reactions: JR

Bri62

SMF Supporter
Joined
Jan 6, 2023
Messages
1,247
Points
113
Location
Widnes, Cheshire
First Name
Brian
Paul just found this thread and I'm blown away with the detail you added to this model (that rear axle wow)
 

scottie3158

SMF Supporter
Joined
Apr 27, 2018
Messages
12,781
Points
113
Location
Spalding
First Name
Paul
Paul such AMAZING detailing going on but I’m still having a bit of trouble focusing while still laughing at your punched nuts comment … that lock is FANTASTIC
Thanks Joe, I am having lots of fun doing this.
Paul just found this thread and I'm blown away with the detail you added to this model (that rear axle wow)
Cheers Brian, good to see you.
 

scottie3158

SMF Supporter
Joined
Apr 27, 2018
Messages
12,781
Points
113
Location
Spalding
First Name
Paul
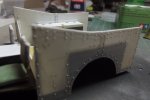
The side panels have now both been redone. I think the rivet detail looks a lot better. Some detail has also been added to the inside of the panels as well. I still have the tie downs to add but will do them later so I don't knock them off.

DSCF4163.JPG

DSCF4164.JPG

The inside detail of the drivers door has been done and when dry I can do the outside. The map pocket is PE the rest is scratched.

DSCF4162.JPG

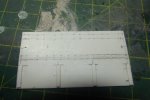
work has started on the rear panel.

DSCF4165.JPG

cheers
Scottie
 

RonGlass

SMF Supporter
Joined
Apr 30, 2018
Messages
622
Points
93
Location
United States
First Name
Ron
The side panels have now both been redone. I think the rivet detail looks a lot better. Some detail has also been added to the inside of the panels as well. I still have the tie downs to add but will do them later so I don't knock them off.

View attachment 501192

View attachment 501193

The inside detail of the drivers door has been done and when dry I can do the outside. The map pocket is PE the rest is scratched.

View attachment 501194

work has started on the rear panel.

View attachment 501195

cheers
Scottie
Paul, please stop, Sir ! I can't take any more !
 

Attachments

  • stop-the-insanity.jpg
    stop-the-insanity.jpg
    66 KB · Views: 3

scottie3158

SMF Supporter
Joined
Apr 27, 2018
Messages
12,781
Points
113
Location
Spalding
First Name
Paul
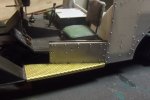
I have added some more panels. I noticed in the reference pictures the lip at the top to stop the door so this was added from very thin brass sheet. The tread plate was also added from some generic etch tread plate.

DSCF4168.JPG

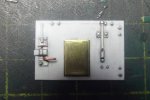
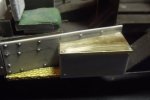
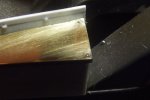
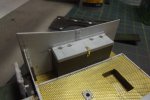
On the other side the panel was added and also a new battery box was added from styrene sheet and a lid made from thin brass sheet. to this some punched detail was added. these were then split to represent screw heads.

DSCF4169.JPG

DSCF4170.JPG

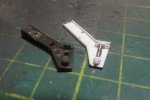
while these bits were driving I also made a start on replacing the front roller support. As you can see the kit one is far from clever with soft detail and bad ejector pin marks.

DSCF4167.JPG

sorry focus could have been better.

cheers
Scottie
 
Top