Tamiya 1/35 Churchill Mk VII Tank

langy71

SMF Supporter
Joined
Apr 27, 2018
Messages
1,561
Points
113
Location
Nottingham
First Name
Chris
Steve,
I wouldn't worry too much at how the paint looks at this moment, like others have said, the variations in the finish actually help break down what is a normal 'boring'... single colour finish,

Single colour finishes are hard to pull off as our eyes look for differing patterns to help gauge size and shape, a single colour confuses them as it looks just like a single coloured blob, this is due to the way light reflects differently off an item that is just one colour, now compare this to an item that has variations in the paint the light reflects differently and it looks 'different' because it helps break up the overall colour and add depth to what we are looking at.

We, as modellers tend to over compensate slightly when doing this because we are trying to make something that is small (eg: 1/35 scale) look like it's much larger 1/1 version, and as such we use these variations in the paint colour to help

Variations in the 'base coat' also help when weathering and aging the model and will help it look more realistic. (It's very rare that you see a tank that is in pristine shape, even a short run across the testing area will begin to weather and fade the paint on a brand new tank)..unless it's on parade, which is a different matter ..lol.... just what reason is there to paint kerb stones perfectly white and spray grass green on an Army base...oh that's right...it's for a parade or visit by somebody 'high up'..

As for you thinking that your possibly not having the desired results with an airbrush, worry not, I've been using them for the last thirty odd years and I still bodge it up from time to time, I've just learned over the years how to hide my mistakes...lol

Practice is your friend, (nobody could ever ride a bike the minute they were put onto one, how many times did we all fall off, get back up and try again?).. learn your own way and your own speed in order to achieve results that YOU want and YOU are happy with, It's your build after all and you're doing it for yourself.

More importantly NEVER EVER compare your work to the work of somebody else, that's a sure fire way to loose faith in your abilities and step away from the hobby, take your time, take every coat of paint you lay down as you want it as a victory, and take every 'failure' as a chance to try again and to learn something new..

you'll get there.. remember this, 'we all started in the same place !'

Finally, the guys on here and the folks you'll see painting stuff on the internet didn't become 'master painters' overnight, they practiced and practiced until they were happy with what they'd achieved.

So take this NOT as a failure !, but as a simple step towards a more realistic looking build.

(Hope this makes sense and I'm not teaching you to suck eggs... :thumb2:)
 
Last edited:

Scratchbuilder

SMF Supporter
Joined
Jul 2, 2022
Messages
1,973
Points
113
Location
Luton
First Name
Mike
Steve,
I wouldn't worry too much at how the paint looks at this moment, like others have said, the variations in the finish actually help break down what is a normal 'boring'... single colour finish,

Single colour finishes are hard to pull off as our eyes look for differing patterns to help gauge size and shape, a single colour confuses them as it looks just like a single coloured blob, this is due to the way light reflects differently off an item that is just one colour, now compare this to an item that has variations in the paint the light reflects differently and it looks 'different' because it helps break up the overall colour and add depth to what we are looking at.

We, as modellers tend to over compensate slightly when doing this because we are trying to make something that is small (eg: 1/35 scale) look like it's much larger 1/1 version, and as such we use these variations in the paint colour to help

Variations in the 'base coat' also help when weathering and aging the model and will help it look more realistic. (It's very rare that you see a tank that is in pristine shape, even a short run across the testing area will begin to weather and fade the paint on a brand new tank)..unless it's on parade, which is a different matter ..lol.... just what reason is there to paint kerb stones perfectly white and spray grass green on an Army base...oh that's right...it's for a parade or visit by somebody 'high up'..

As for you thinking that your possibly not having the desired results with an airbrush, worry not, I've been using them for the last thirty odd years and I still bodge it up from time to time, I've just learned over the years how to hide my mistakes...lol

Practice is your friend, (nobody could ever ride a bike the minute they were put onto one, how many times did we all fall off, get back up and try again?).. learn your own way and your own speed in order to achieve results that YOU want and YOU are happy with, It's your build after all and you're doing it for yourself.

More importantly NEVER EVER compare your work to the work of somebody else, that's a sure fire way to loose faith in your abilities and step away from the hobby, take your time, take every coat of paint you lay down as you want it as a victory, and take every 'failure' as a chance to try again and to learn something new..

you'll get there.. remember this, 'we all started in the same place !'

Finally, the guys on here and the folks you'll see painting stuff on the internet didn't become 'master painters' overnight, they practiced and practiced until they were happy with what they'd achieved.

So take this NOT as a failure !, but as a simple step towards a more realistic looking build.

(Hope this makes sense and I'm not teaching you to suck eggs... :thumb2:)
I fully agree Chris - sound advice.
 

Scratchbuilder

SMF Supporter
Joined
Jul 2, 2022
Messages
1,973
Points
113
Location
Luton
First Name
Mike
It must have taken you an age to type all that up but I thank you so very much for doing so. I found that very helpful and motivating, in fact I've just printed it out. So thanks again!

This morning I tried to give it another light coat to see if it helps. once this is fully dry I'll do the coat of gloss and move on from there. I really appreciate the advice.
Steve, if it takes an age to type up and you only take in a part of it, then that is the job done.
I have looked at your model again today and to be honest - stop tinkering - the finish looks to be where you would have darker patches because that is where the crew enter or work mostly on the vehicle.
So looking forward to more of your work, and we will all help out where we can.
 

SteveT

SMF Supporter
Joined
Jan 18, 2024
Messages
301
Points
93
Location
Lancashire
First Name
Steve
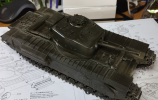
Well this is an interesting development, I'm a tad puzzled. Yesterday morning I gave it one last very light coat of paint and then left it to dry, last last night I sprayed it with humbrol gloss varnish and left it to dry.

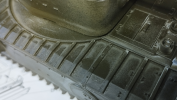
Today I go and look at it and.. ohh, weird! it's what looks like grainy mess around some of the surface. is it supposed to do that? or is it the humbrol varnish not likng the tamiya paint, or something else?

Two pics for you, one of the tank as-is and one zoomed in showing the ..weird.. bits. (oh and the tracks are actually sprayed brown as a base coat, but you can't tell. it looks like the green but it's not)

tank_6.pngtank_7.png
 
  • Like
Reactions: JR

Jakko

Way past the mad part
SMF Supporter
Joined
Apr 28, 2018
Messages
10,884
Points
113
First Name
Jakko
If I’m honest, then as far as I’m concerned, your mistake here was to spray varnish over the model at all … Nearly all modern decals will adhere just fine over matt paint, so there’s no reason to apply gloss varnish for that reason. All the varnish does, in my experience, is darken the colour and, too often, go wrong in ways you don’t expect.
 

Scratchbuilder

SMF Supporter
Joined
Jul 2, 2022
Messages
1,973
Points
113
Location
Luton
First Name
Mike
That light colouring is the varnish laying on too thick. Believe it or not we all get this at some time or other. We think that we have not covered the model and then when it dries we end up with what looks like iceing on the cake.
Solution - mix up a thin wash of your top coat and apply a fine spray overall. the other solution is to ignore it and when you apply your 'dirt' wash this will flow into the areas where the 'icing' has collected.
And just to show that even the experienced people on here can screw it up....
20240318_115947_HDR.jpg
20240318_120008_HDR.jpg
This was supposed to be a primer coat of MIG white primer over a grey primer coat... I sprayed this about 1 hour ago with the grey primer being sprayed 24 hours prior to the white. The problem - a bad batch of primer containing too much solvent (thinner).
My solution now is to get out the lacquer white and go over all of this again.
So you are not on your own.
 

Scratchbuilder

SMF Supporter
Joined
Jul 2, 2022
Messages
1,973
Points
113
Location
Luton
First Name
Mike
If I’m honest, then as far as I’m concerned, your mistake here was to spray varnish over the model at all … Nearly all modern decals will adhere just fine over matt paint, so there’s no reason to apply gloss varnish for that reason. All the varnish does, in my experience, is darken the colour and, too often, go wrong in ways you don’t expect.
But you are leaving yourself open for the 'silvering' effect you get when applying decals over a matt surface. Plus you can weather far better on a gloss surface that a matt where the wash/filter soaks into the matt and cannot be 'moved' around as easily.
 

SteveT

SMF Supporter
Joined
Jan 18, 2024
Messages
301
Points
93
Location
Lancashire
First Name
Steve
That light colouring is the varnish laying on too thick. Believe it or not we all get this at some time or other. We think that we have not covered the model and then when it dries we end up with what looks like iceing on the cake.
Solution - mix up a thin wash of your top coat and apply a fine spray overall. the other solution is to ignore it and when you apply your 'dirt' wash this will flow into the areas where the 'icing' has collected.
And just to show that even the experienced people on here can screw it up....
View attachment 504254
View attachment 504255
This was supposed to be a primer coat of MIG white primer over a grey primer coat... I sprayed this about 1 hour ago with the grey primer being sprayed 24 hours prior to the white. The problem - a bad batch of primer containing too much solvent (thinner).
My solution now is to get out the lacquer white and go over all of this again.
So you are not on your own.
Very interesting thank you!
 

Waspie

SMF Supporter
Joined
Mar 13, 2023
Messages
2,545
Points
113
Location
Portland - Dorset
First Name
Doug
Thing about operational tanks............................ they're driven on dusty roads, on wet roads, across muddy ploughed fields, across standing crops, through hedges and narrow streets and bridges, are in sunlight, pouring rain, blizzards, parked in the open, or under trees, crewed by men who are tired, and will do essential maintenance only. - and that's not thinking about any effects of action!
A tank may start Olive Drab, but after a few weeks' operations, it won't look like that!
Dave
You missed spraying high pressure water over the things at the end of the day/exercise etc. that can discolour any paint job.
Even aircraft end up suffering colour loss. Ardrox can change a dark sea grey to light sea grey if left on too long when being cleaned!!!
 

SteveT

SMF Supporter
Joined
Jan 18, 2024
Messages
301
Points
93
Location
Lancashire
First Name
Steve
Just finished adding the decals (tbh there wasn't a lot) and I'm going to leave it overnight to set.

Now my reason for posting, do I give it a coat of gloss varnish tomorrow or matt varnish? - before my attempt at weathering (I just want to be sure)

in other news, I just bought myself a present, a new airbrush. it's one of the pull trigger ones (a Gaahleri GHAD-68) I'm finding that I'm struggling to use my normal airbrush for more than a couple of mins without my fingers hurting and my control suffering ...arthritis, don't get old guys and girls! - I'm hoping this will make it easier for me to use longer and more importantly finer control.

More images soon, thanks for watching!
 

langy71

SMF Supporter
Joined
Apr 27, 2018
Messages
1,561
Points
113
Location
Nottingham
First Name
Chris
I'd let the decals settle overnight and then give it a few light coats of matt varnish tomorrow..(unless you want it glossy then swap the matt for gloss).
 

andy55

SMF Supporter
Joined
Sep 21, 2023
Messages
243
Points
63
Location
Near Selby
First Name
Andy
in other news, I just bought myself a present, a new airbrush. it's one of the pull trigger ones (a Gaahleri GHAD-68) I'm finding that I'm struggling to use my normal airbrush for more than a couple of mins
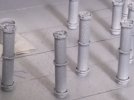
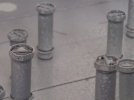
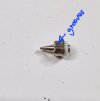
I think you'll be pleased with the Gaahleri, I have the ghad39, and use it for everything from primer to top coat and fine camo lines. Assuming it's the same or similar internals as mine two things to watch for: 1. The brass at the front where the nozzle seats needs to be scrupulously clean or it will bleed air to the paint reservoir. 2. When cleaning the nozzle make sure you clean the grooves where the air goes though.
1000018893.jpg1000018894.jpg

It's that white washer that seats onto the brass.
Hope the above is of use. Apologies if I'm teaching 'to suck eggs :smiling4:
Andy
 

SteveT

SMF Supporter
Joined
Jan 18, 2024
Messages
301
Points
93
Location
Lancashire
First Name
Steve
I think you'll be pleased with the Gaahleri, I have the ghad39, and use it for everything from primer to top coat and fine camo lines. Assuming it's the same or similar internals as mine two things to watch for: 1. The brass at the front where the nozzle seats needs to be scrupulously clean or it will bleed air to the paint reservoir. 2. When cleaning the nozzle make sure you clean the grooves where the air goes though.
View attachment 504413View attachment 504414

It's that white washer that seats onto the brass.
Hope the above is of use. Apologies if I'm teaching 'to suck eggs :smiling4:
Andy
ookay.. I'm a bit scared now! I dreaded cleaning my Fengda airbrush as taking it to bits I knew it was only a matter of time before I bent the needle or lost the tiny nozzle. this looks even trickier. ohh-er!!
 

Waspie

SMF Supporter
Joined
Mar 13, 2023
Messages
2,545
Points
113
Location
Portland - Dorset
First Name
Doug
ookay.. I'm a bit scared now! I dreaded cleaning my Fengda airbrush as taking it to bits I knew it was only a matter of time before I bent the needle or lost the tiny nozzle. this looks even trickier. ohh-er!!
Just be systematic with it Steve. I always lay out some blue tissue from a roll on a small plastic tray so they can't roll off. Then slowly take my AB apart placing each piece on the roll. Then I simply clean each bit. The cleaned parts go on another tray/paper roll. Once reassembled. re-assemble it all and blast some air through it to make sure the 'trigger' and everything works fine. It's not as scary as building a kit!!!!!
I must admit my latest AB is a lot easier, no fear of over tightening anything and less hassle replacing the needle!!
 

SteveT

SMF Supporter
Joined
Jan 18, 2024
Messages
301
Points
93
Location
Lancashire
First Name
Steve
What I do/did with my Fengda is a tip I found on a video and instead of taking it to bits each time I use it. I wipe it out with tissue and then put some airbrush cleaner in it 2-3 times and then backflush and pour it away and after that, wipe it out again and put one more bit of airbrush cleaner in and this time spray it through the nozzle to clean it. I found this worked quite well on my 186k and I only needed to strip it down once when it blocked. Not sure this cleaning 'trick' will work for this but I need to do some research before I use it for sure. If I can avoid disassembling each time, I will.
 

Waspie

SMF Supporter
Joined
Mar 13, 2023
Messages
2,545
Points
113
Location
Portland - Dorset
First Name
Doug
What I do/did with my Fengda is a tip I found on a video and instead of taking it to bits each time I use it. I wipe it out with tissue and then put some airbrush cleaner in it 2-3 times and then backflush and pour it away and after that, wipe it out again and put one more bit of airbrush cleaner in and this time spray it through the nozzle to clean it. I found this worked quite well on my 186k and I only needed to strip it down once when it blocked. Not sure this cleaning 'trick' will work for this but I need to do some research before I use it for sure. If I can avoid disassembling each time, I will.
That's pretty much all I do now except at the end of every paint session I fully strip mine down. With my previous AB after every colour change it needed stripping down or it would clog or spit!!!
 

Mark1

SMF Supporter
Joined
Apr 17, 2021
Messages
3,563
Points
113
Location
South london
First Name
Mark
I just blow mine through with cleaner,occasionally ill pull the needle out the back and give it a wipe but as for completely strip it, maybe 5 or 6 six times in the last 18 months. All the time its working fine then leave it alone.
 

andy55

SMF Supporter
Joined
Sep 21, 2023
Messages
243
Points
63
Location
Near Selby
First Name
Andy
ookay.. I'm a bit scared now! I dreaded cleaning my Fengda airbrush as taking it to bits I knew it was only a matter of time before I bent the needle or lost the tiny nozzle. this looks even trickier. ohh-er!!
Sorry Steve didn't mean to put the wind up you. It's just a couple of things I've come across using mine, and caused me a lot of agro till I sorted it. You'll have difficulty bending the needle as it's spring steel. Personally I strip and clean mine after every use. Is it necessary, 'shrugs shoulders'. Down to personal preference.
 
Top